Product Guide
This product guide covers more advanced Flask-Stormpath usage. You can selectively jump around from topic-to-topic to discover all the neat features that Flask-Stormpath provides!
Enforce User Authentication
Now that we’ve seen how easy it is to register, login, and logout users in your Flask app, let’s see how simple it is to restrict views to logged-in users only.
Let’s say you have a simple view which should only be accessible to users who have logged in. Below is a code sample which shows how easy it is to restrict access to your view:
from flask.ext.stormpath import login_required

@app.route('/secret')
@login_required
def secret():
    return 'secret information here'
The login_required() decorator makes it really easy to enforce user
authentication on your views.
If you try to visit the /secret URL and you’re not logged in, you’ll be
redirected to: /login?next=%2Fsecret. If you then enter your credentials
and log in – you’ll be immediately redirected back to the page you were trying
to access: /secret.
Note
If you have TESTING set to True in your Flask settings, this decorator
will NOT enforce authentication. This is done to simplify unit testing.
Enforce User Authorization
Stormpath supports extremely complex authorization rules. This section aims to provide a basic introduction to Flask-Stormpath’s authorization enforcement (this topic is covered in-depth later on).
The main authorization resource in Stormpath is the Group. A Stormpath
Group is a named resource (admins, developers, paid users, free users, etc.)
which can be assigned to any number of user accounts.
Let’s say you’re building a site that has three tiers of users: free users, paid
users, and admins. In this case, you’d want to create three Stormpath Groups:
free users, paid users, and admins.
Let’s quickly take a look at how we can create and assign a Group to a
User:
>>> directory = stormpath_manager.application.default_account_store_mapping.account_store

>>> free_users = directory.groups.create({'name': 'free users'})
>>> paid_users = directory.groups.create({'name': 'paid users'})
>>> admins = directory.groups.create({'name': 'admins'})

>>> # Put the current user into the 'Free Users' group.
>>> user.add_group(free_users)
Now that we’ve created our Groups, and also added our User to the “free
users” group – let’s see how we can enforce different types of authorization on
our User using the groups_required() decorator:
from flask.ext.stormpath import groups_required

@app.route('/admins')
@groups_required(['admins'])
def admins_only():
    """A top-secret view only accessible to admins."""
    pass
If the User() tries to visit /admins, they’ll get redirected to the
login page and won’t be able to access the view.
What if we wanted to build a view only accessible to users who are both free users and admins? In this case we could just list both required Groups:
@app.route('/free_and_admins')
@groups_required(['free users', 'admins'])
def free_users_and_admins_only():
    """Only free users and admins can access this view."""
    pass
Now that you’ve seen how you can require a User() to be a member of
multiple Groups, let’s take a look at how you can enforce selective Group
membership:
@app.route('/any_user')
@groups_required(['free users', 'paid users', 'admins'], all=False)
def any_user():
    """A view accessible to any user, but only if they're logged in."""
The view above lists three Groups, and sets the all parameter to False
– signifying that a User must be a member of at least one of the
list Groups in order to gain access.
Note
If you have TESTING set to True in your Flask settings, this decorator
will NOT enforce authentication. This is done to simplify unit testing.
Restrict Session Duration / Expiration
Another thing people commonly want to do is restrict how long a user can be logged in without activity before being forced to log into their account again.
As of the latest Flask-Stormpath release, this is now possible!
You can easily change the default session / cookie expiration by modifying the
STORMPATH_COOKIE_DURATION setting:
from datetime import timedelta

app.config['STORMPATH_COOKIE_DURATION'] = timedelta(minutes=30)
By default, sessions / cookies will not expire for a year (out of convenience).
Access User Data
Let’s take a quick look at how we can access user data from a custom view.
Let’s say we’ve defined a simple view that should simply display a user’s email
address. We can make use of the magical user context variable to do
this:
from flask.ext.stormpath import login_required, user

@app.route('/email')
@login_required
def name():
    return user.email
The user context allows you to directly interact with the current
User model. This means you can perform any action on the
User model directly.
For more information on what you can do with a User model, please see
the Python SDK documentation: http://docs.stormpath.com/python/product-guide/#accounts
Let’s say you want to change a user’s given_name (first name). You could
easily accomplish this with the following code:
>>> user.given_name = 'Randall'
>>> user.save()
As you can see above, you can directly modify User attributes, then
persist any changes by running user.save().
Working With Custom User Data
In addition to managing basic user fields, Stomrpath also allows you to store up to 10MB of JSON information with each user account!
Instead of defining a database table for users, and another database table for user profile information – with Stormpath, you don’t need either!
Let’s take a look at how easy it is to store custom data on a User
model:
>>> user.custom_data['somefield'] = 'somevalue'
>>> user.custom_data['anotherfield'] = {'json': 'data'}
>>> user.custom_data['woot'] = 10.202223
>>> user.save()

>>> user.custom_data['woot']
10.202223

>>> del user.custom_data['woot']
>>> user.save()

>>> user.custom_data['woot']
Traceback (most recent call last):
  File "<stdin>", line 1, in <module>
KeyError: 'woot'
As you can see above – storing custom information on a User account is
extremely simple!
Customize Redirect Logic
As you might have already noticed by playing around with the registration and
login pages – when you first register or log into an account, you’ll be
immediately redirected to the URL /.
This is actually a configurable setting – you can easily modify this default redirect URL by adding the following config setting:
app.config['STORMPATH_REDIRECT_URL'] = '/dashboard'
You can also redirect users to different URL after they register by adding this config setting:
app.config['STORMPATH_REGISTRATION_REDIRECT_URL'] = '/thank-you'
If this setting is not set, users will be redirected to
STORMPATH_REDIRECT_URL after registration.
This allows you to build nicer apps as you can do stuff like redirect newly registered users to a tutorial, dashboard, or something similar.
Note
If a user visits a page which has restricted access, they’ll be redirected
to the login page. Once the user logs in, they’ll be immediately redirected
back to whatever page they were initially trying to access (this behavior
overrides the STORMPATH_REDIRECT_URL setting).
Customize User Registration Fields
In many cases you might want to change the fields you collect when a user registers. Let’s customize the fields we ask for when a user registers!
Every user you register ends up getting stored in Stormpath as an Account object. Accounts in Stormpath have several fields you can set:
- username
- email (required)
- password (required)
- given_name (required) also known as “first name”
- middle_name
- surname (required) also known as “last name”
By default, the built-in registration view that Flask-Stormpath ships with gets you a registration page that looks like this:
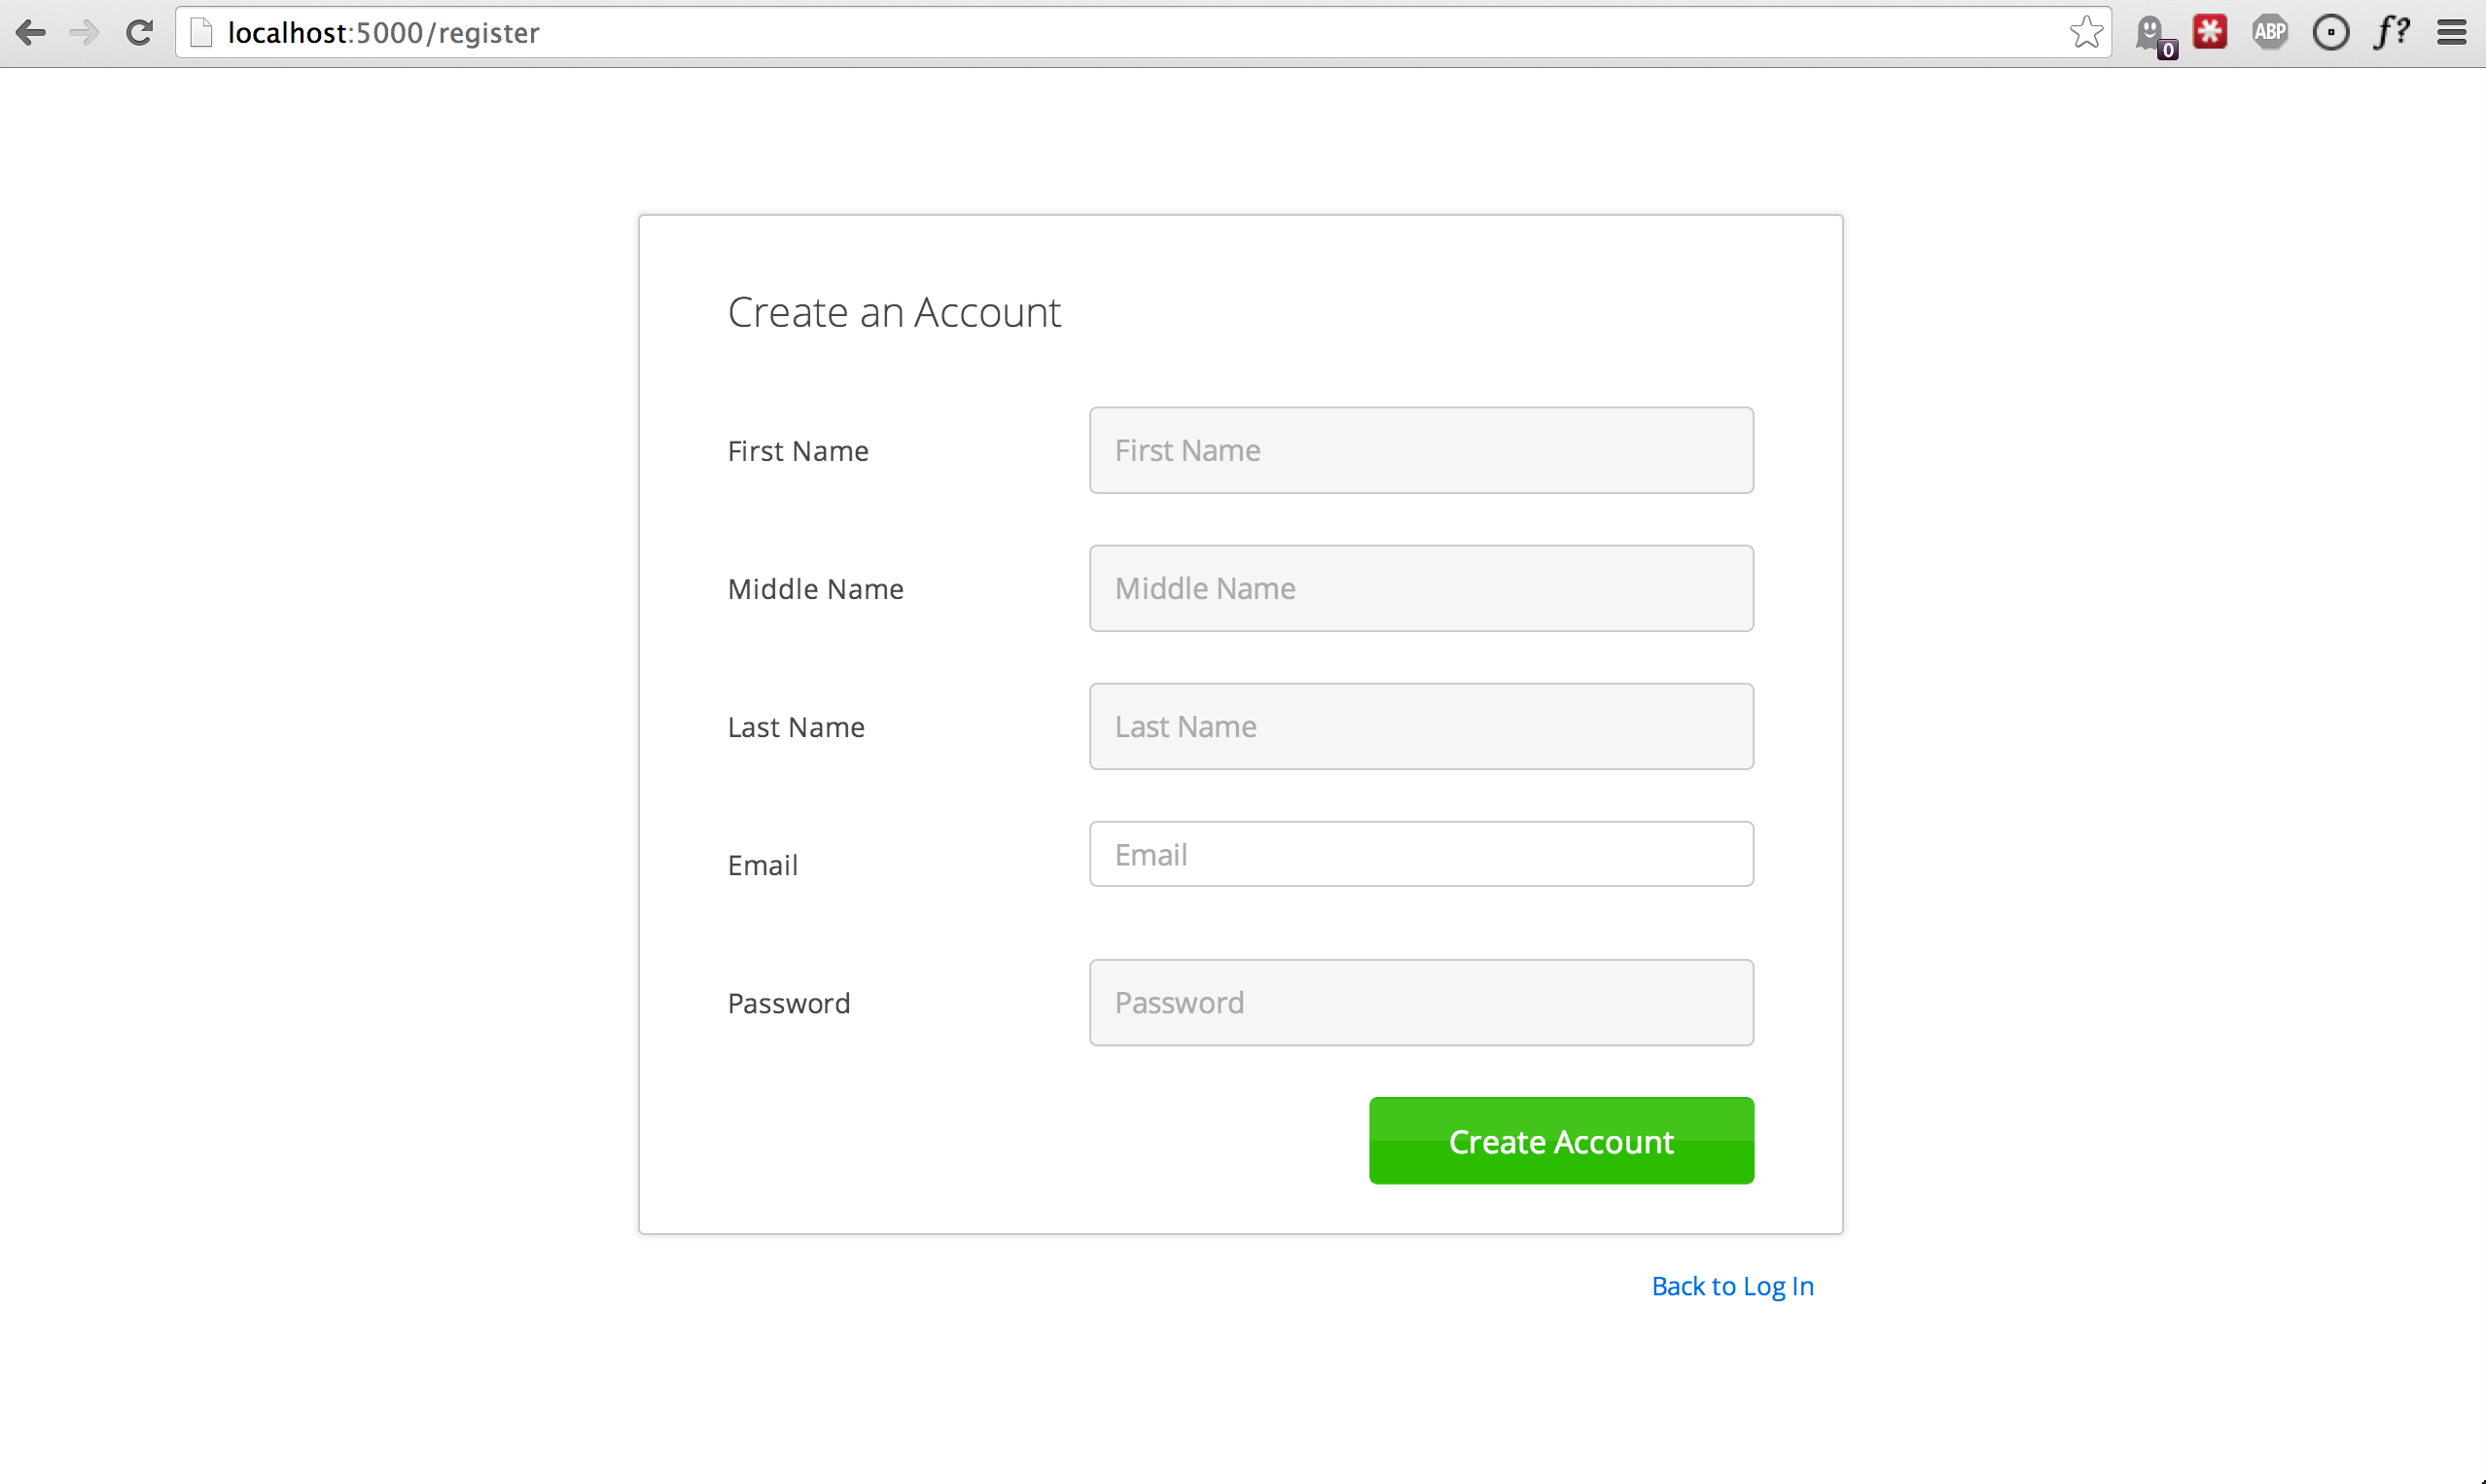
As you can see, it includes the given_name, middle_name, surname,
email, and password fields by default. All of these fields are
required, with the exception of middle_name.
What happens if a user enters an invalid value – or leaves a required field blank? They’ll see something like this:
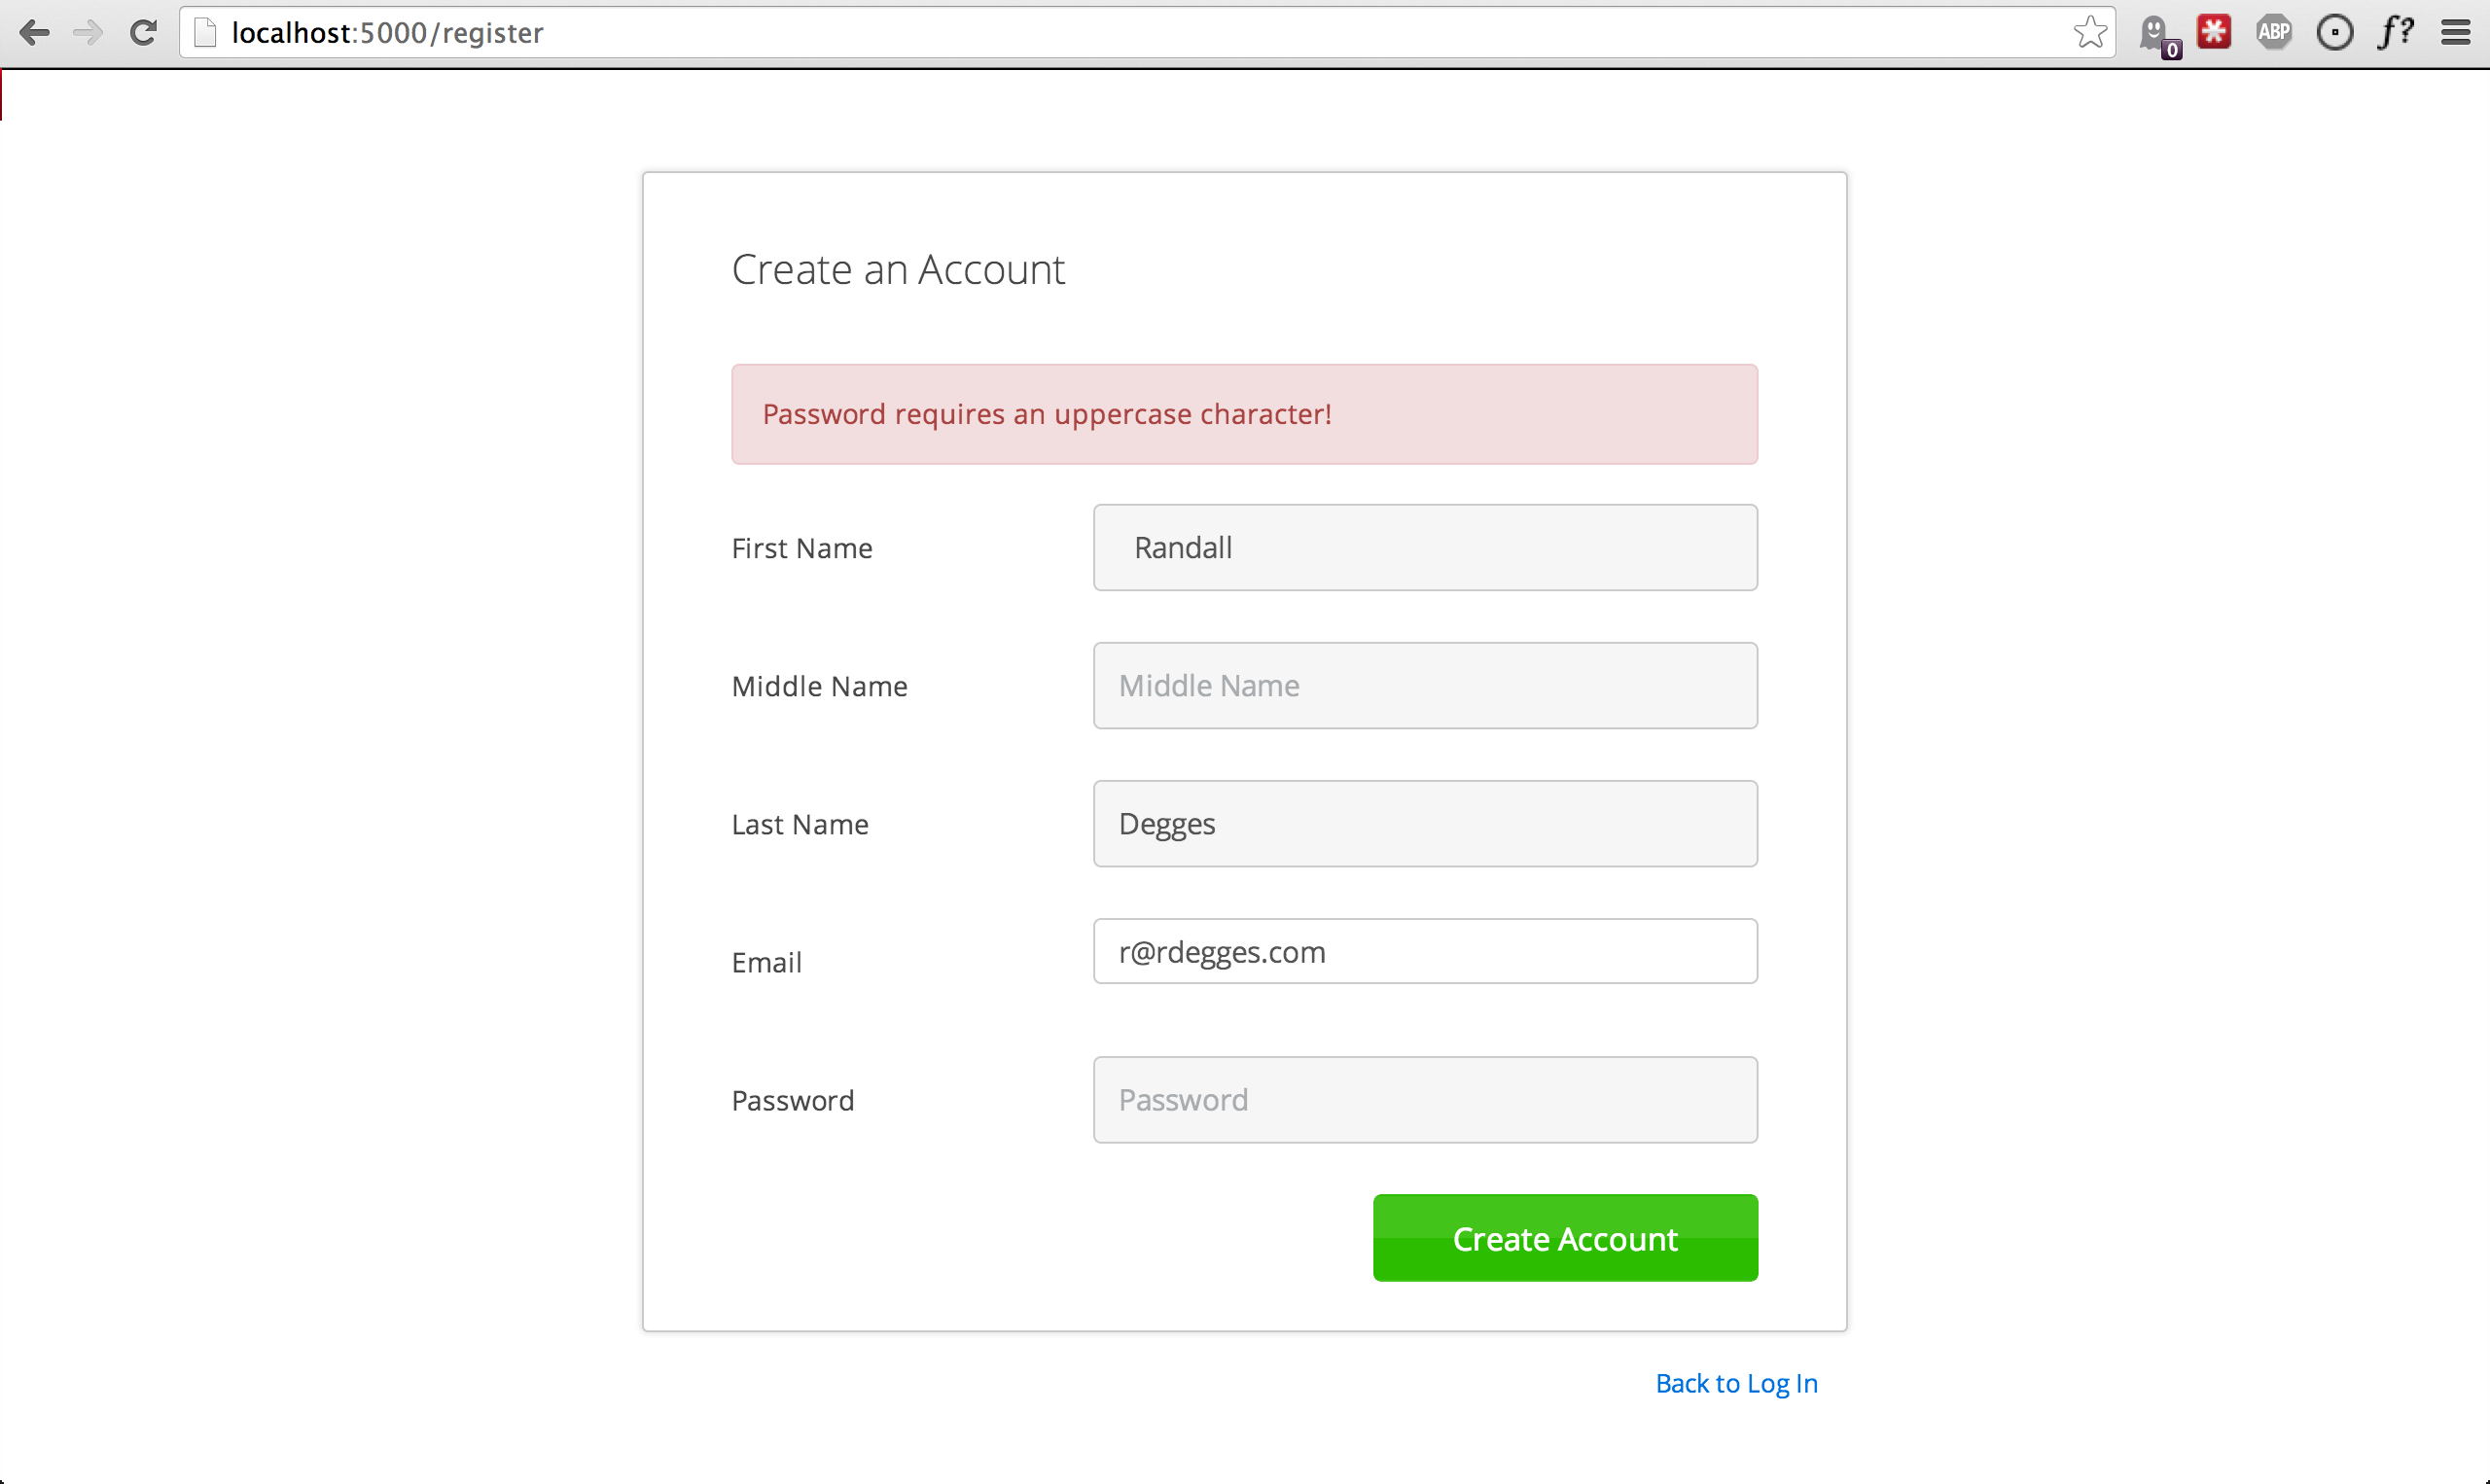
But what if you want to force the user to enter a value for middle name? Doing so is easy! Flask-Stormpath is highly customizable, and allows you to easily control which fields are accepted, and which fields are required.
To require a user to enter a middle name field, set the following value in your Flask app config:
app.config['STORMPATH_REQUIRE_MIDDLE_NAME'] = True
Now go ahead and give it a try – if you attempt to create a new user and don’t specify a middle name, you’ll see an error!
But what if you wanted to only accept email and password? By using the
STORMPATH_ENABLE_* and STORMPATH_REQUIRE_* settings in your Flask app,
you can completely customize which fields are accepted (and required)!
Now, remove the STORMPATH_REQUIRE_MIDDLE_NAME setting and add the following in
its place:
app.config['STORMPATH_ENABLE_GIVEN_NAME'] = False
app.config['STORMPATH_ENABLE_MIDDLE_NAME'] = False
app.config['STORMPATH_ENABLE_SURNAME'] = False
If you refresh the registration page, you’ll now see a form that only accepts
email and password! Not bad, right?
Note
If you explicitly disable the given_name and surname fields as shown
above, those fields will automatically receive the value 'Anonymous' (as
they are required by Stormpath).
We’re currently working to make these fields optional on Stormpath’s side.
Want to keep everything as default, except make first and last name optional for the user? All you’d have to do is:
app.config['STORMPATH_REQUIRE_GIVEN_NAME'] = False
app.config['STORMPATH_REQUIRE_SURNAME'] = False
Lastly, it’s also simple to add in a username field (either required or
optional). Just like the examples above, you can use the ENABLE and
REQUIRE settings to control the registration behavior:
app.config['STORMPATH_ENABLE_USERNAME'] = True
app.config['STORMPATH_REQUIRE_USERNAME'] = False
And that’s it!
Customize User Login Fields
If you visit your login page (/login), you will see (by default), two
input boxes: one for email and one for password.
While this is fine for most purposes, sometimes you might want to let users log
in with a username or email (especially if your site collects
username during registration).
Doing this is simple: by enabling the STORMPATH_ENABLE_USERNAME setting
you’ll not only make the username field available on the registration page,
but also on the login page (so users can log in by entering either their
username or email and password).
To enable username support, just set the following config variable:
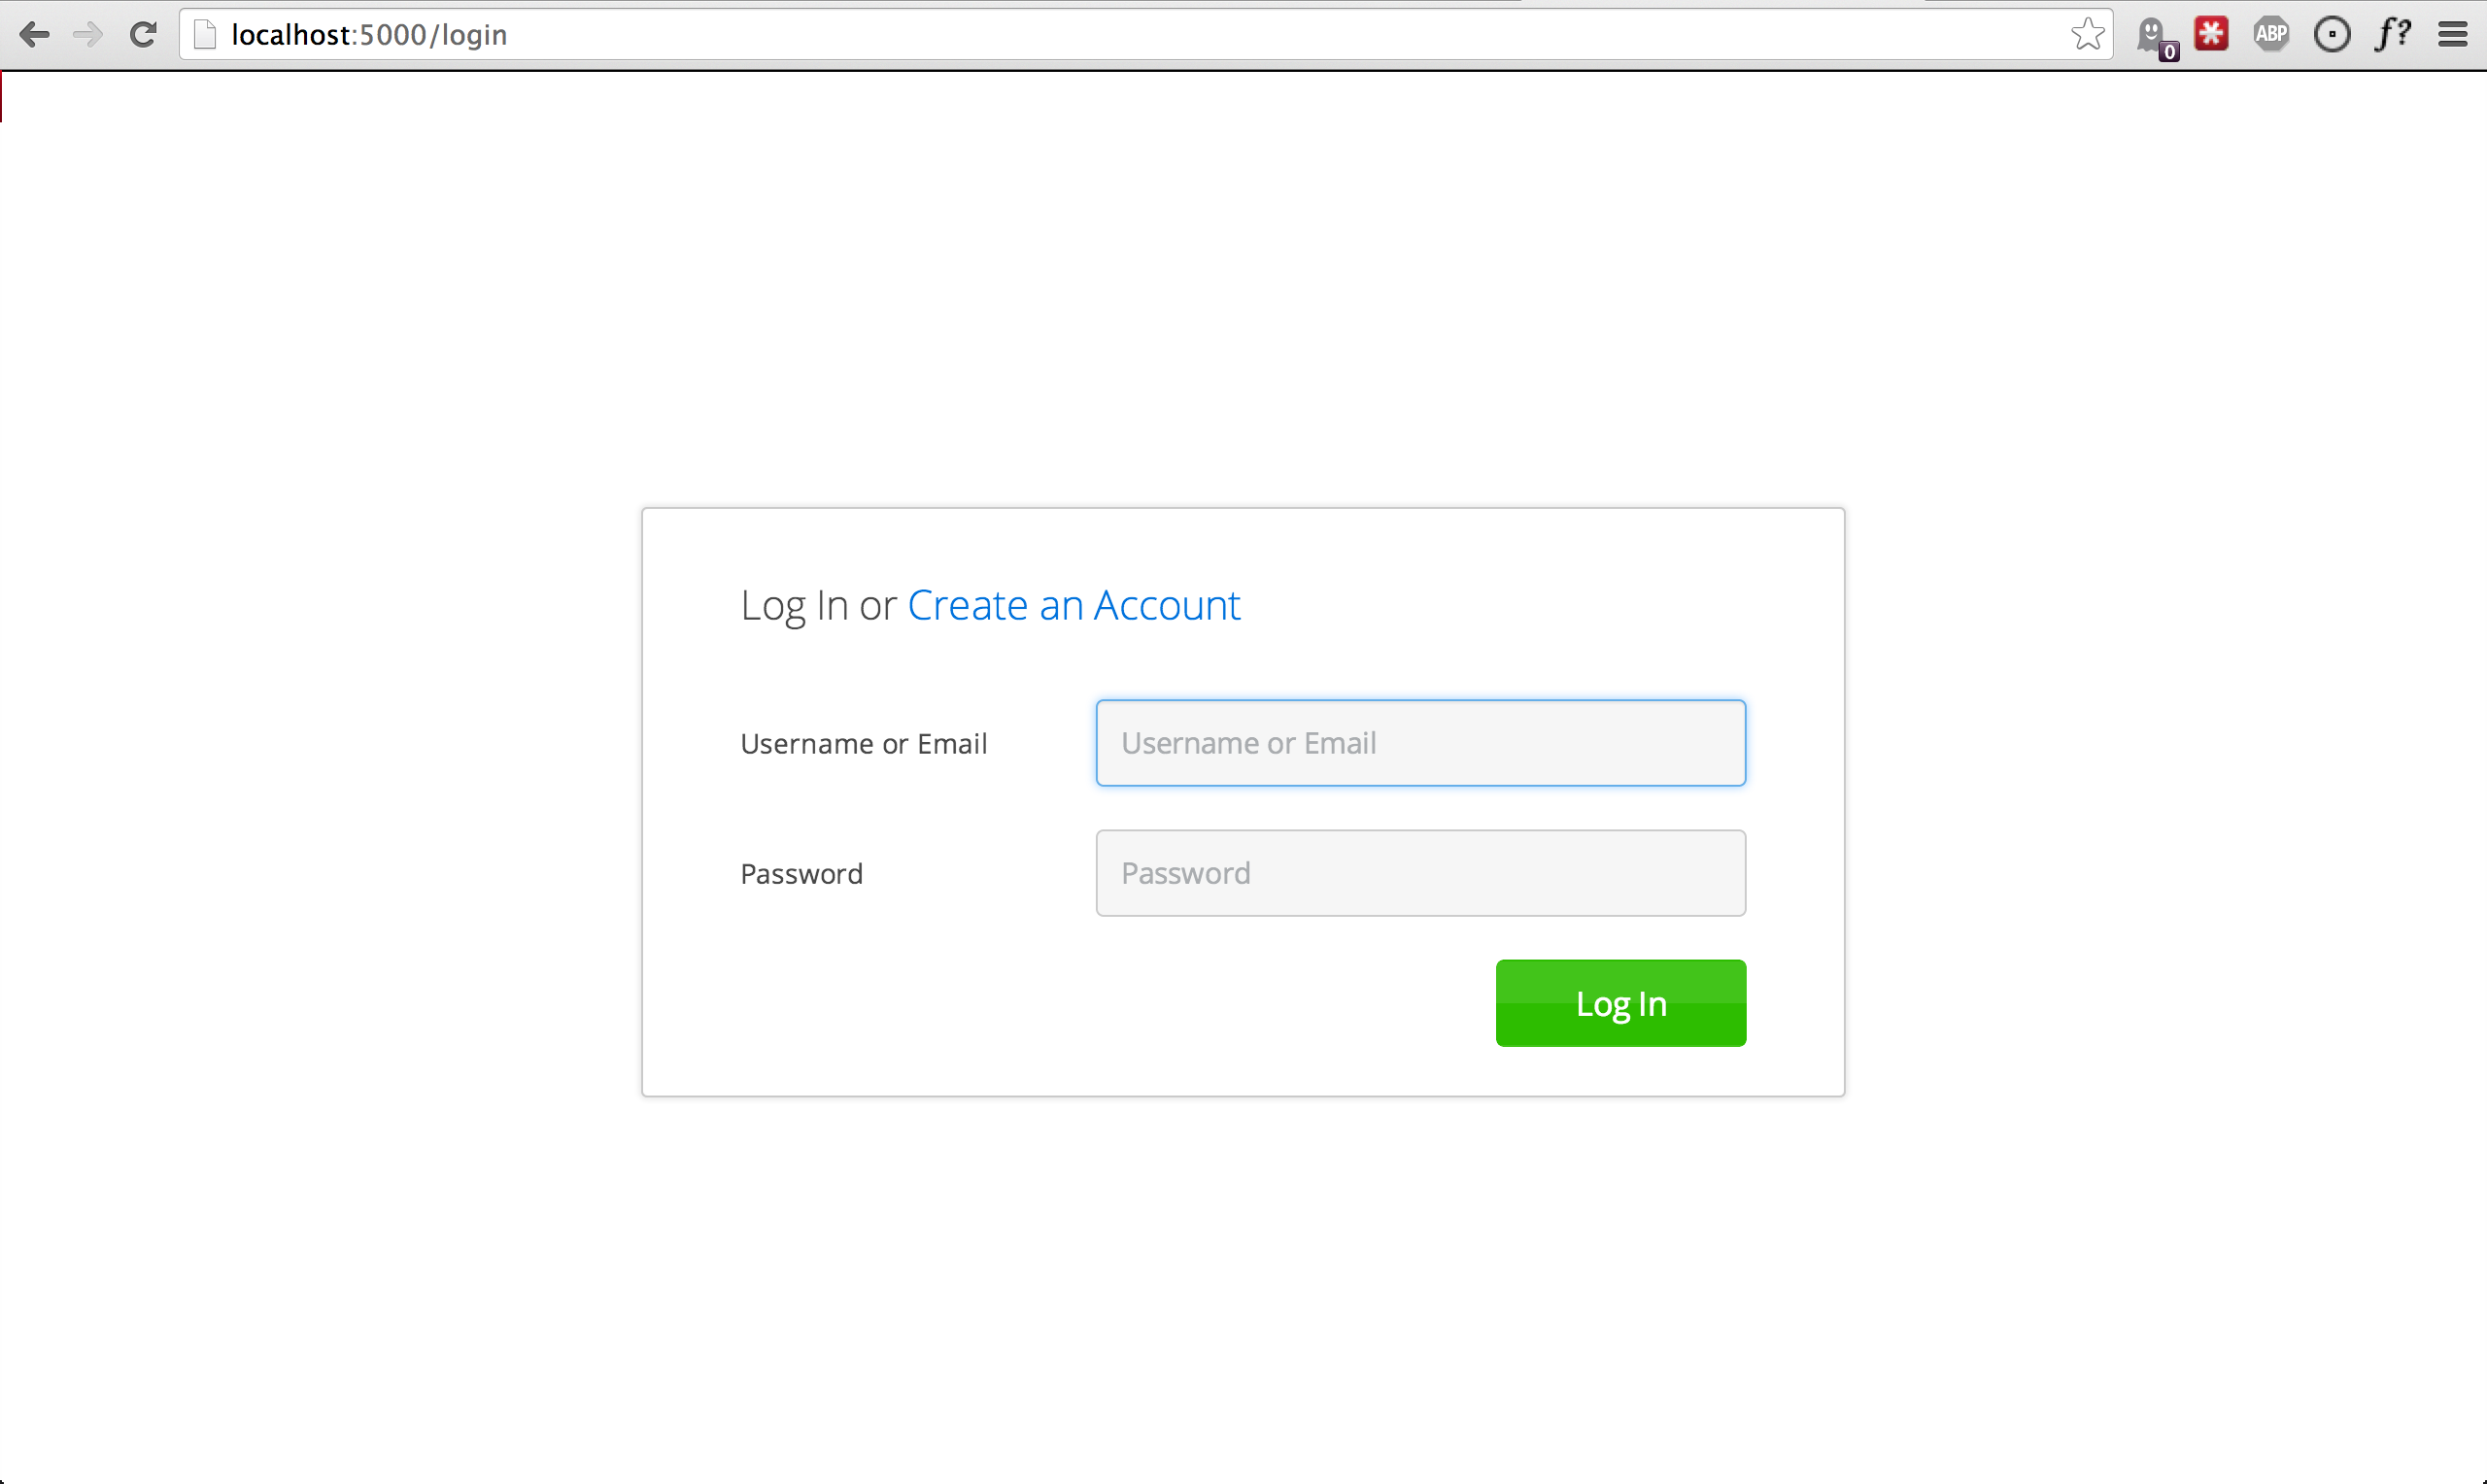
app.config['STORMPATH_ENABLE_USERNAME'] = True
You should now see the following on your login page:
Note
In the example above we didn’t set the STORMPATH_REQUIRE_USERNAME field
to True – if we did, this would ensure that when a new user registers
for the site, they must pick a username.
The STORMPATH_REQUIRE_USERNAME field has no effect on the login page.
Customize User Registration, Login, and Logout Routes
By default, Flask-Stormpath automatically enables three separate views and routes:
/register- the registration view/login- the login view/logout- the logout view
Customizing the built-in URL routes is quite simple. There are several config variables you can change to control these URL mappings. To change them, just modify your app’s config.
STORMPATH_REGISTRATION_URL– default:/registerSTORMPATH_LOGIN_URL– default:/loginSTORMPATH_LOGOUT_URL– default:/logout
If you were to modify your config such that:
app.config['STORMPATH_REGISTRATION_URL'] = '/welcome'
Then visit /welcome, you’d see your registration page there, instead!
Customize the Templates
Although I personally find our registration and login pages to be incredibly good looking – I realize that you might not share my same design passion!
Flask-Stormpath was built with customizability in mind, and makes it very easy to build your own custom registration and login templates.
Let’s start by looking at the built-in templates: https://github.com/stormpath/stormpath-flask/tree/develop/flask_stormpath/templates/flask_stormpath
Here’s a quick rundown of what each template is for:
base.htmlis the base template that the registration and login templates extend. It provides a basic bootstrap based layout, with a couple of blocks for customizing the child templates.facebook_login_form.htmlis a simple standalone template that includes a Facebook login button (for social login, which is covered later on in the guide).google_login_form.htmlis a simple standalone template that includes a Google login button (for social login, which is covered later on in the guide).login.htmlis the login page. It has some logic to flash error messages to the user if something fails, and also dynamically determines which input boxes to display based on the app’s settings.register.htmlis the registration page. It has some logic to flash error messages to the user if something fails, and also dynamically determines which input boxes to display based on the app’s settings.
If you’re comfortable with Jinja2, you can copy these templates to your project directly, and customize them yourself. If you’re not already a super Flask guru, continue reading!
The Most Basic Templates
Let’s say you want to build your own, fully customized registration and login templates – no problem!
The first thing you need to do is create two templates in the templates
directory of your project.
First, copy the following code into templates/register.html:
<form method="post">
  {{ form.hidden_tag() }}

  {# This bit of code displays a list of error messages if anything bad happens. #}
  {% with messages = get_flashed_messages() %}
    {% if messages %}
      <ul>
        {% for message in messages %}
          <li>{{ message }}</li>
        {% endfor %}
      </ul>
    {% endif %}
  {% endwith %}

  {# This block of code renders the desired input boxes for registering users.  #}
  {% if config['STORMPATH_ENABLE_USERNAME'] %}
    {% if config['STORMPATH_REQUIRE_USERNAME'] %}
      {{ form.username(placeholder='Username', required='true') }}
    {% else %}
      {{ form.username(placeholder='Username') }}
    {% endif %}
  {% endif %}
  {% if config['STORMPATH_ENABLE_GIVEN_NAME'] %}
    {% if config['STORMPATH_REQUIRE_GIVEN_NAME'] %}
      {{ form.given_name(placeholder='First Name', required='true') }}
    {% else %}
      {{ form.given_name(placeholder='First Name') }}
    {% endif %}
  {% endif %}
  {% if config['STORMPATH_ENABLE_MIDDLE_NAME'] %}
    {% if config['STORMPATH_REQUIRE_MIDDLE_NAME'] %}
      {{ form.middle_name(placeholder='Middle Name', required='true') }}
    {% else %}
      {{ form.middle_name(placeholder='Middle Name') }}
    {% endif %}
  {% endif %}
  {% if config['STORMPATH_ENABLE_SURNAME'] %}
    {% if config['STORMPATH_REQUIRE_SURNAME'] %}
      {{ form.surname(placeholder='Last Name', required='true') }}
    {% else %}
      {{ form.surname(placeholder='Last Name') }}
    {% endif %}
  {% endif %}
  {{ form.email(placeholder='Email', required='true', type='email') }}
  {{ form.password(placeholder='Password', required='true', type='password') }}

  <button type="submit">Create Account</button>
</form>
The simple template you see above is the most basic possible registration page. It’s using Flask-WTF to render the form fields, but everything other than that is all standard – nothing special happening.
Next, copy the following code into templates/login.html:
{# Display errors (if there are any). #}
{% with messages = get_flashed_messages() %}
  {% if messages %}
    <ul>
      {% for message in messages %}
        <li>{{ message }}</li>
      {% endfor %}
    </ul>
  {% endif %}
{% endwith %}

{# Render the login form. #}
<form method="post">
  {{ form.hidden_tag() }}
  {% if config['STORMPATH_ENABLE_USERNAME'] %}
    {{ form.login(placeholder='Username or Email', required='true') }}
  {% else %}
    {{ form.login(placeholder='Email', required='true') }}
  {% endif %}
  {{ form.password(placeholder='Password', required='true') }}
  <button type="submit">Log In</button>
</form>

{# If social login is enabled, display social login buttons. #}
{% if config['STORMPATH_ENABLE_FACEBOOK'] or config['STORMPATH_ENABLE_GOOGLE'] %}
  <p>Or, log in using a social provider.</p>
  {% if config['STORMPATH_ENABLE_FACEBOOK'] %}
    {% include "flask_stormpath/facebook_login_form.html" %}
  {% endif %}
  {% if config['STORMPATH_ENABLE_GOOGLE'] %}
    {% include "flask_stormpath/google_login_form.html" %}
  {% endif %}
{% endif %}
This is the most basic login template possible (it also includes support for social login, which is covered later in this guide).
Update Template Paths
Now that you’ve got the simplest possible templates ready to go, let’s activate them! In your app’s config, you’ll need to specify the path to your new templates like so:
app.config['STORMPATH_REGISTRATION_TEMPLATE'] = 'register.html'
app.config['STORMPATH_LOGIN_TEMPLATE'] = 'login.html'
That will tell Flask-Stormpath to render the templates you created above instead of the built-in ones!
Now, if you open your browser and checkout /register and /login, you
should see something like the following:
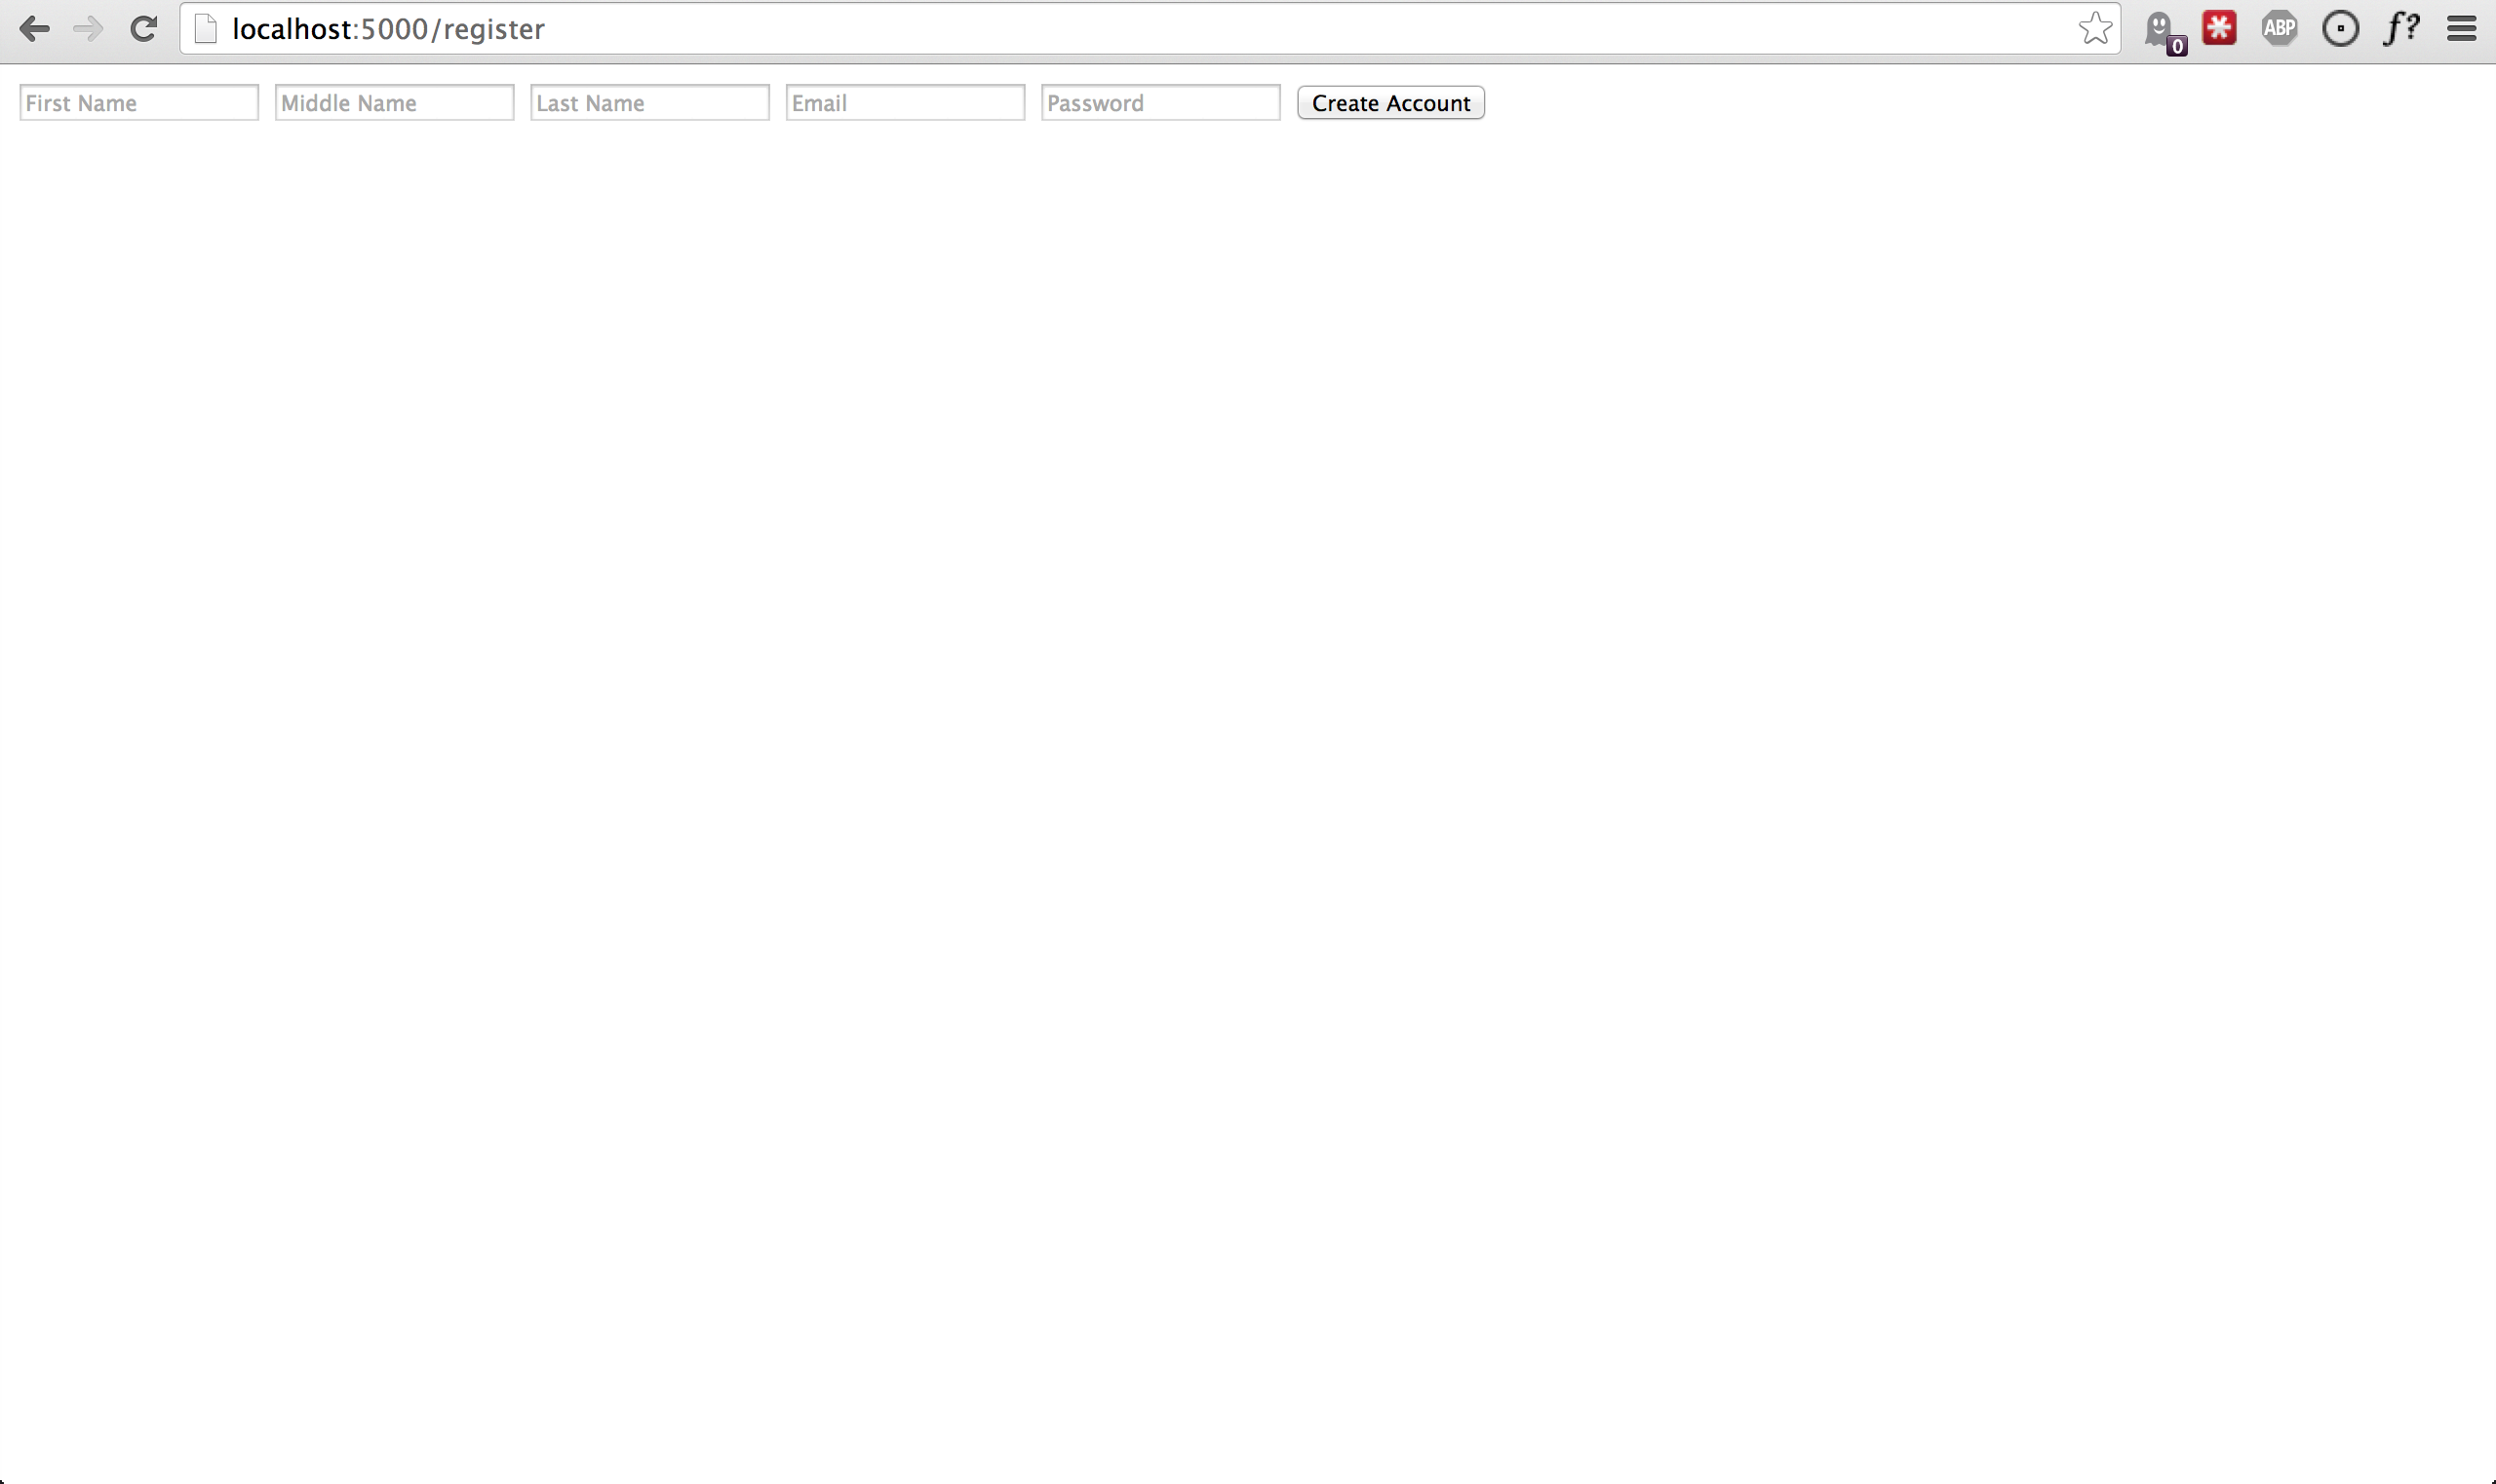
BAM! That wasn’t so bad, was it? You now have your own customized registration and login templates – all you need to do now is design them the way you want!
Disable the Built-in Views
If for some reason you want to write your own registration, login, and logout views (not recommended), you can easily disable all of the automatic functionality described above by modifying your app config and adding the following:
app.config['STORMPATH_ENABLE_REGISTRATION'] = False
app.config['STORMPATH_ENABLE_LOGIN'] = False
app.config['STORMPATH_ENABLE_LOGOUT'] = False
Use Password Reset
As of Flask-Stormpath 0.2.6, it is now possible to easily enable a “Password Reset Workflow”, which allows your users to reset their passwords automatically.
We highly encourage you to use this feature, as it provides a simple and secure way to allow your users to reset their passwords without hassle.
Configure the Workflow
The first thing you need to do to enable “Password Reset” functionality in your Flask app is visit the Directory Dashboard and select your default user directory.
Next, you should see several options in a tab. You will want to click the “Workflows” button. Once you’ve landed on this page, you’ll then want to click the “show” link to the right of the “Password Reset” header. This section allows you to configure your “Password Reset” settings.
On this page, the only thing you need to change is the “Base URL” setting at
the top. You need to set this to be: https://mysite.com/forgot/change,
substituting in your own website address.
For instance, if your site lives at https://www.mysite.com, you’ll want to
set “Base URL” to https://www.mysite.com/forgot/change.
This URL determines where a user will be redirected after attempting to reset
their password on your website. If you’re testing things out locally, you can
also set this to a local URL (eg: http://localhost:5000/forgot/change).
After setting “Base URL”, you can also adjust any of the other settings below – you can customize the email templates that are used to email the user, and a variety of other options.
When you’re finished customizing the “Password Reset Workflow”, be sure to hit the “Update” button at the bottom of the page.
Enable Password Reset in Your App
Now that you’ve configured the “Password Reset” settings on Stormpath’s side, you need to configure your Flask application to enable password reset.
You can do this easily by modifying your application config like so:
app.config['STORMPATH_ENABLE_FORGOT_PASSWORD'] = True
And... That’s all you have to do!
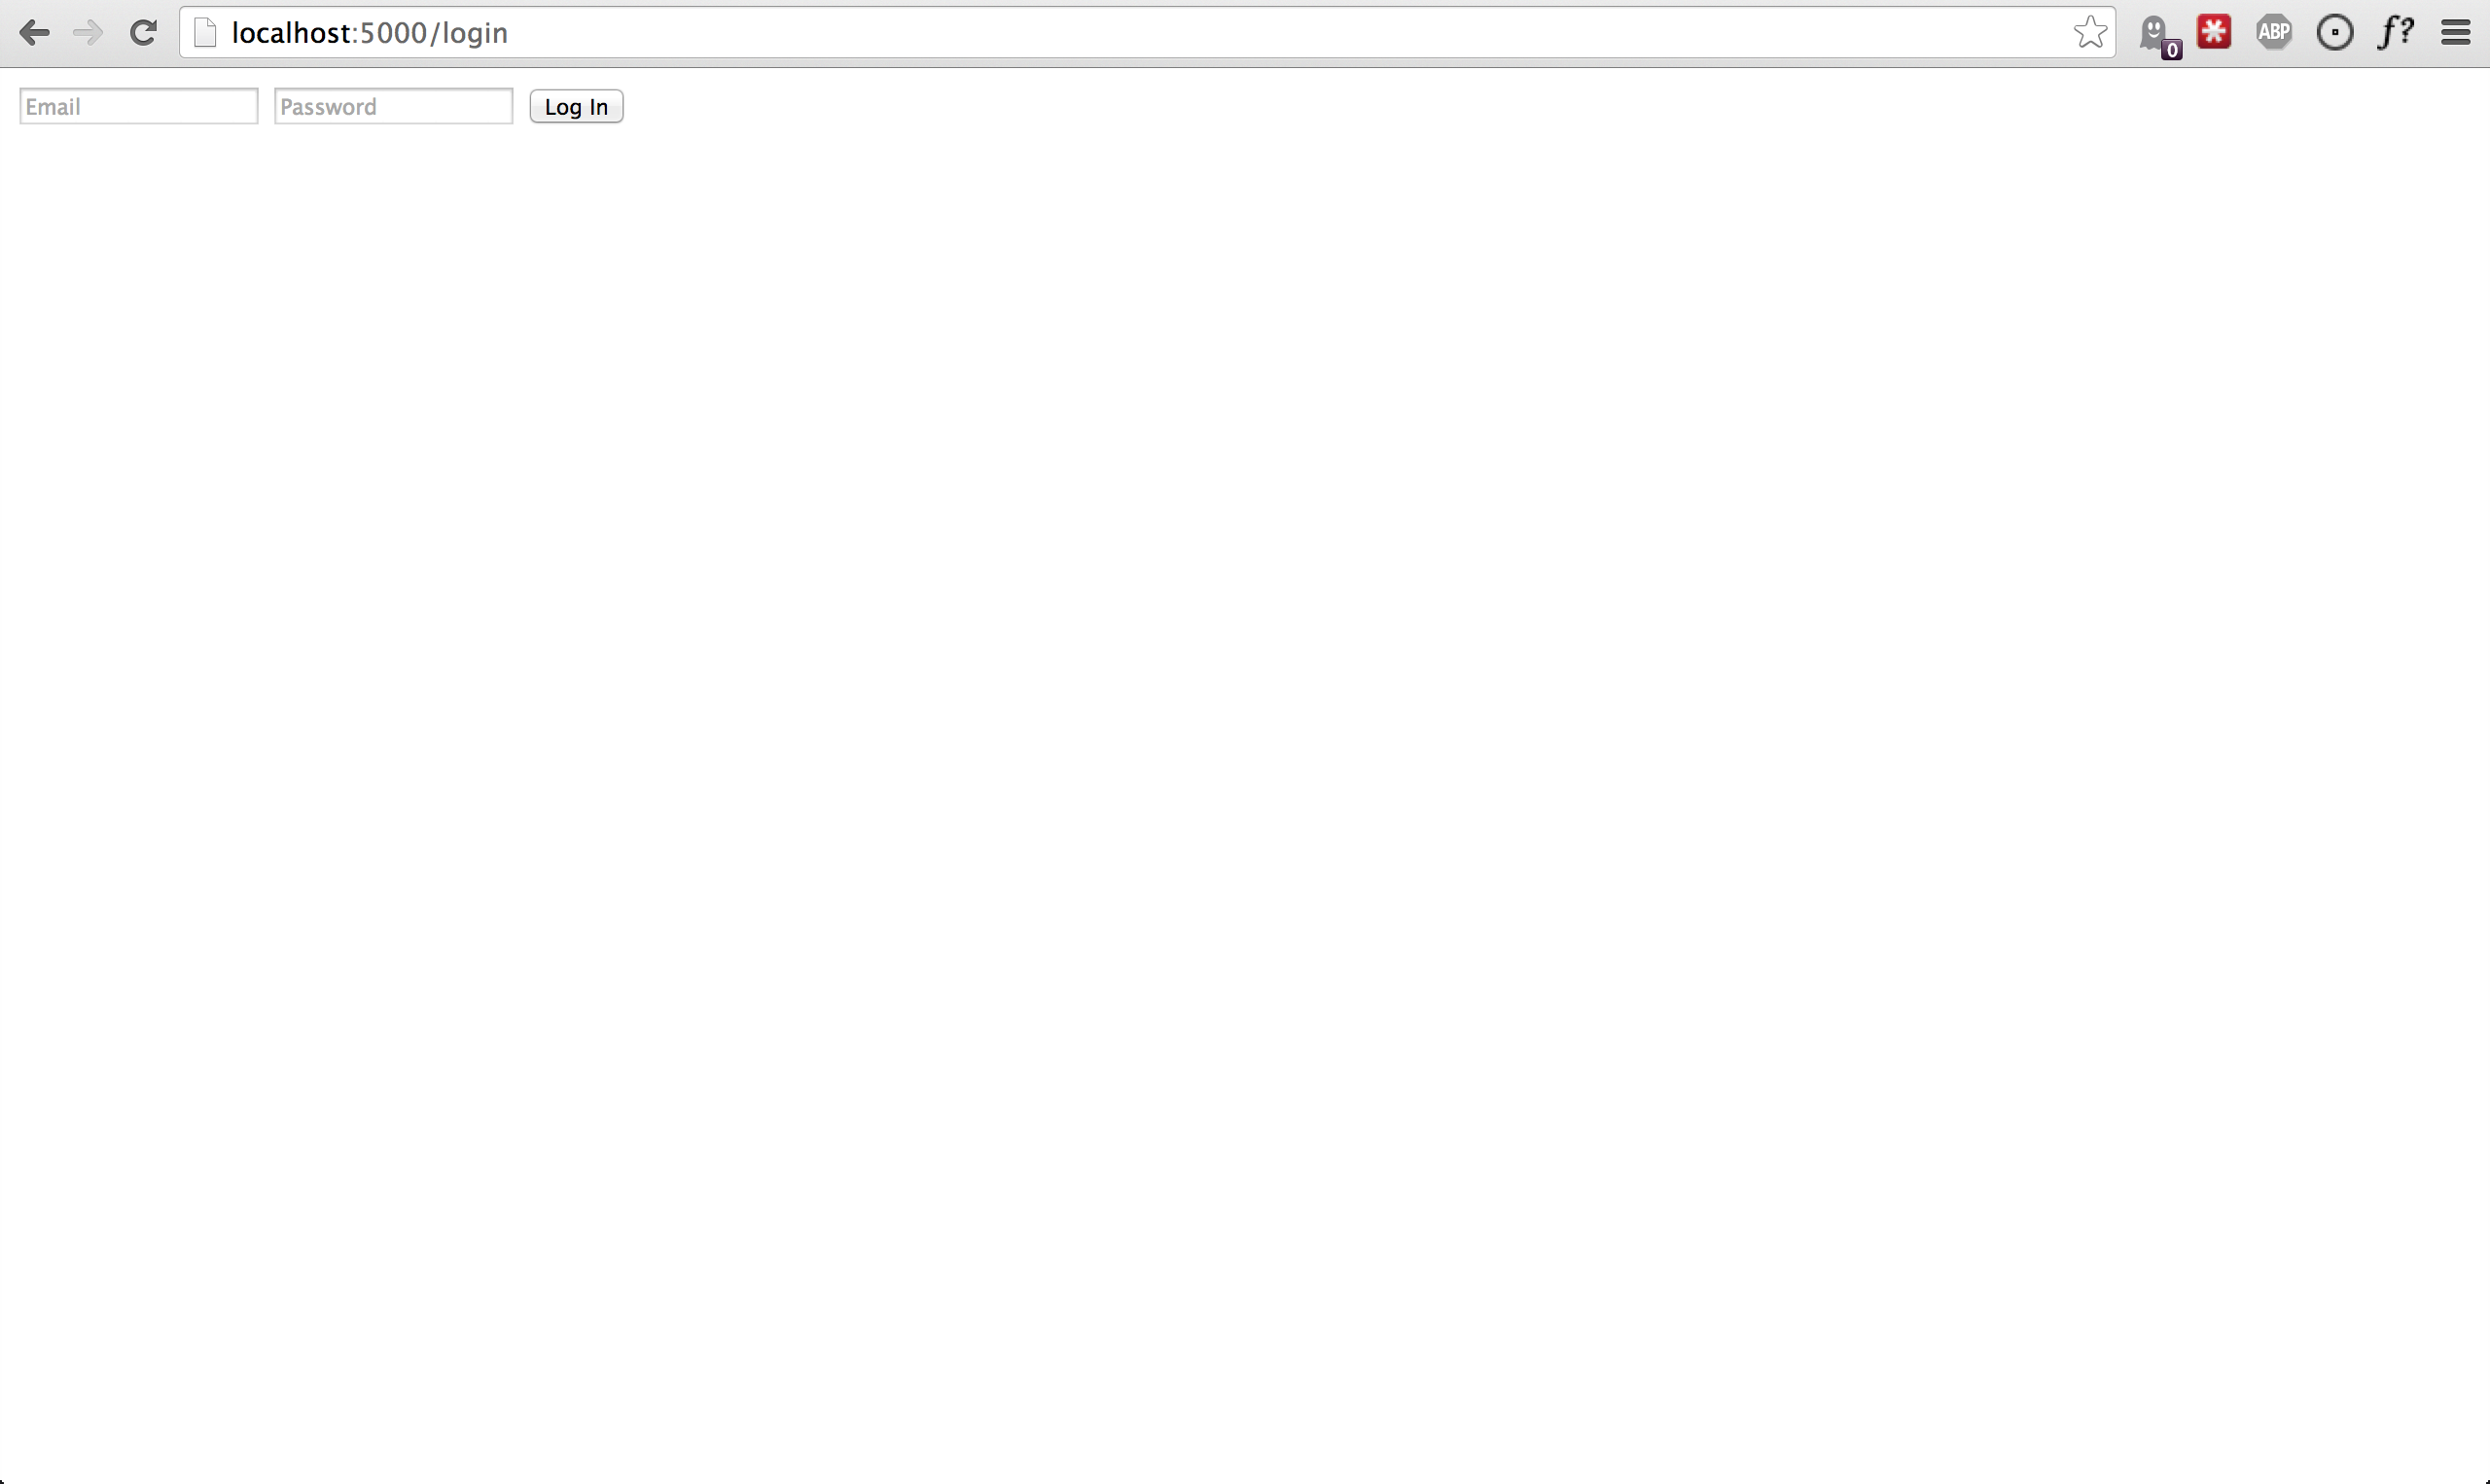
Test it Out
Now that you’ve fully enabled password reset functionality in your app, open up the login page in your Flask app and check it out! You should see a “Forgot Password?” link below the login form which looks like this:
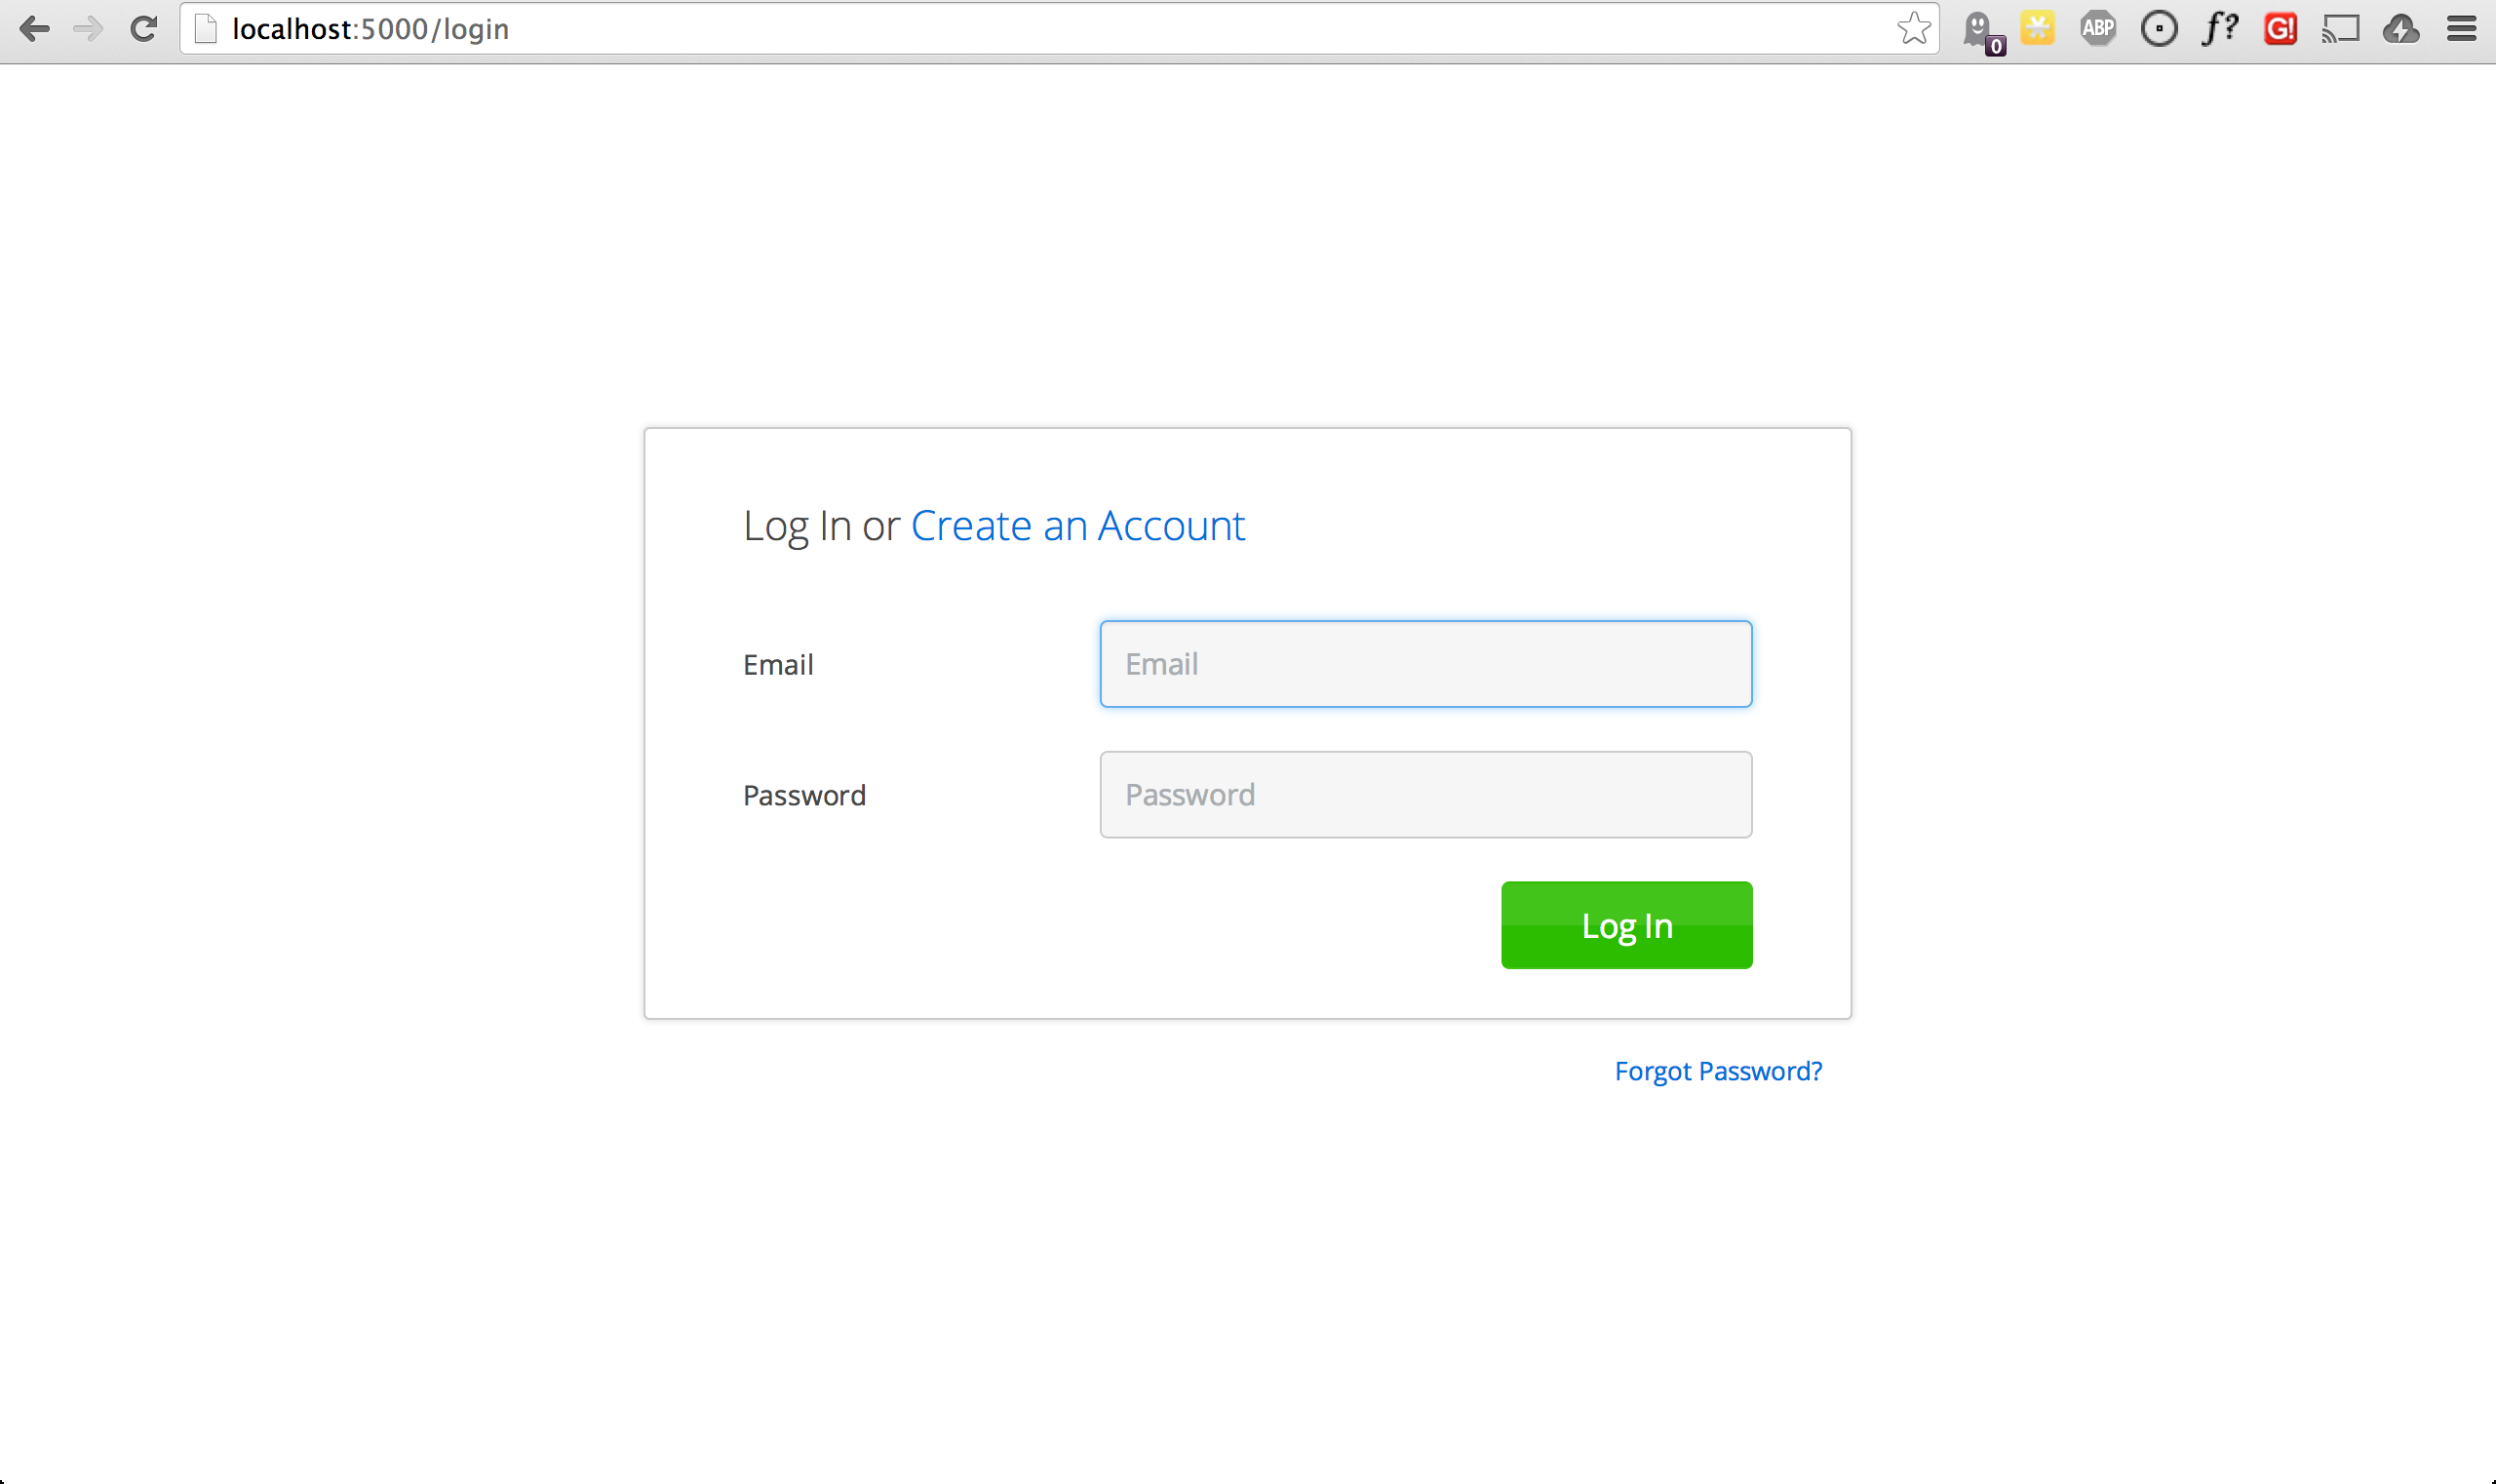
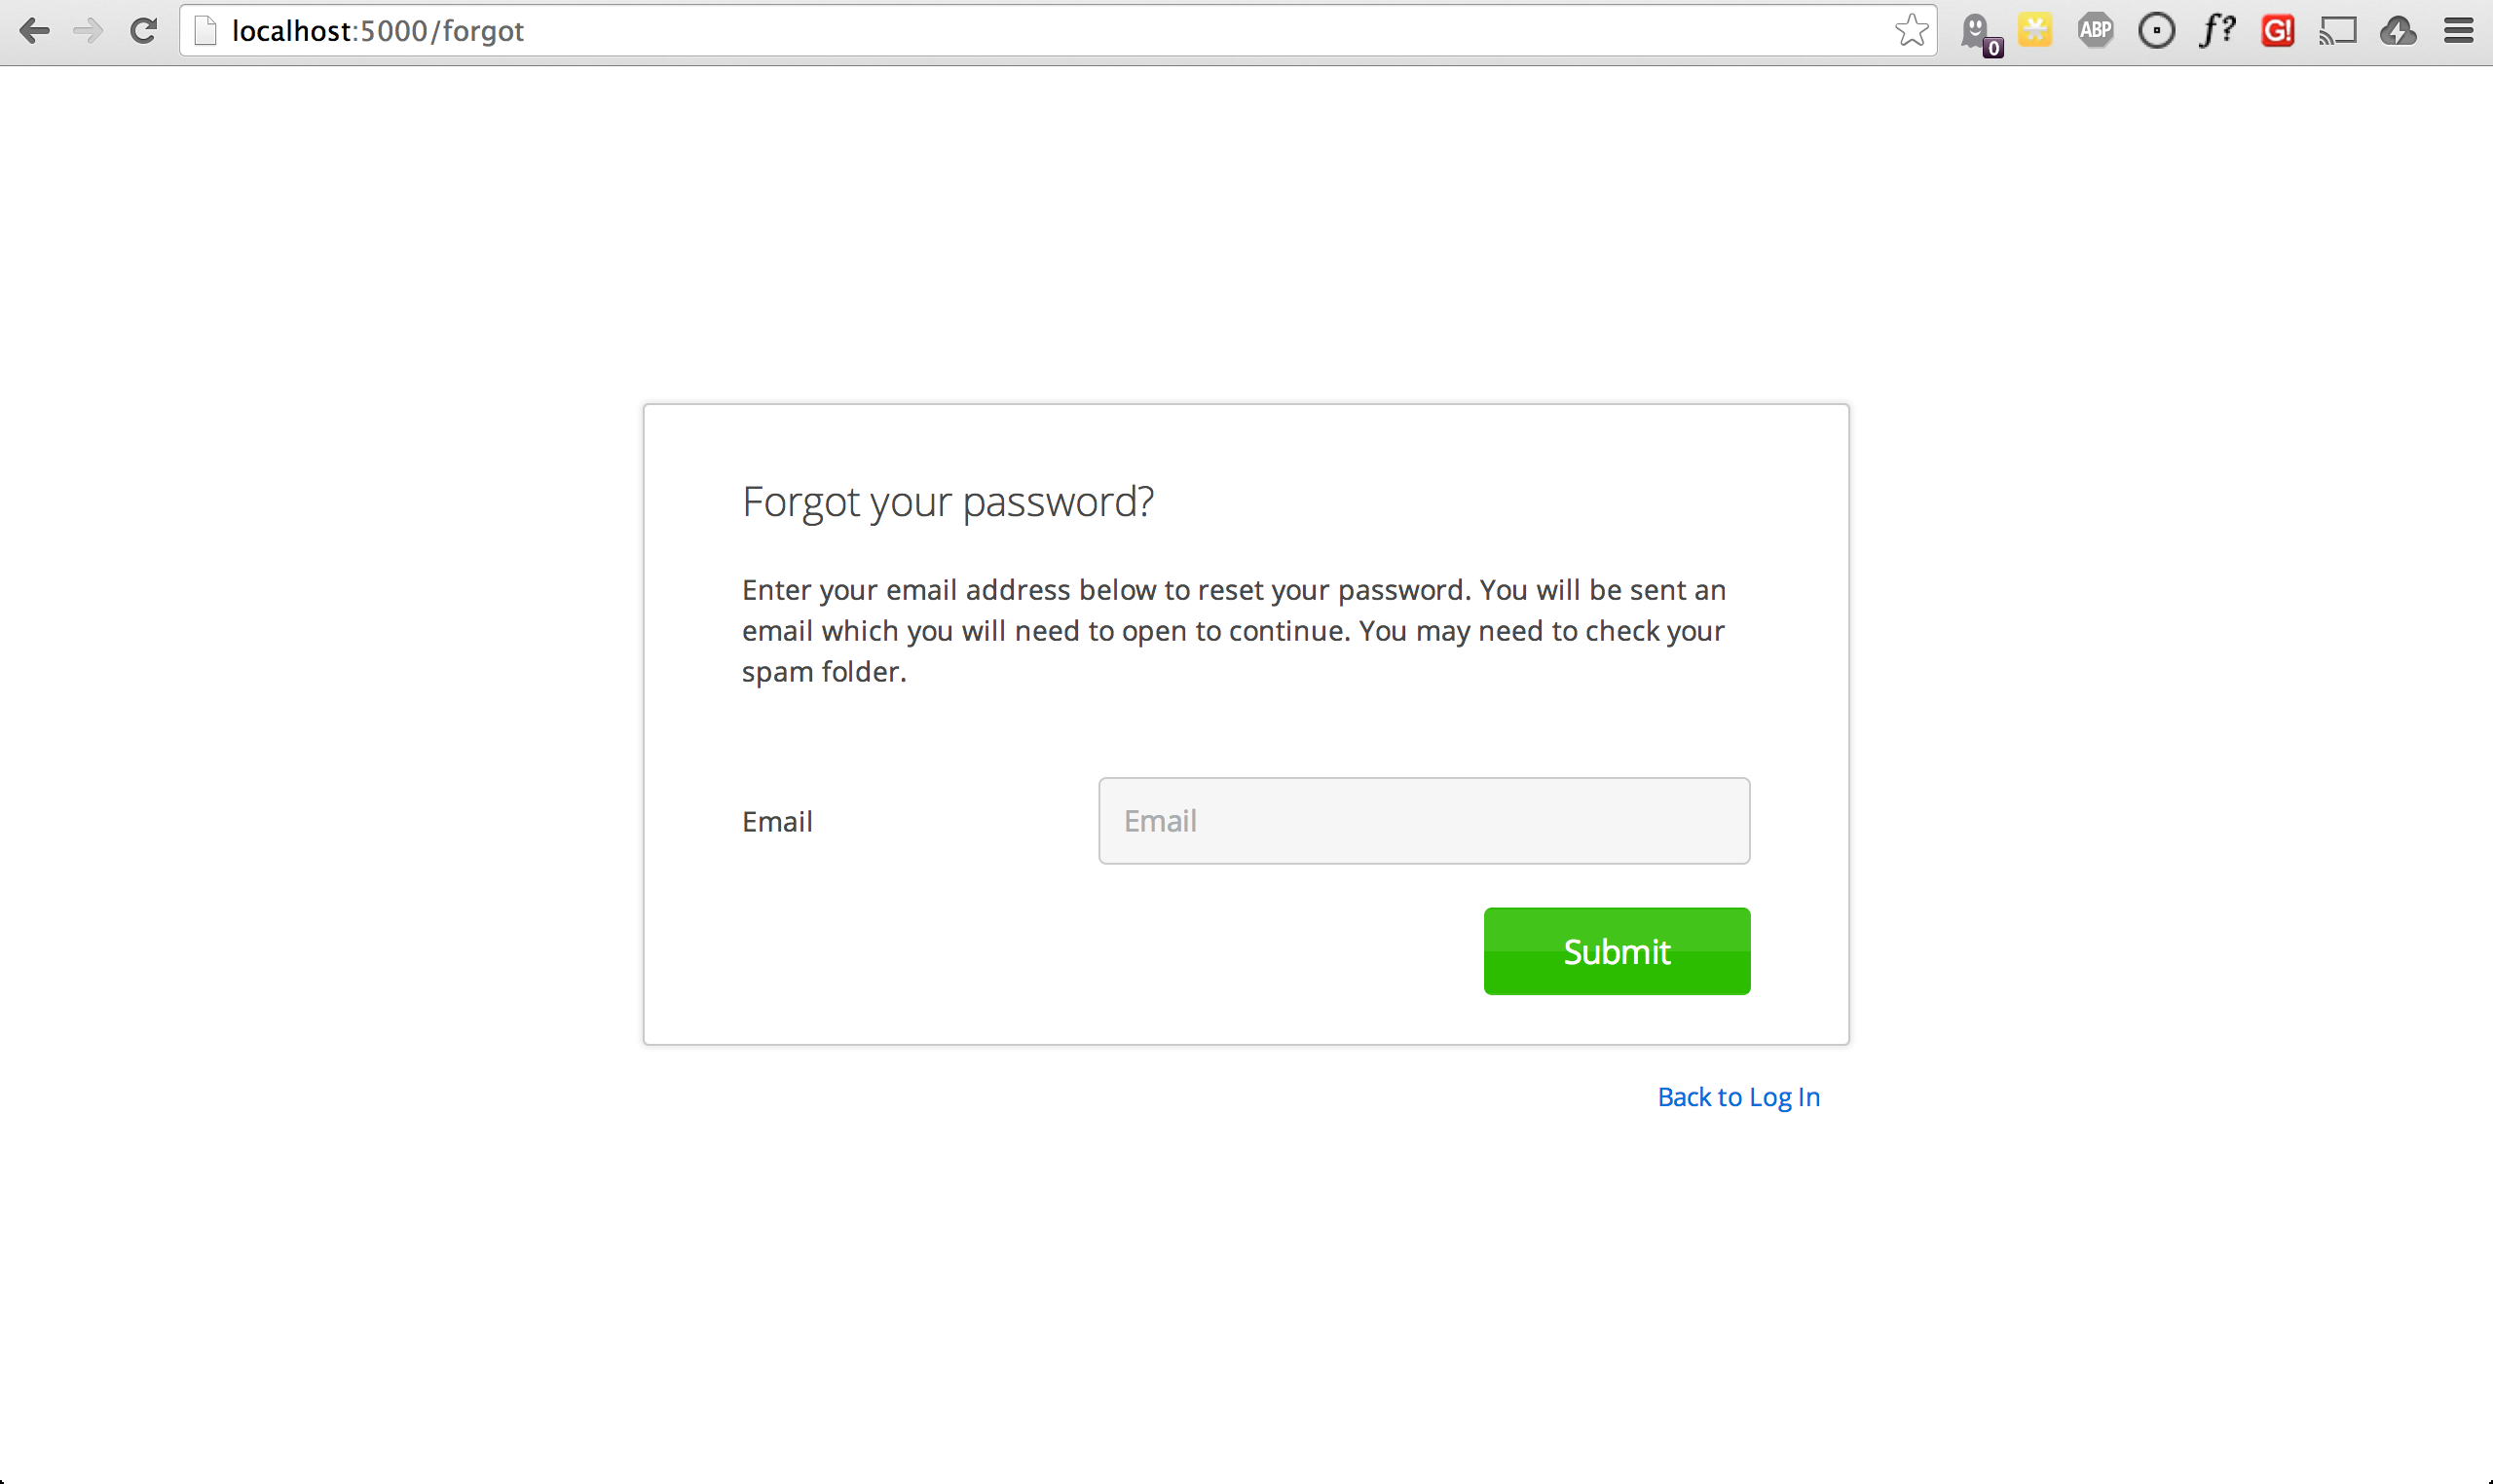
If you click the “Forgot Password?” link, you’ll be brought to a password reset page that looks like this:
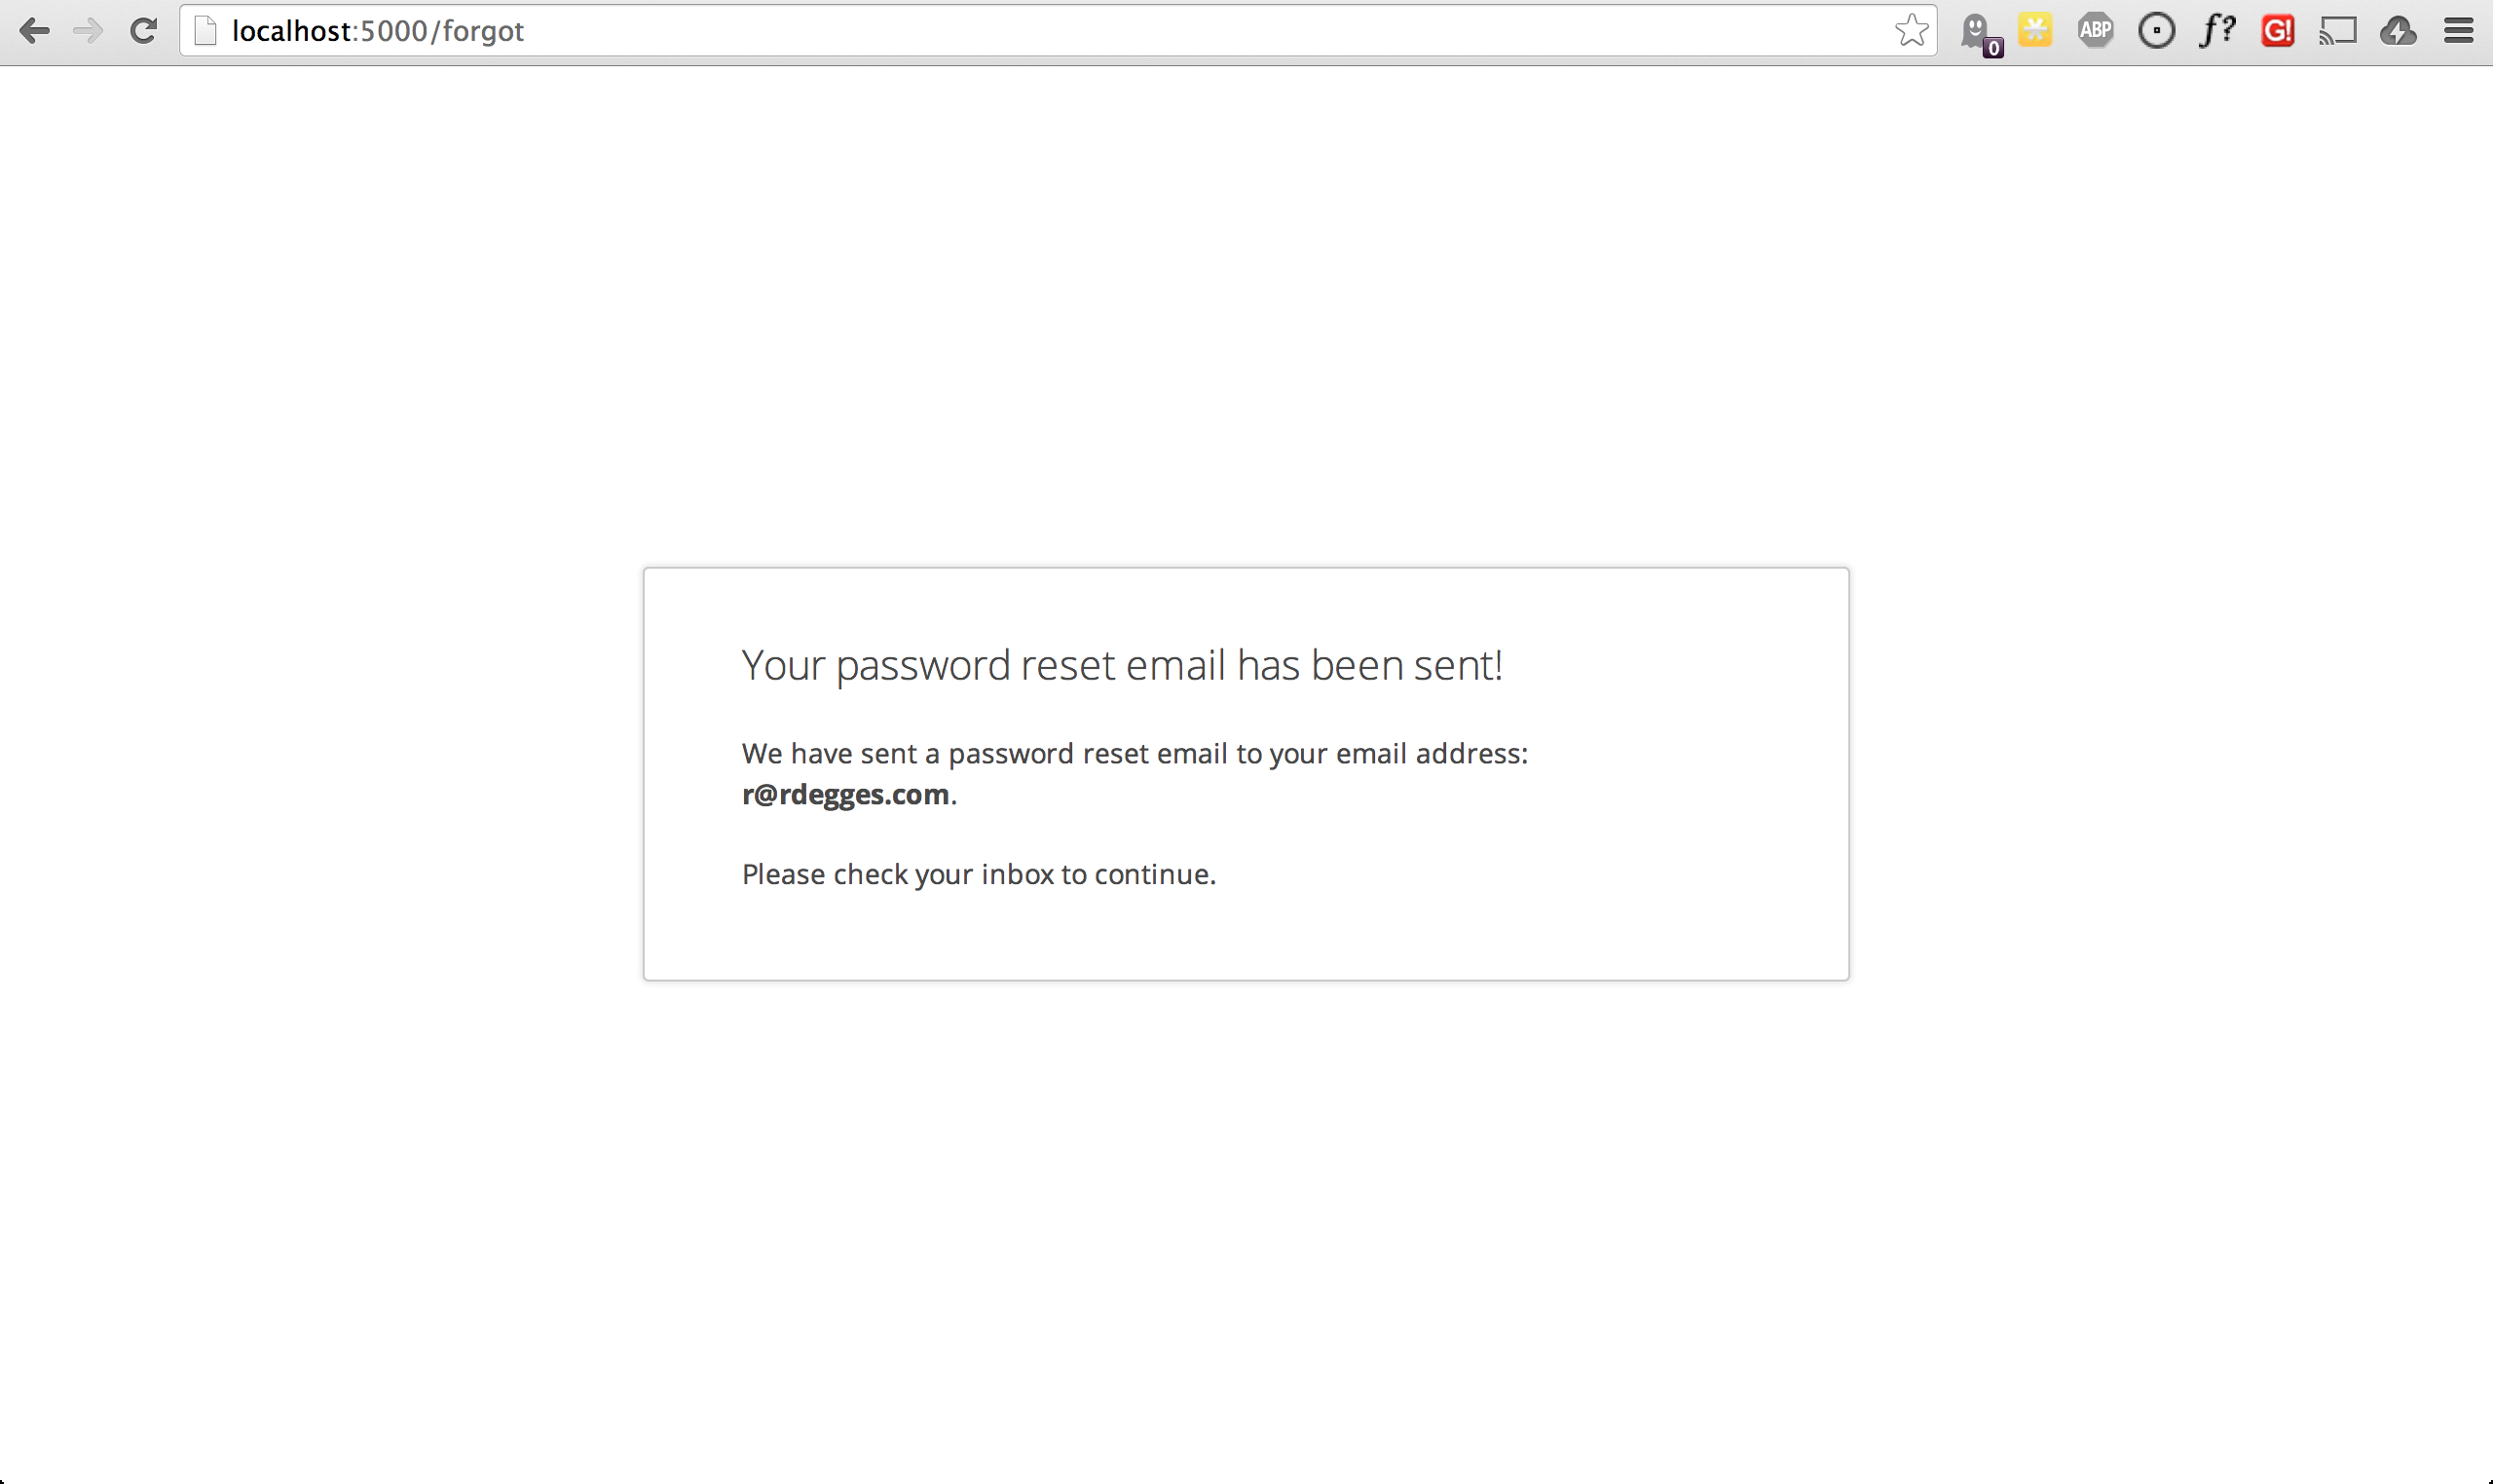
After filling in their email address, a user will see the following page:
Then, depending on your “Password Reset Workflow” configuration, the user will see an email that looks like the following:
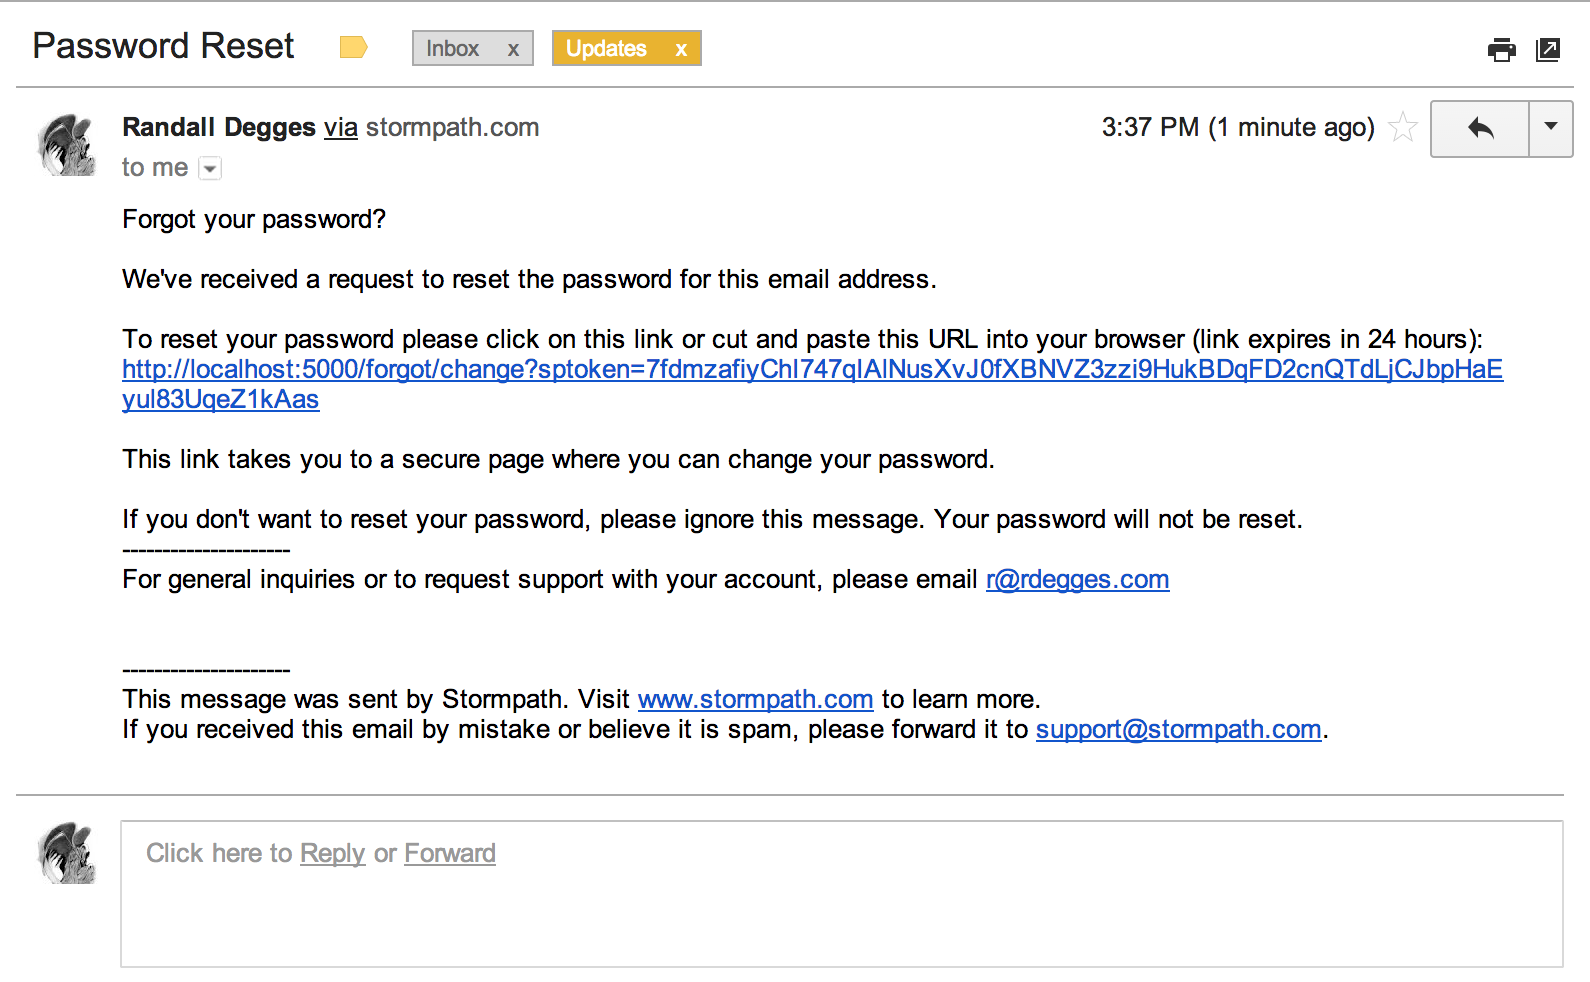
When a user clicks the link in their email, they’ll reach a password change page that looks like this:
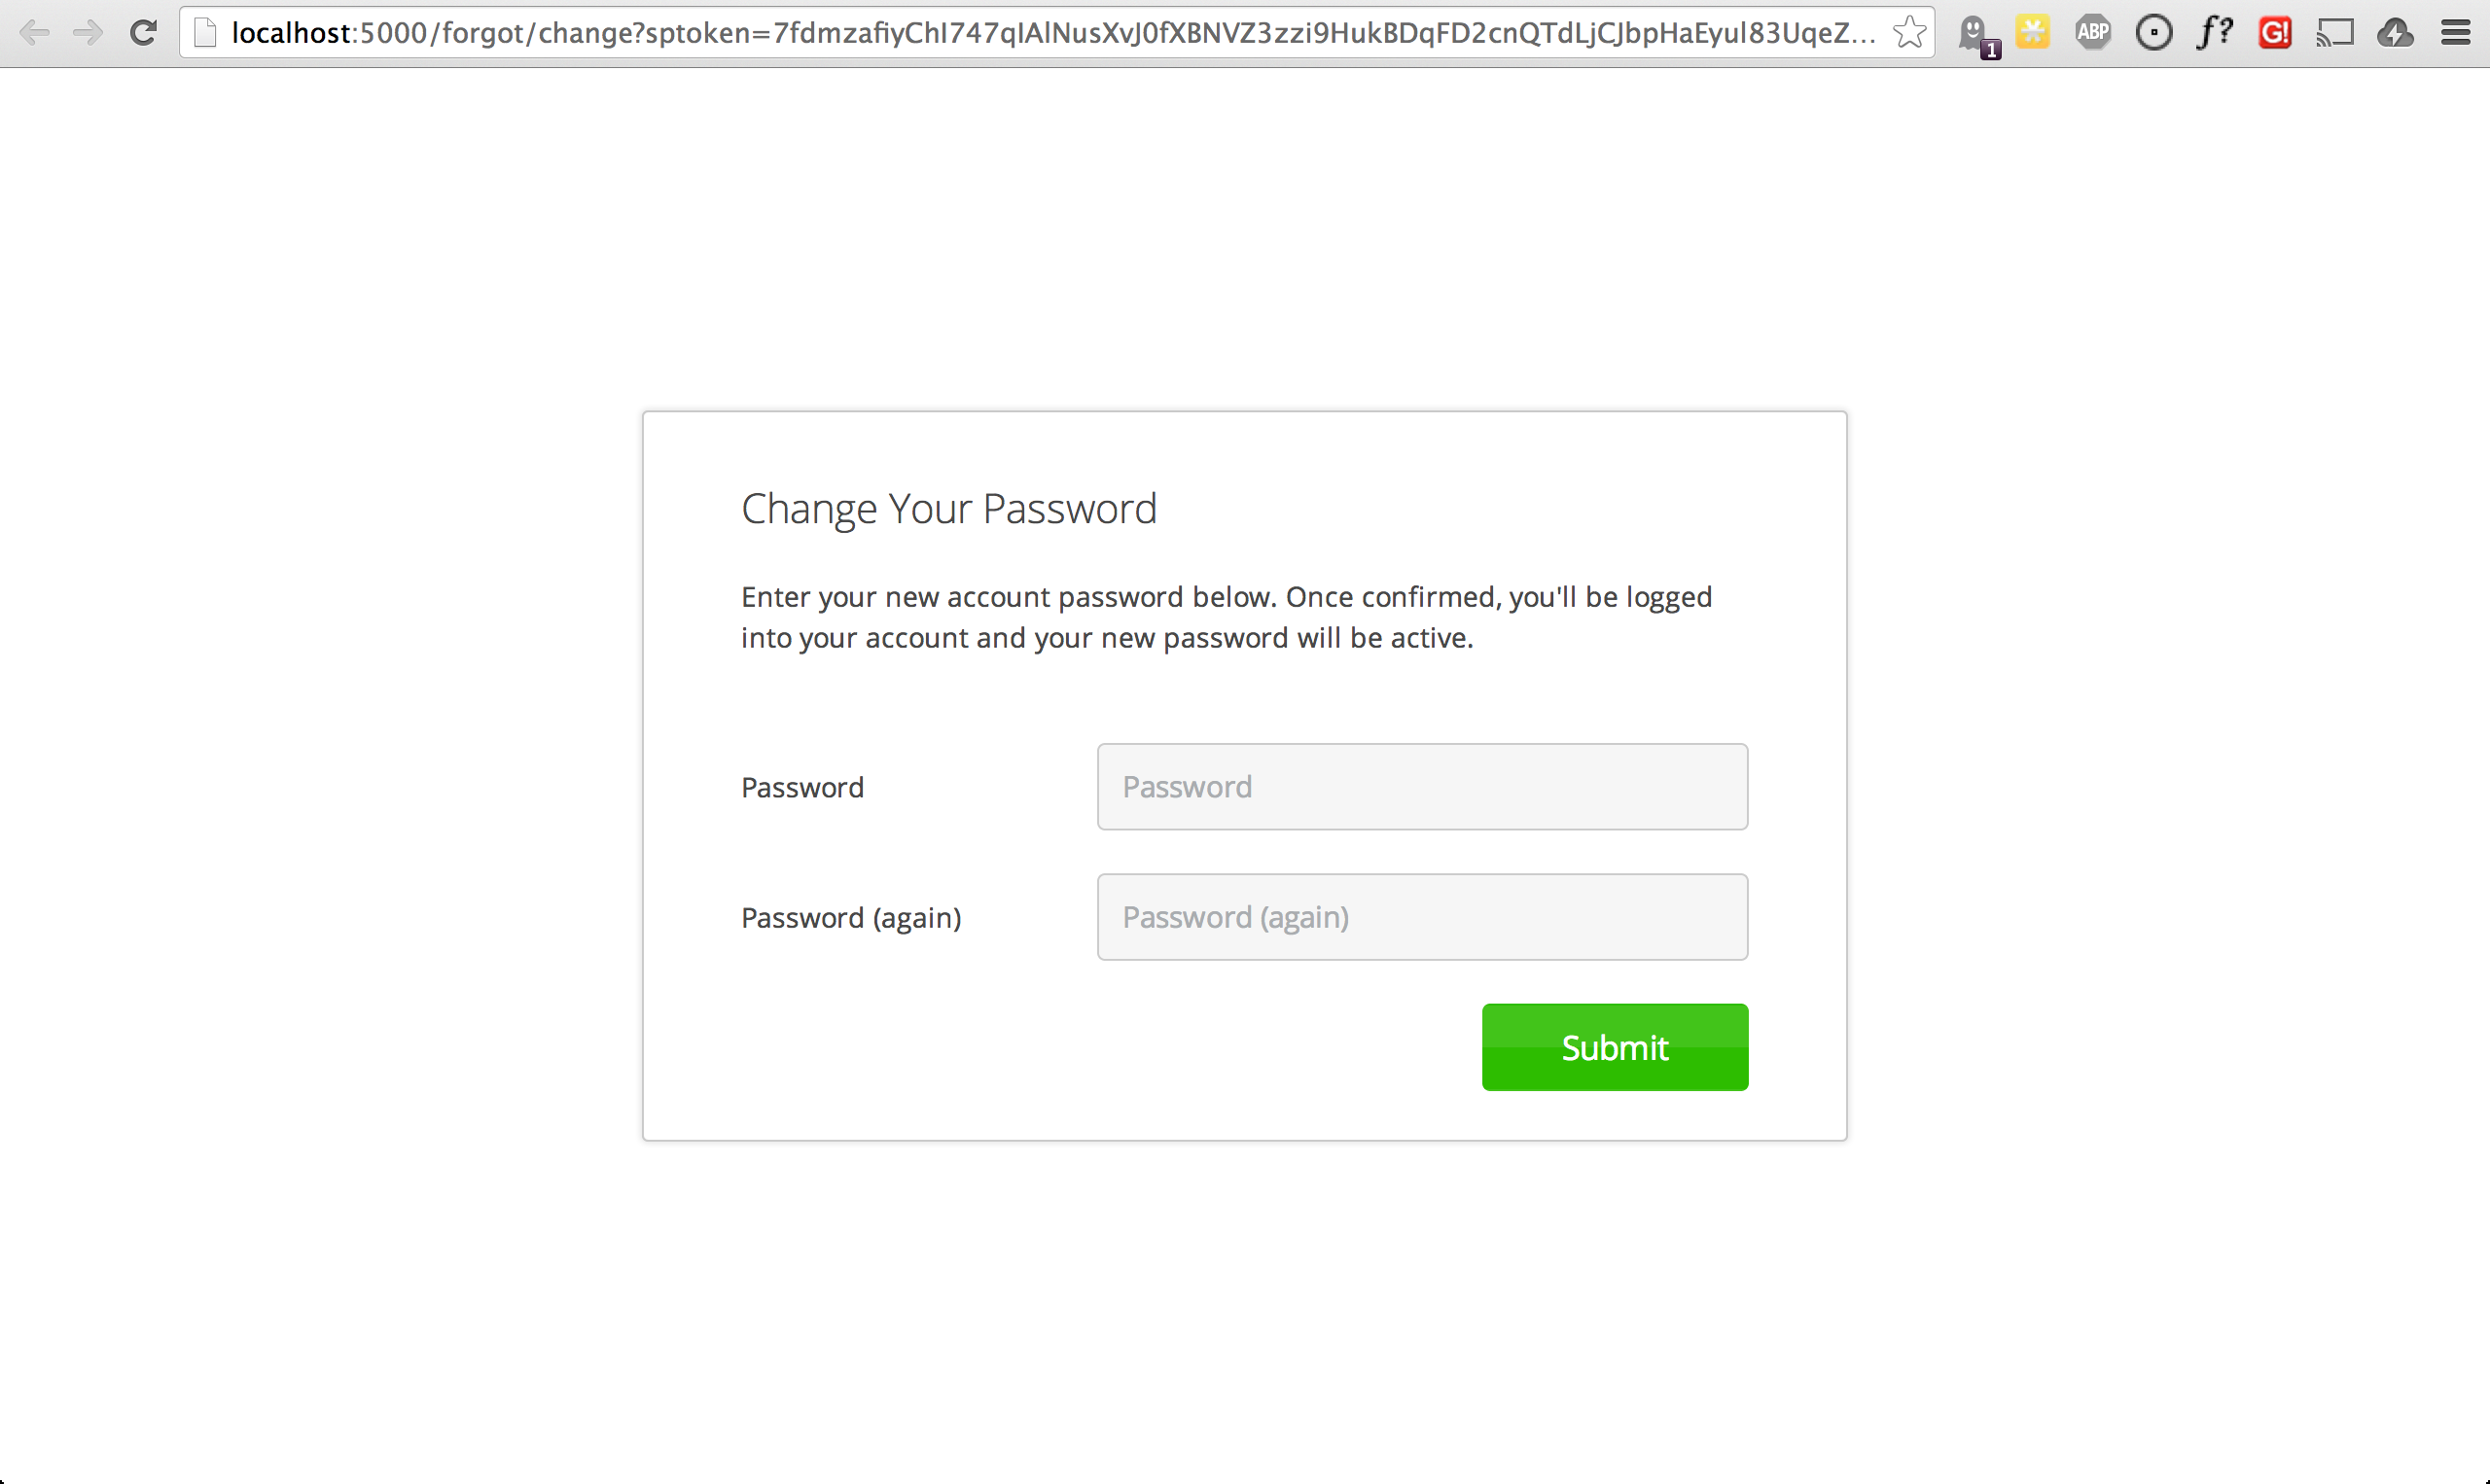
And lastly, once a user changes their password successfully, they’ll be
automatically logged into their account, then redirected to the main page of
your site (whatever URL is set as STORMPATH_REDIRECT_URL in your
configuration). They’ll also be shown this page for a few seconds to let them
know the change was successful:
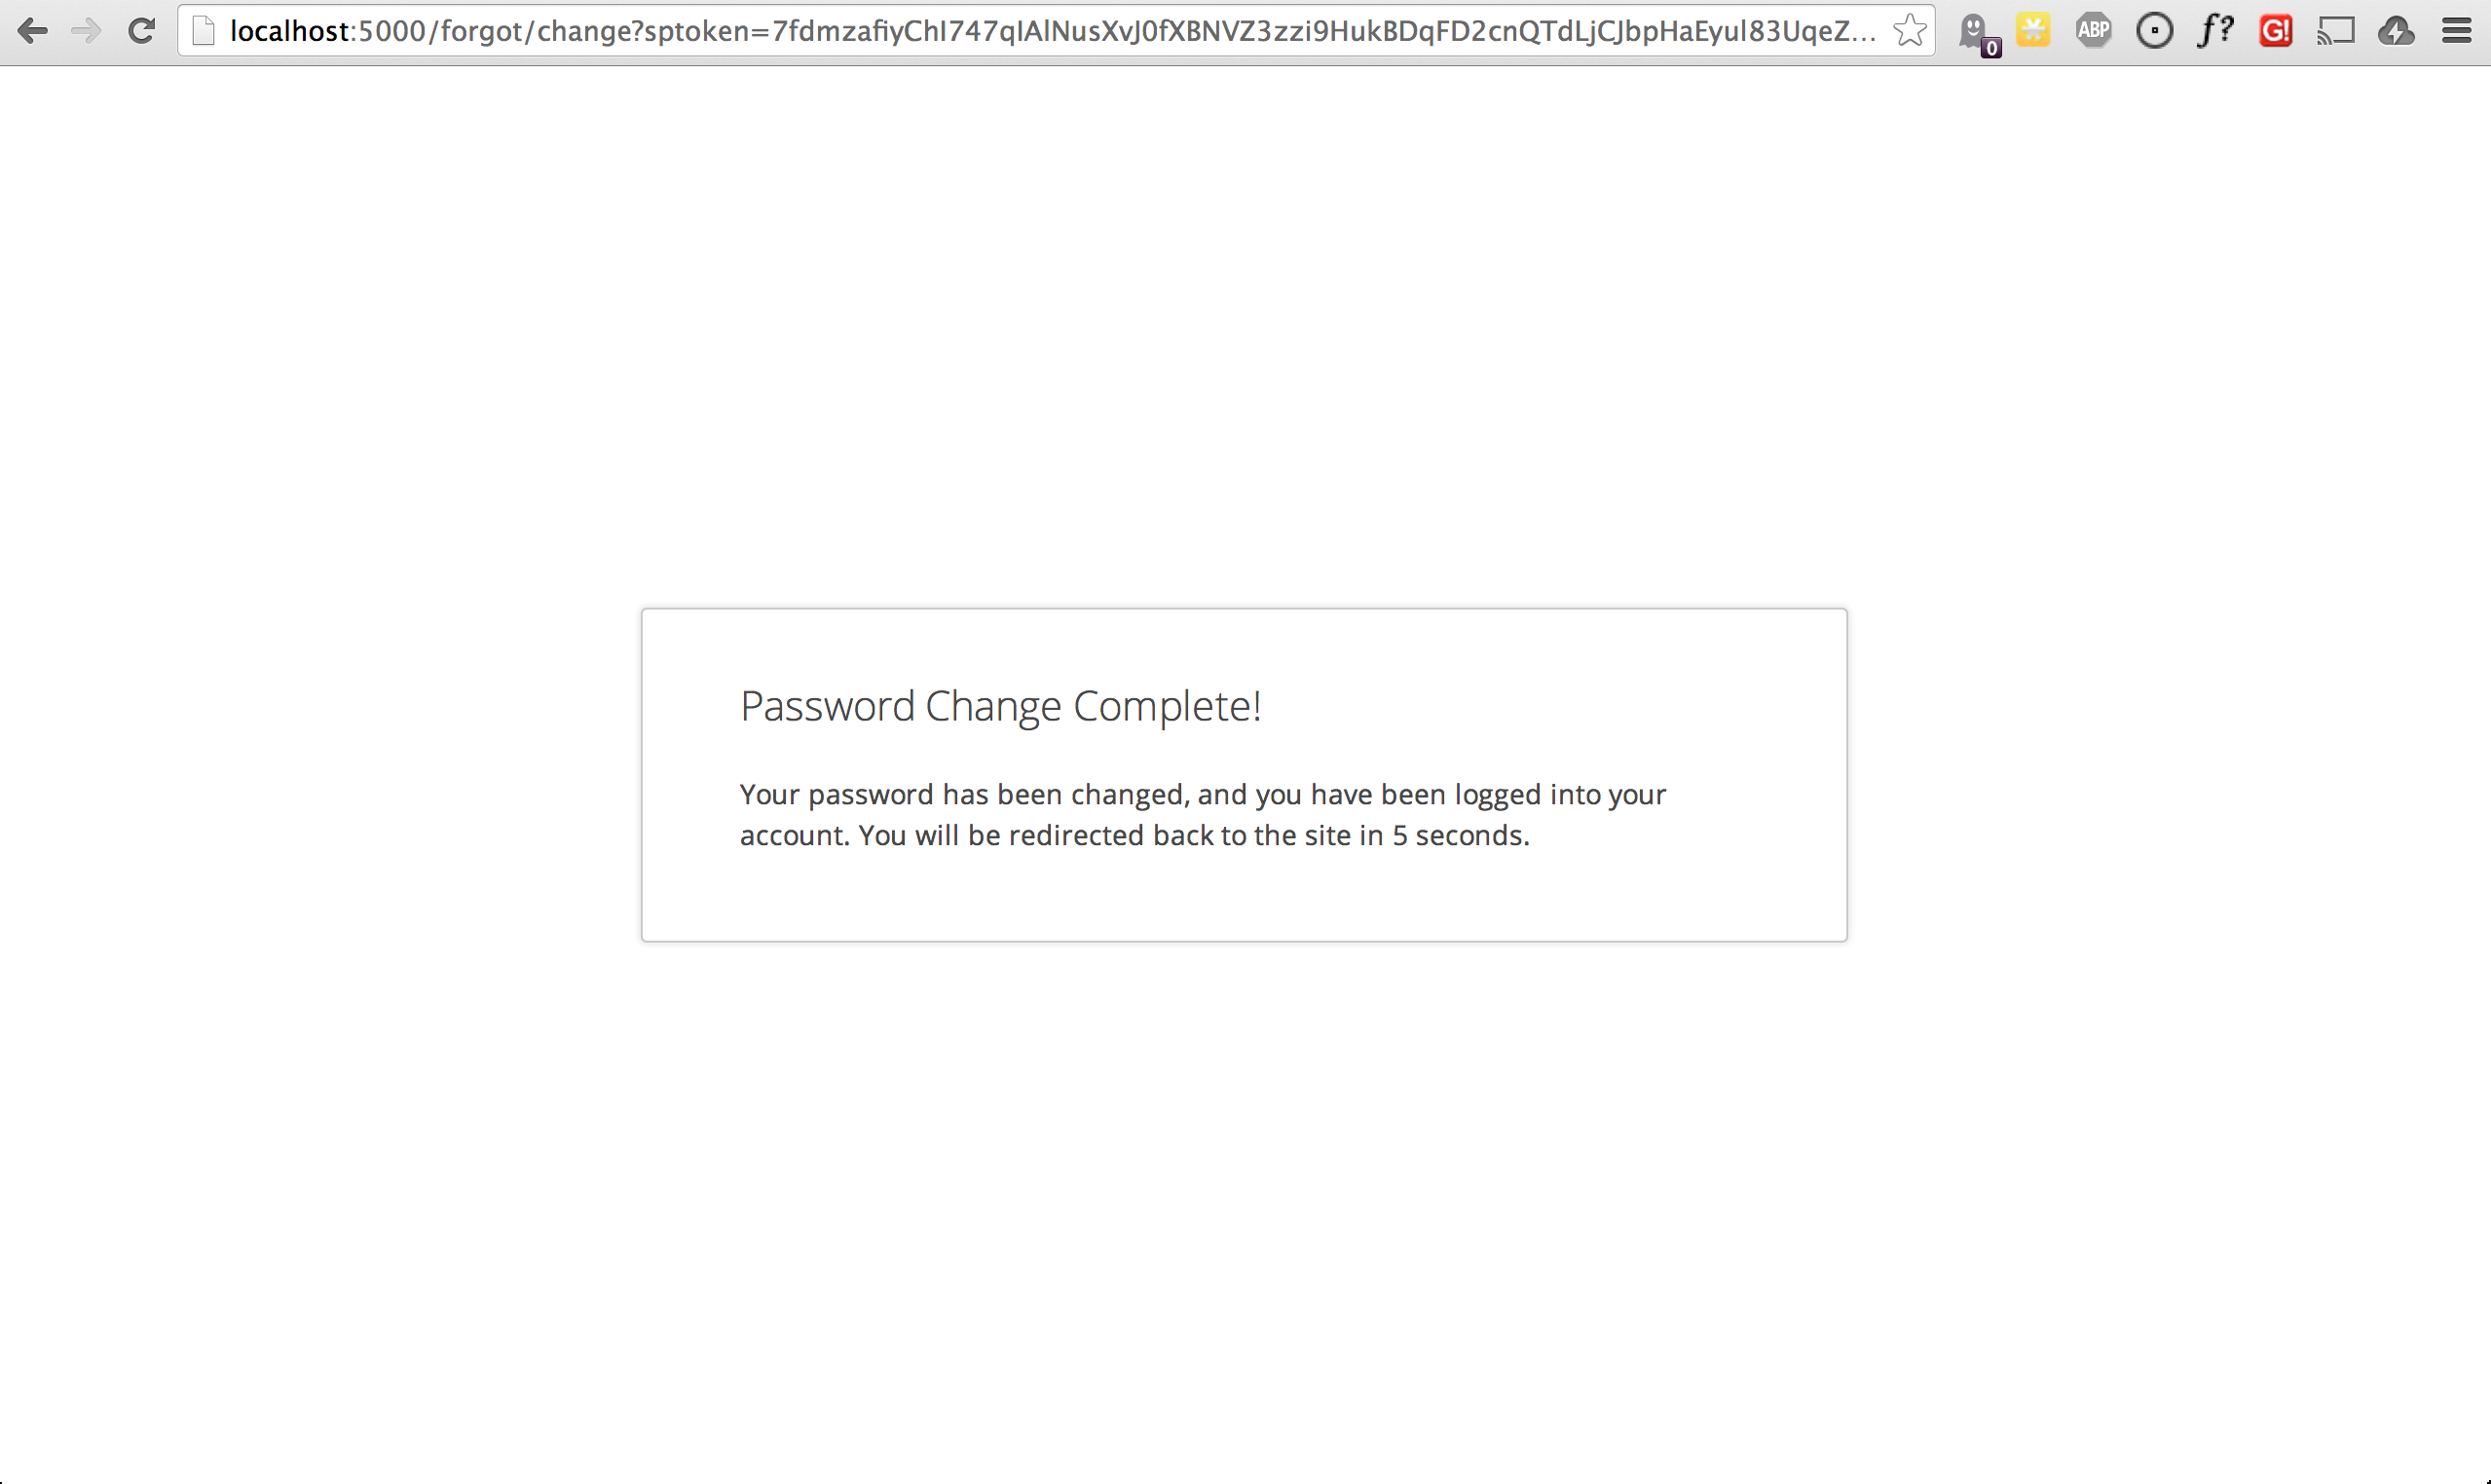
Not bad, right?
Customization
Much like all other Flask-Stormpath features, the password reset feature is completely customizable.
You can easily change the password reset templates by modifying the following configuration variables, respectively:
STORMPATH_FORGOT_PASSWORD_TEMPLATE- The template which is shown when a user clicks the “Forgot Password?” link on the login page.STORMPATH_FORGOT_PASSWORD_EMAIL_SENT_TEMPLATE- The template which is shown after a user has successfully requested a password reset.STORMPATH_FORGOT_PASSWORD_CHANGE_TEMPLATE- The template which is shown to a user after they’ve clicked the link in their email. This template allows the user to change their password.STORMPATH_FORGOT_PASSWORD_COMPLETE_TEMPLATE- The template which is shown after the user has successfully reset their account password.
If you’d like to override the default templates, you should take a look at the ones included with Flask-Stormpath here: https://github.com/stormpath/stormpath-flask/tree/master/flask_stormpath/templates/flask_stormpath and use these as a base for your own templates.
Use Facebook Login
Now that we’ve covered the basics: let’s add Facebook Login support to your app! Stormpath makes it very easy to support social login with Facebook.
In the next few minutes I’ll walk you through everything you need to know to support Facebook login with your app.
Create a Facebook App
The first thing you need to do is log into the Facebook Developer Site and create a new Facebook App.
You can do this by visiting the Facebook Developer Site and click the “Apps” menu at the top of the screen, then select the “Create a New App” button. You should see something like the following:
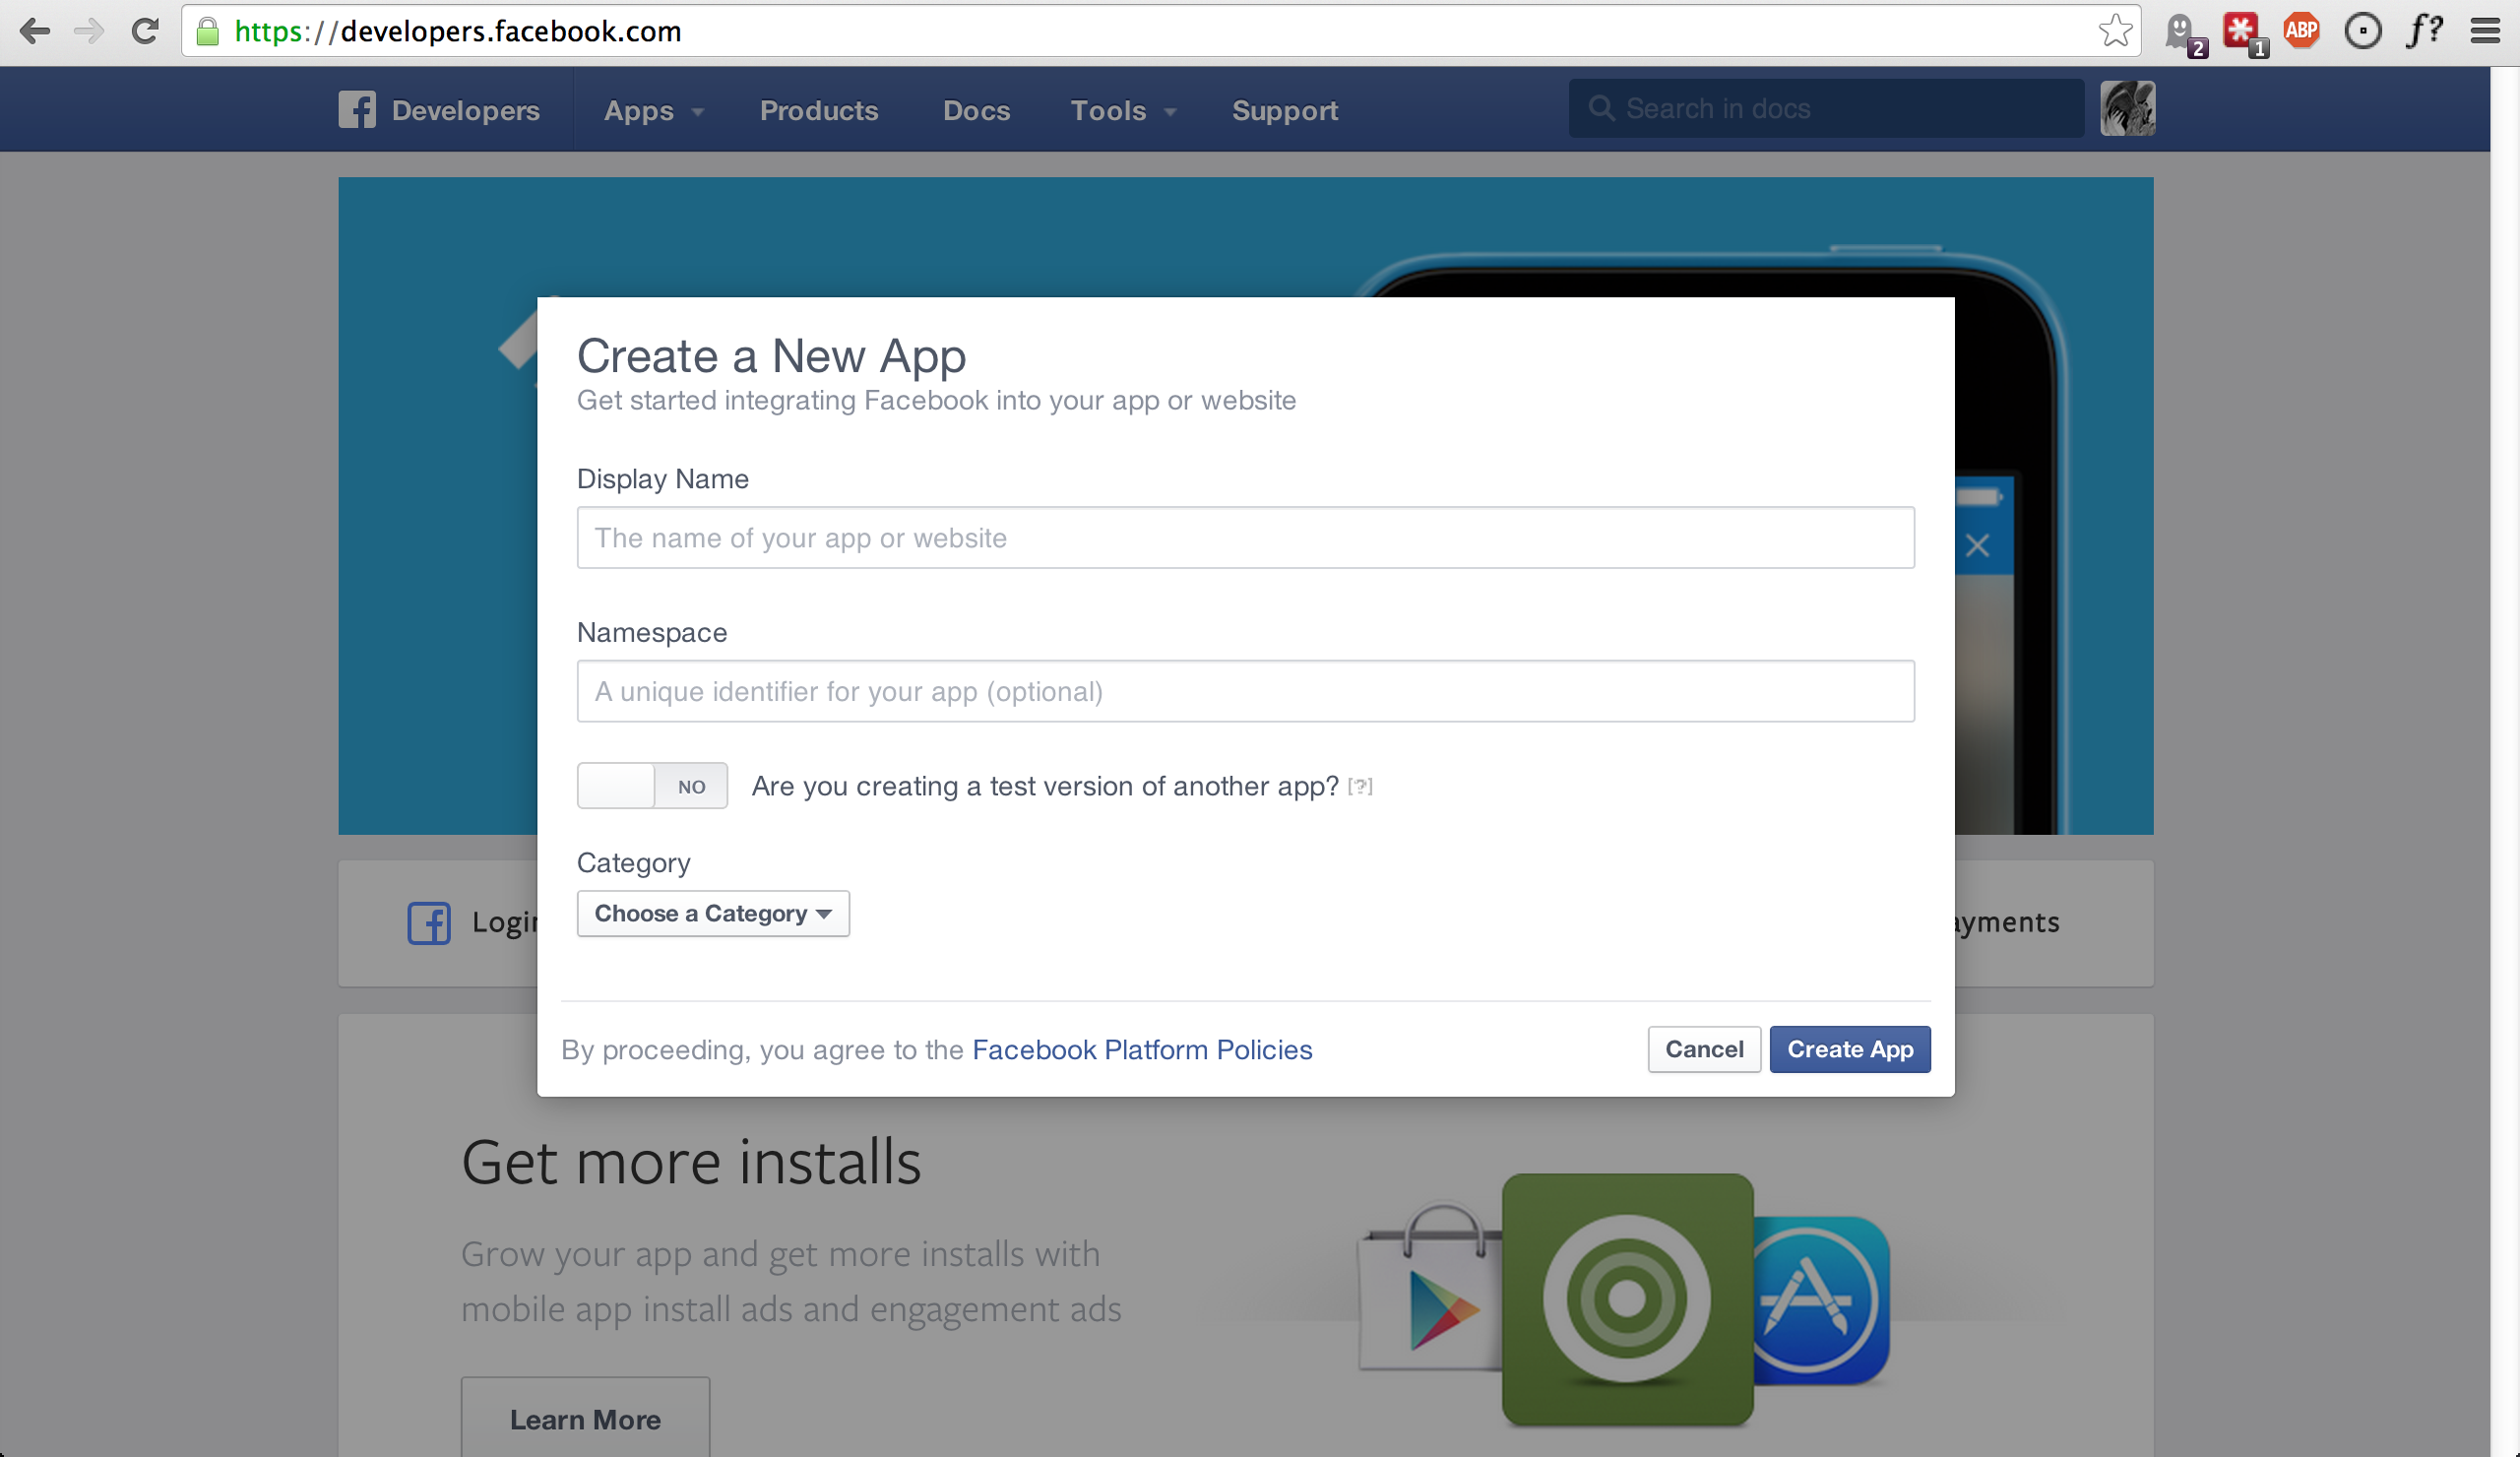
Go ahead and pick a “Display Name” (usually the name of your app), and choose a category for your app. Once you’ve done this, click the “Create App” button.
Specify Allowed URLs
The next thing we need to do is tell Facebook what URLs we’ll be using Facebook Login from.
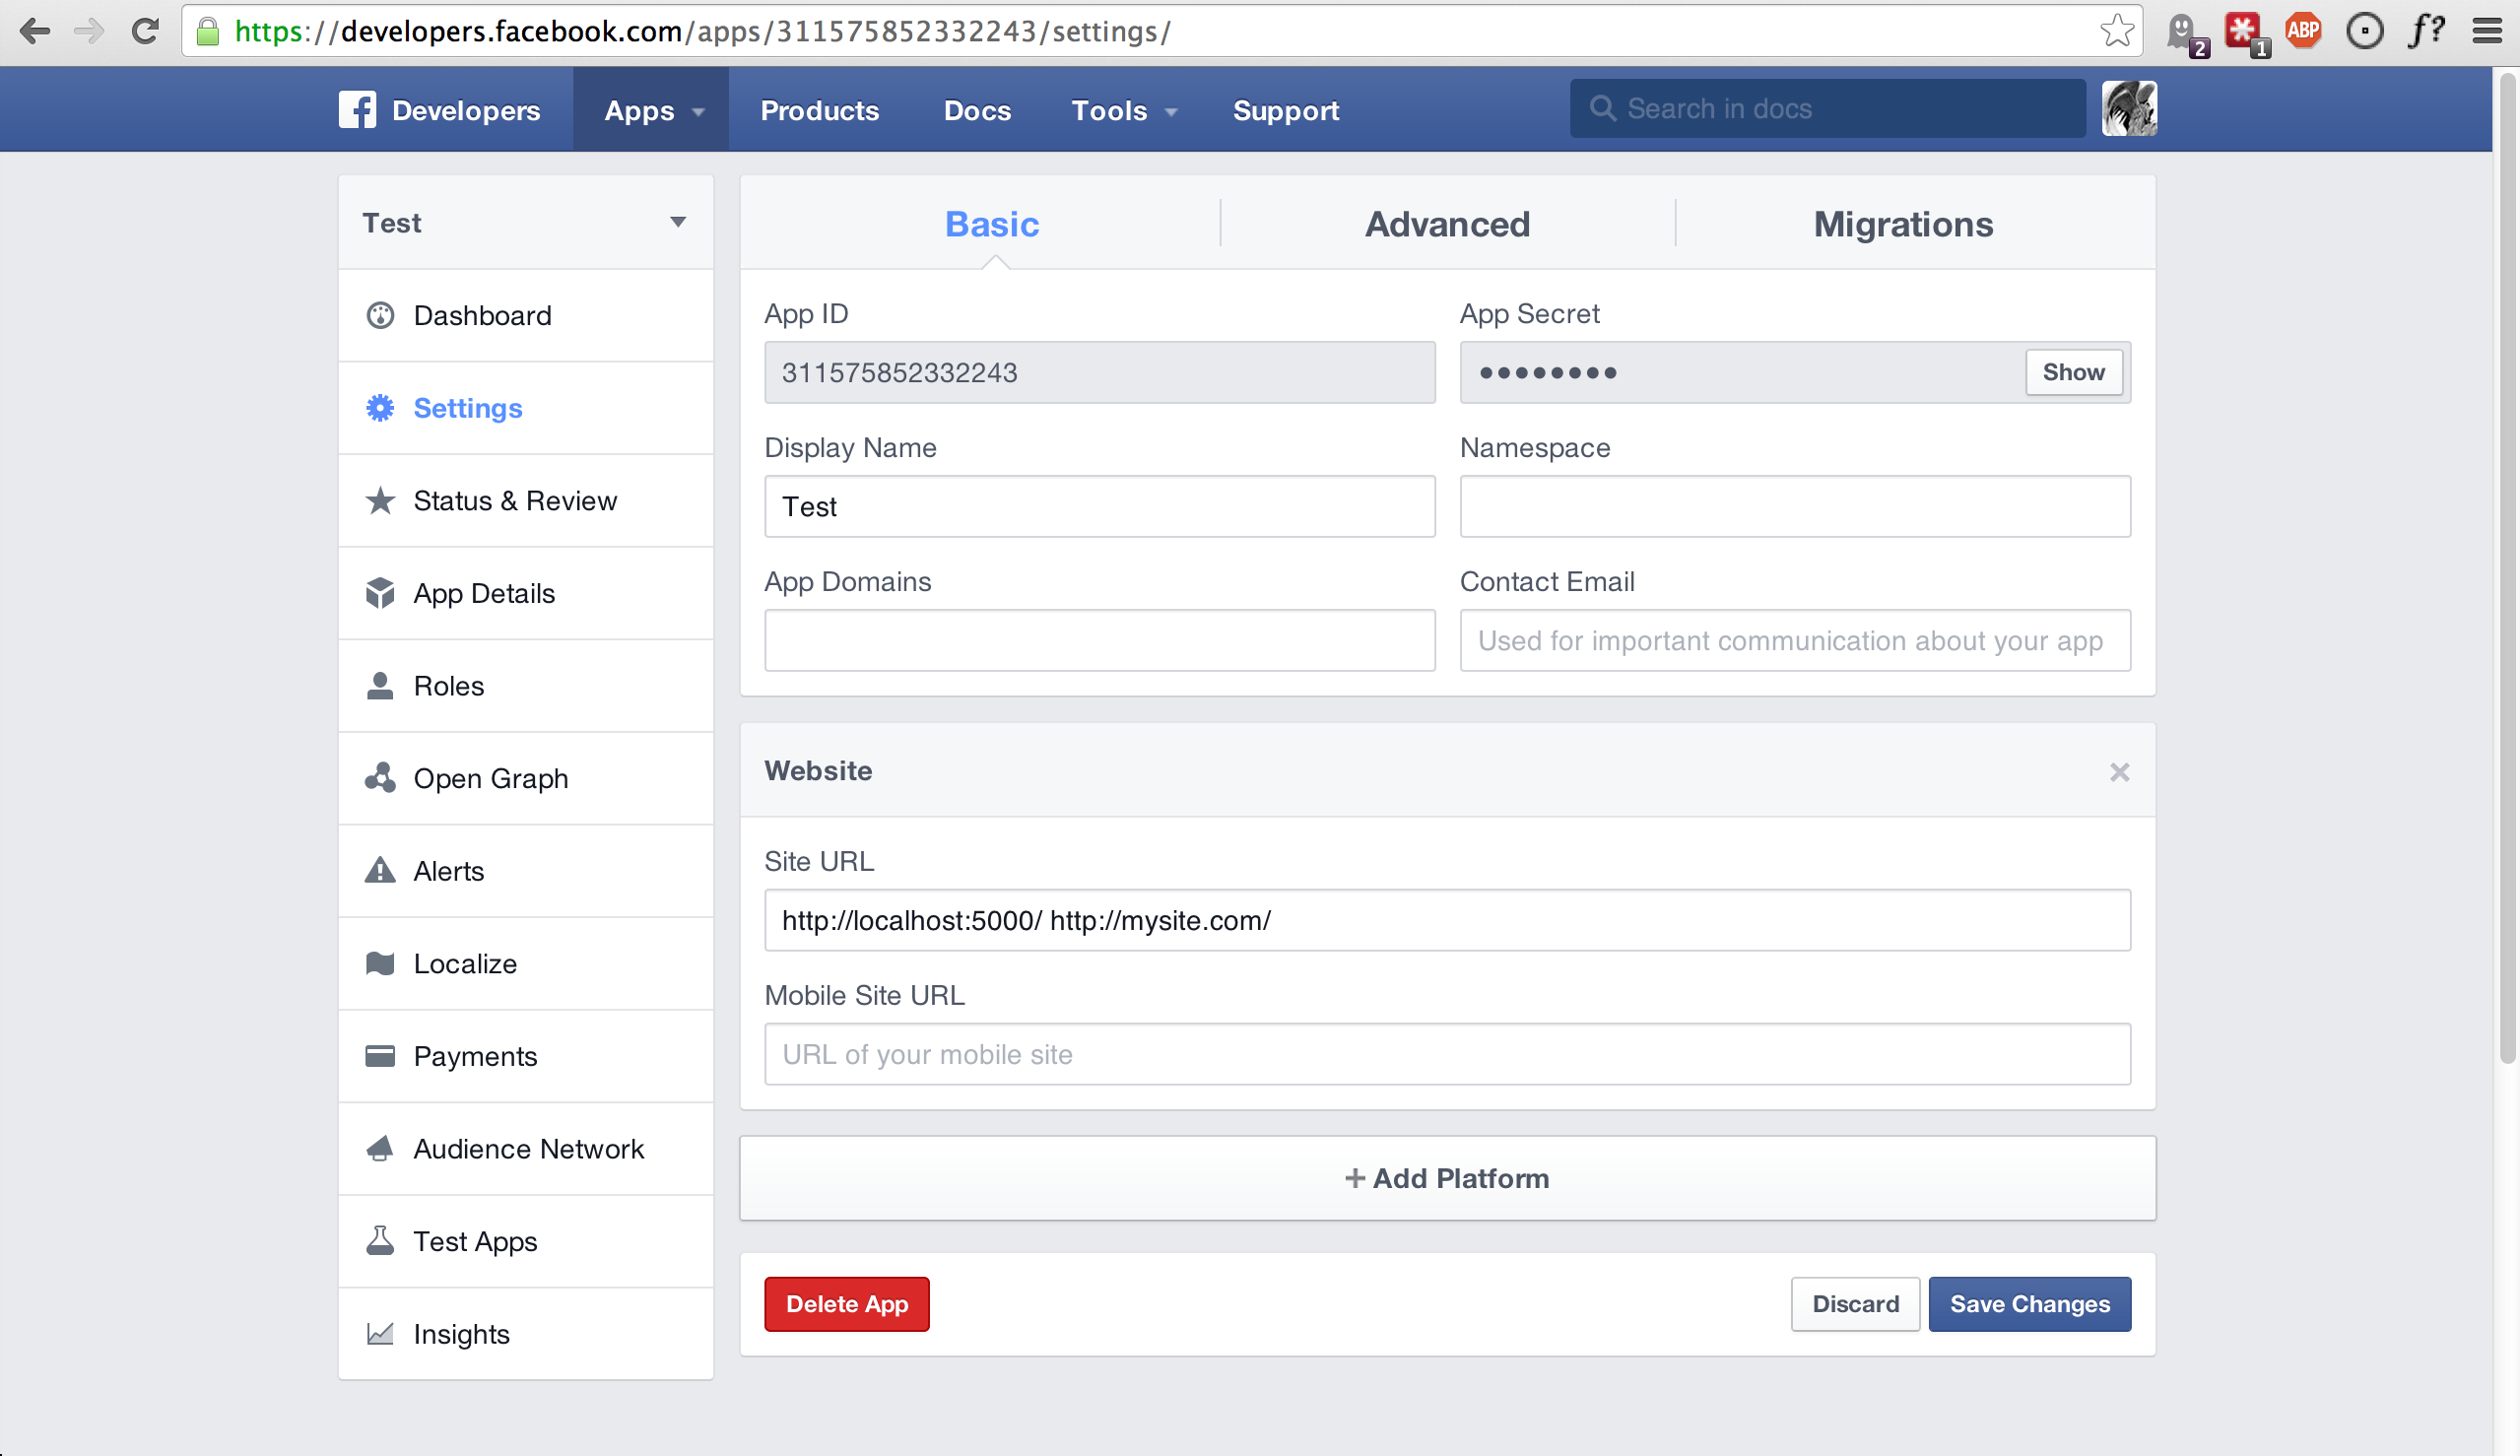
From the app dashboard page you’re on, click the “Settings” tab in the left menu, then click the “Add Platform” button near the bottom of the page. When prompted, select “Website” as your platform type.
In the “Site URL” box, enter your private and public root URLs. This should be
something like "http://localhost:5000" or "http://mysite.com". If you
want to allow Facebook Login from multiple URLs (local development, production,
etc.) you can just click the “Add Platform” button again and enter another URL.
Lastly, click the “Save Changes” button to save the changes.
Your settings should now look something like this:
Configure Your Flask App
Now that we’ve created a new Facebook App and configured our URLs – we need to enter our Facebook App secrets into our Flask app so that Flask-Stormpath knows about them.
You can find your Facebook App ID and Secret on your App dashboard page, at the top of the screen.
In your app’s config, you’ll want to add the following settings (don’t forget to substitute in the proper credentials!):
from os import environ

app.config['STORMPATH_ENABLE_FACEBOOK'] = True
app.config['STORMPATH_SOCIAL'] = {
    'FACEBOOK': {
        'app_id': environ.get('FACEBOOK_APP_ID'),
        'app_secret': environ.get('FACEBOOK_APP_SECRET'),
    }
}
These two settings: STORMPATH_ENABLE_FACEBOOK and STORMPATH_SOCIAL work
together to tell Flask-Stormpath to enable social login support for Facebook, as
well as provide the proper credentials so things work as expected.
Note
We recommend storing your credentials in environment variables (as shown in the example above). Please don’t hard code secret credentials into your source code!
Test it Out
Now that you’ve plugged your Facebook credentials into Flask-Stormpath, social login should already be working!
Open your Flask app in a browser, and try logging in by visiting the login page
(/login). If you’re using the default login page included with this
library, you should see the following:
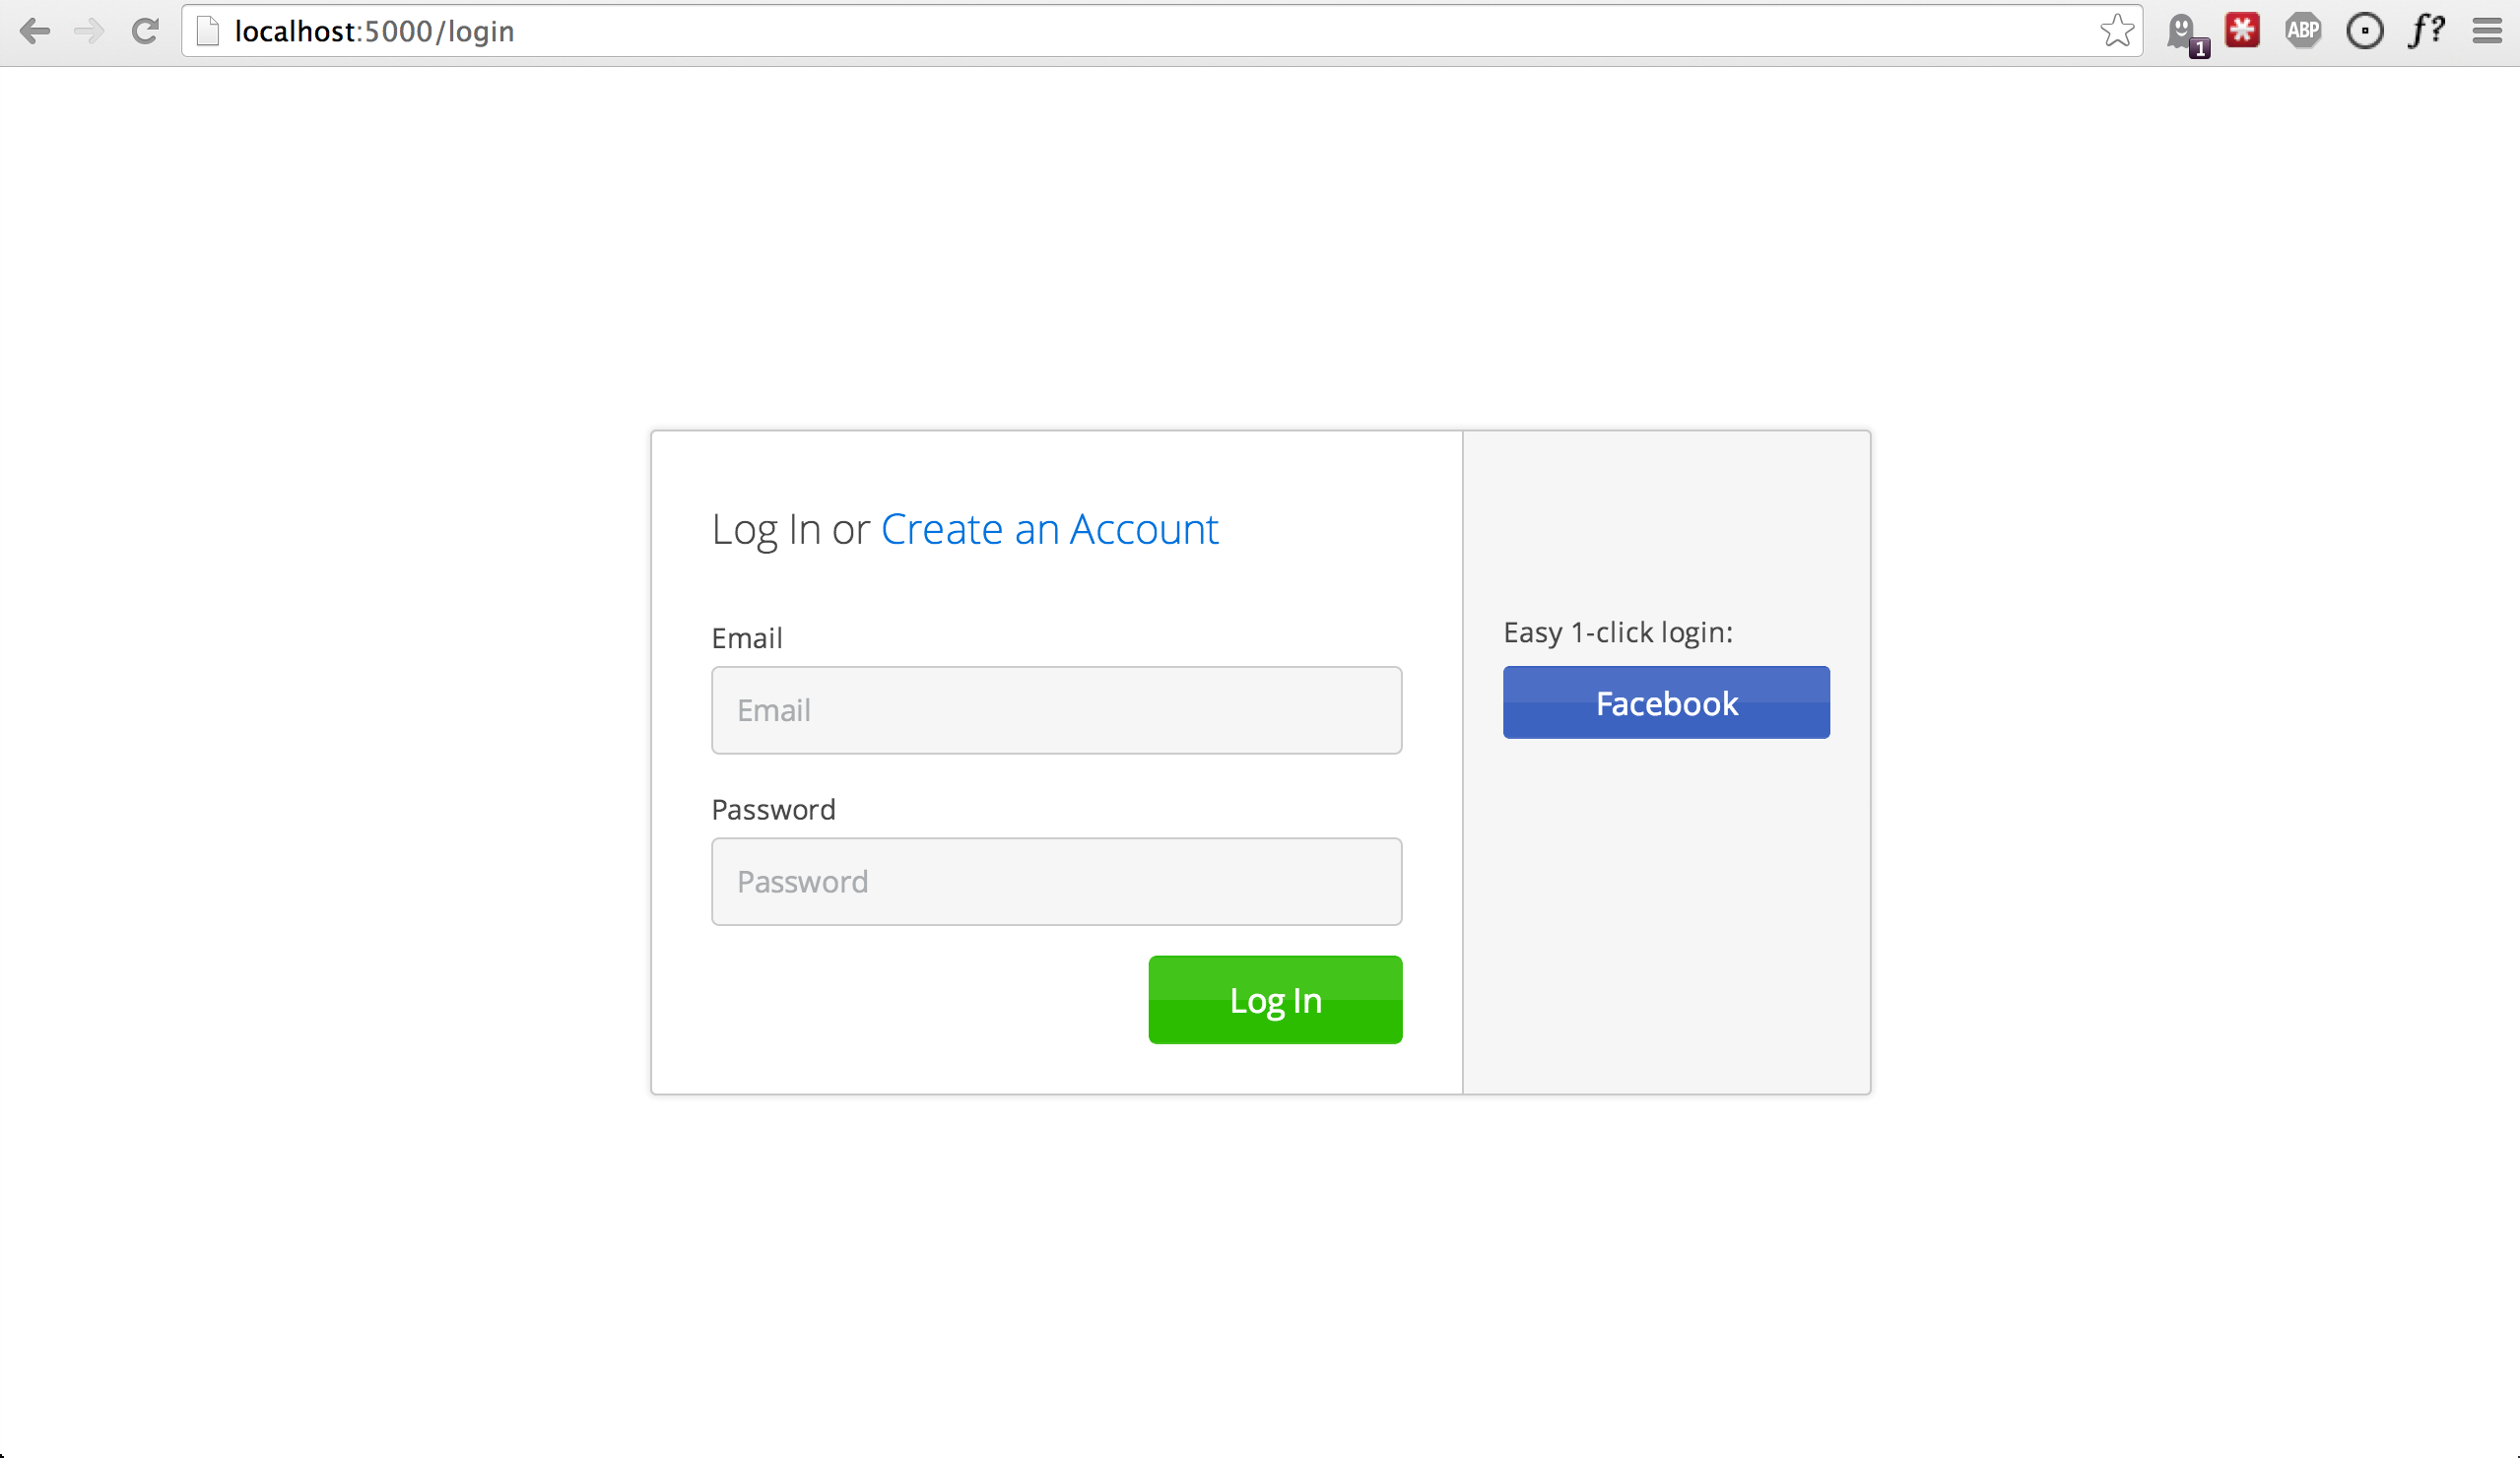
You now have a fancy new Facebook enabled login button! Try logging in! When you click the new Facebook button you’ll be redirected to Facebook, and prompted to accept the permissions requested:
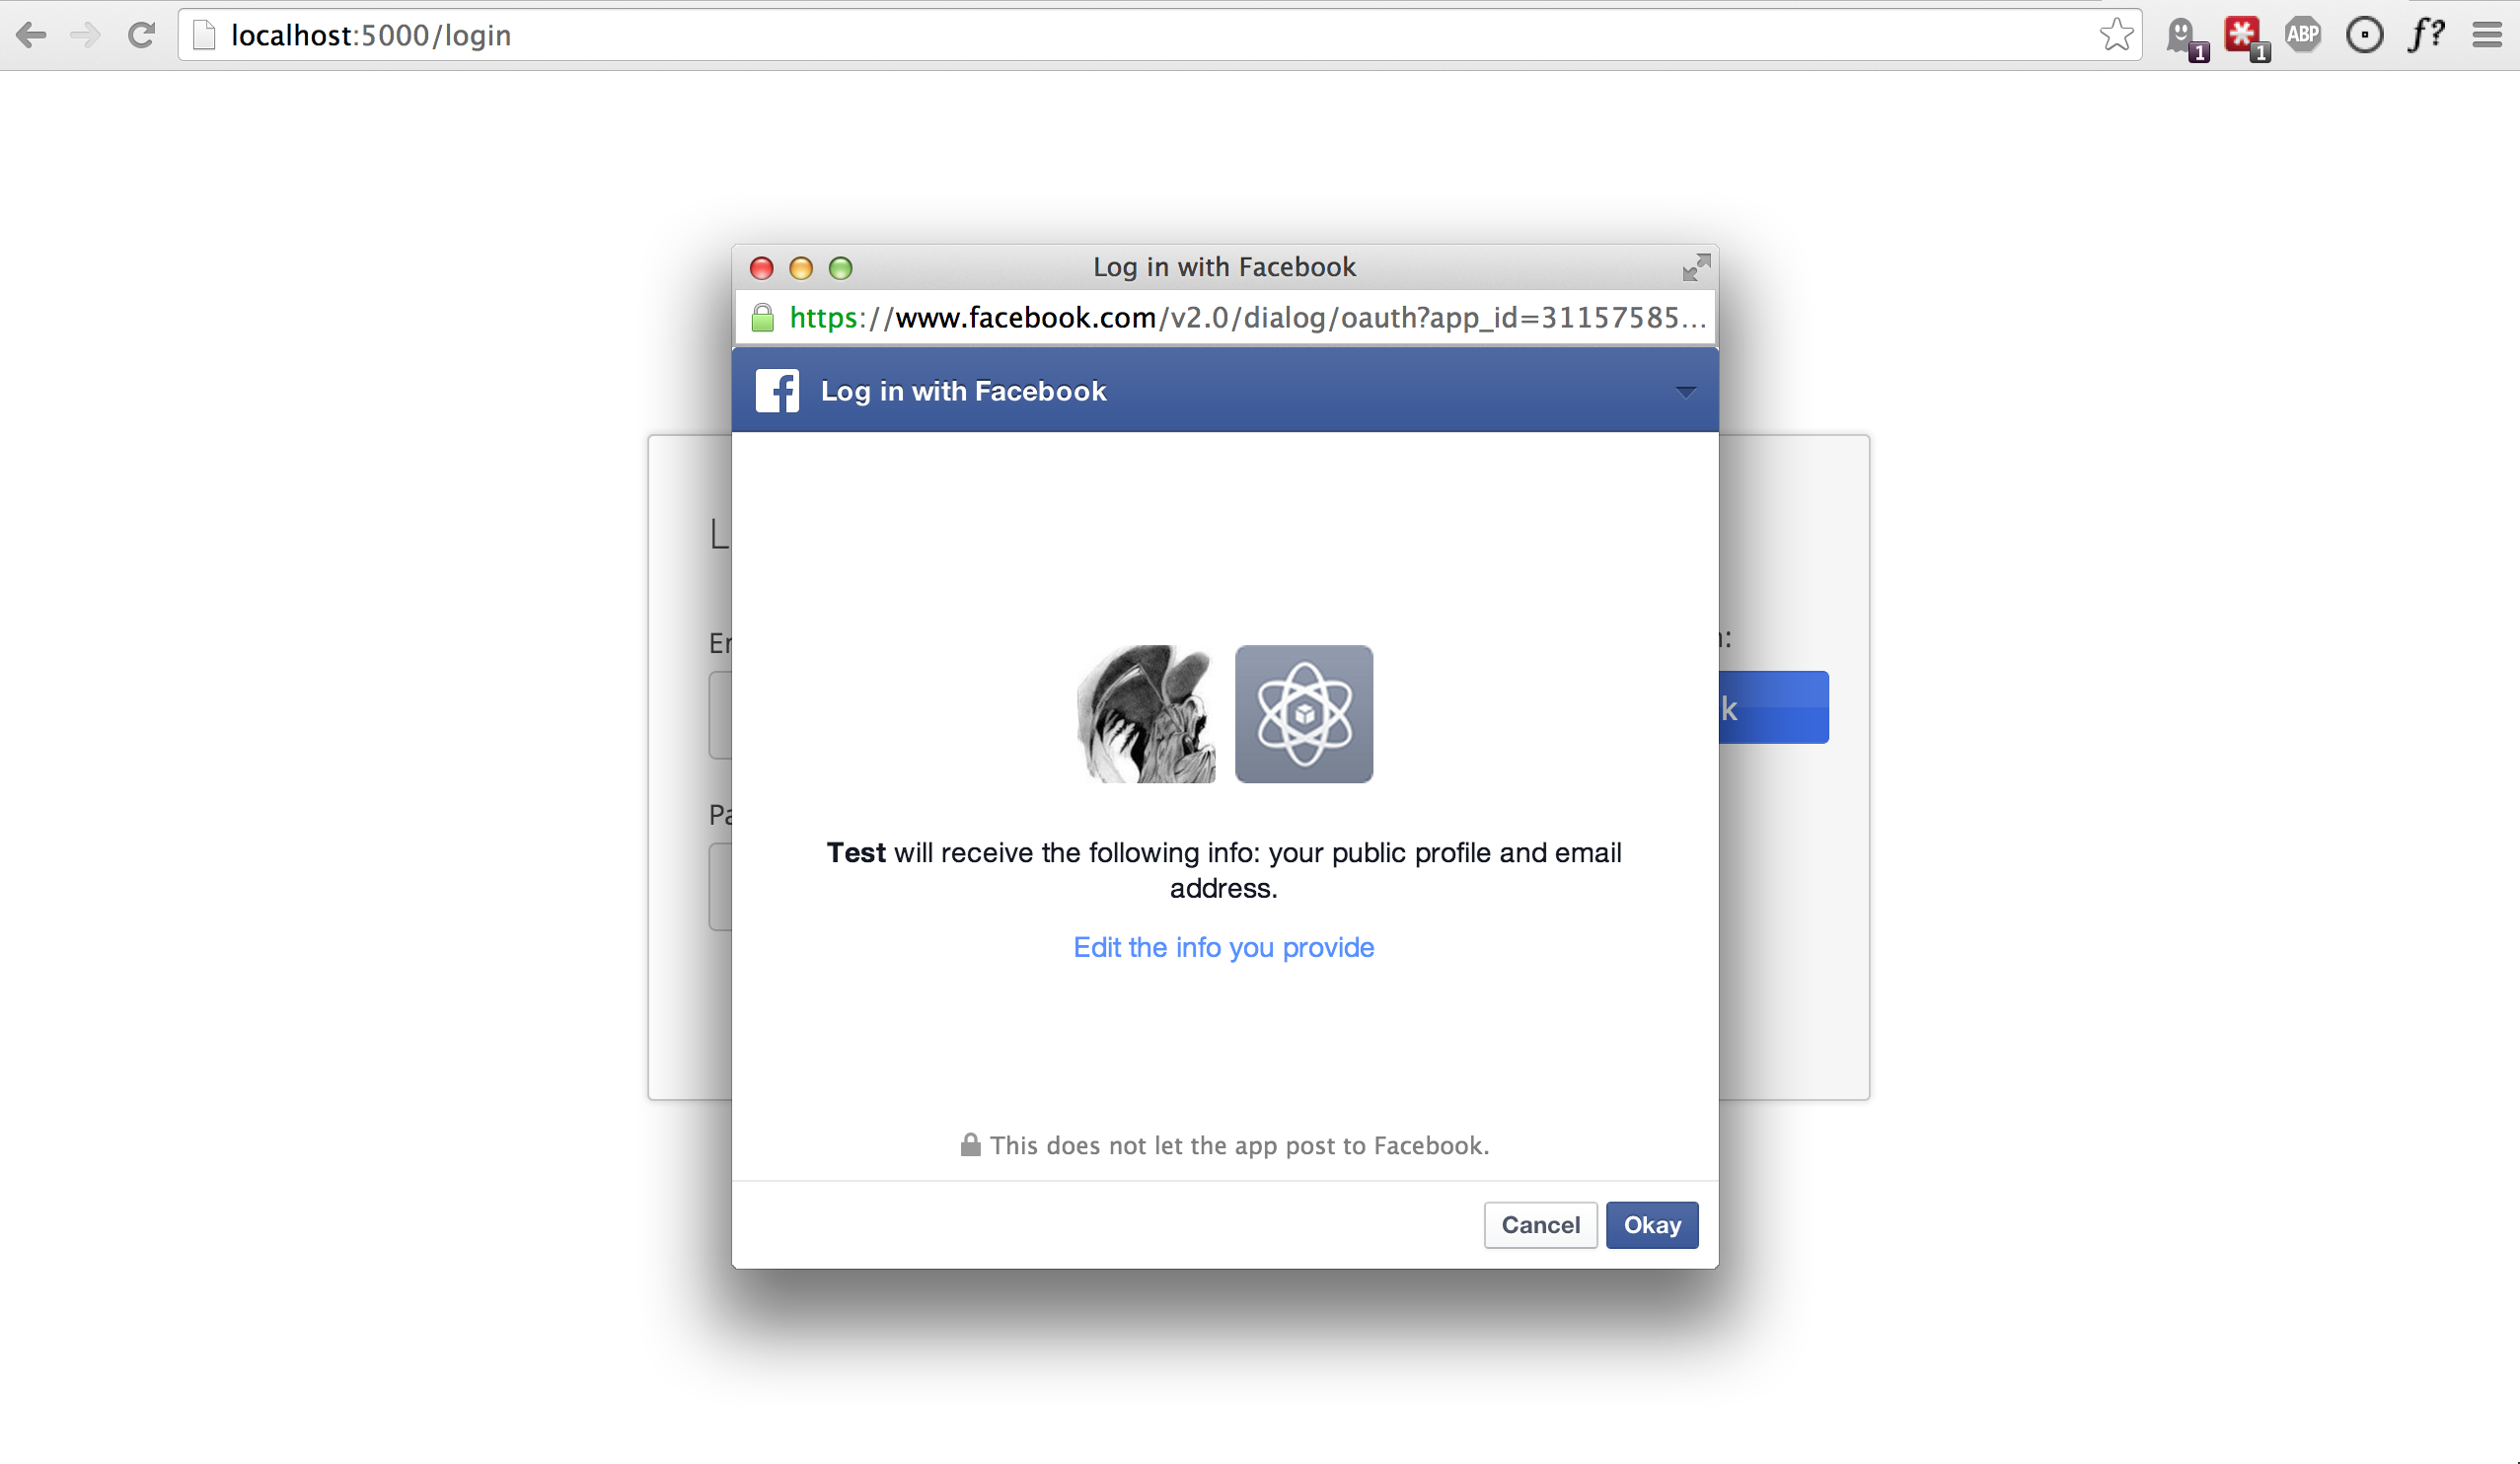
After accepting permissions, you’ll be immediately redirected back to your
website at the URL specified by STORMPATH_REDIRECT_URL in your app’s
settings.
Simple, right?!
Use Google Login
Google Login is incredibly popular – let’s enable it!
In the next few minutes I’ll walk you through everything you need to know to support Google login with your app.
Create a Google Project
The first thing you need to do is log into the Google Developer Console and create a new Google Project.
You can do this by visiting the Developer Console and clicking the “Create Project” button. You should see something like the following:
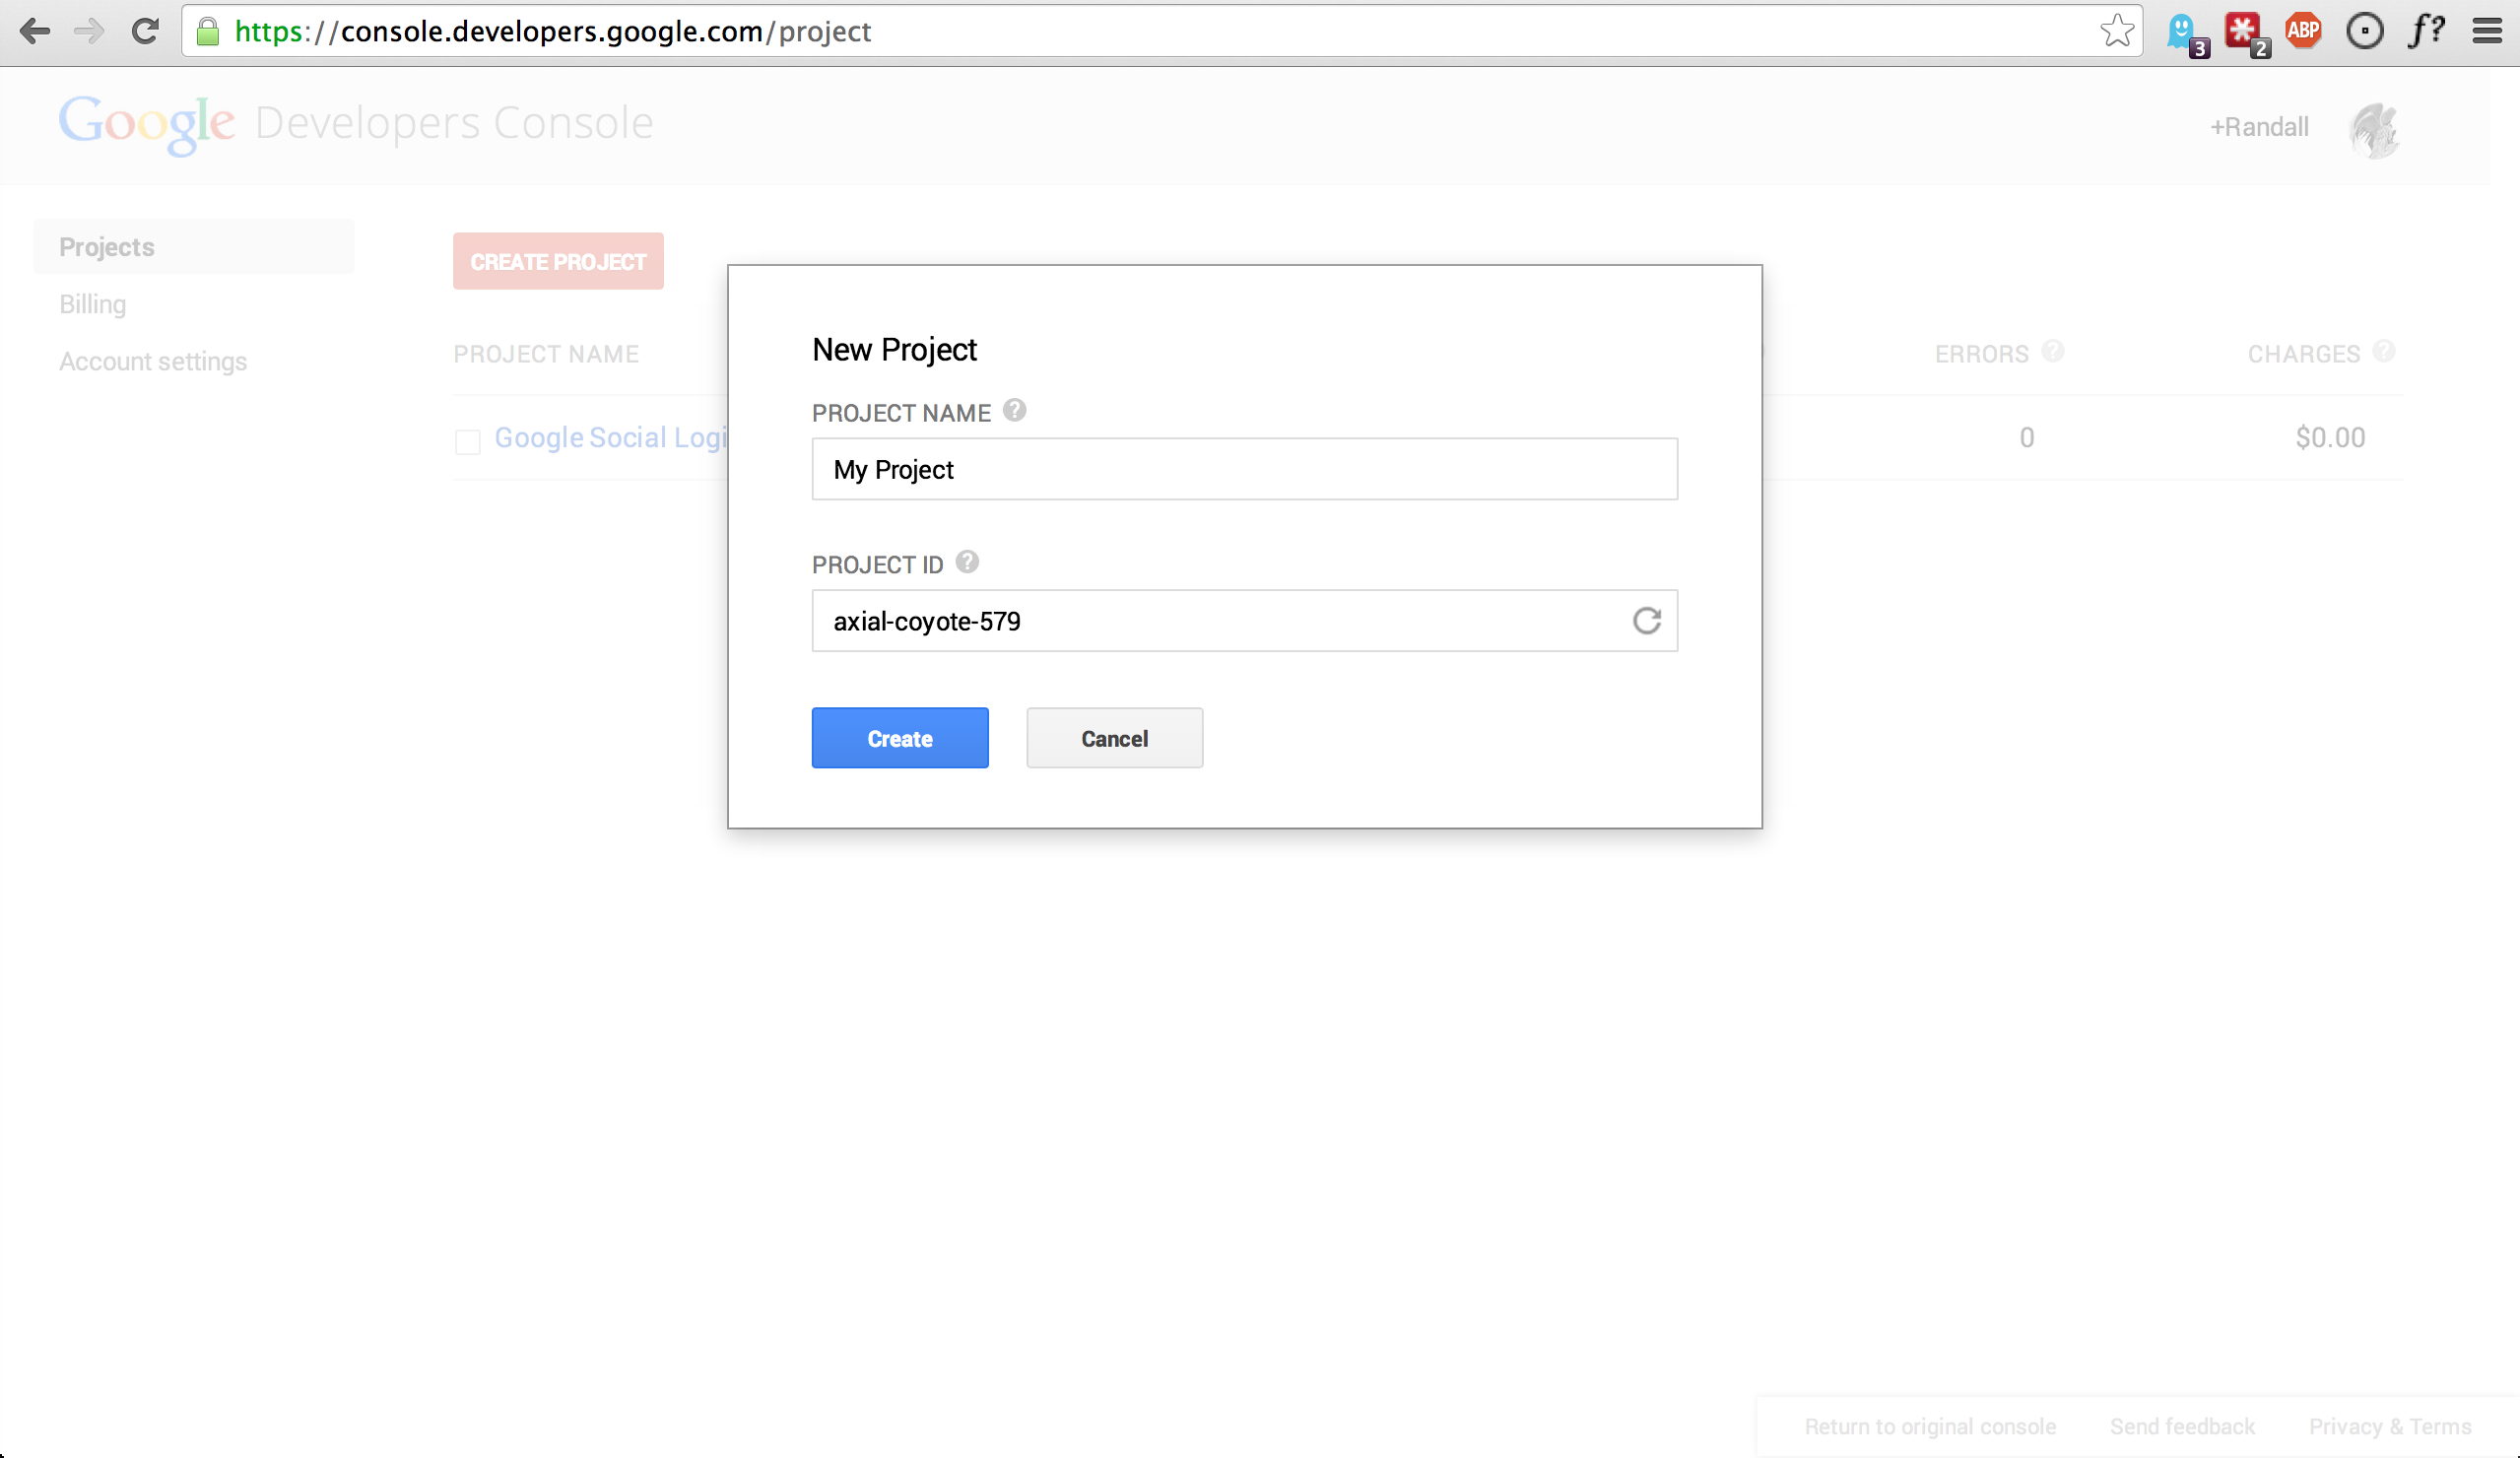
Go ahead and pick a “Project Name” (usually the name of your app), and (optionally) a “Project ID”.
Enable Google Login
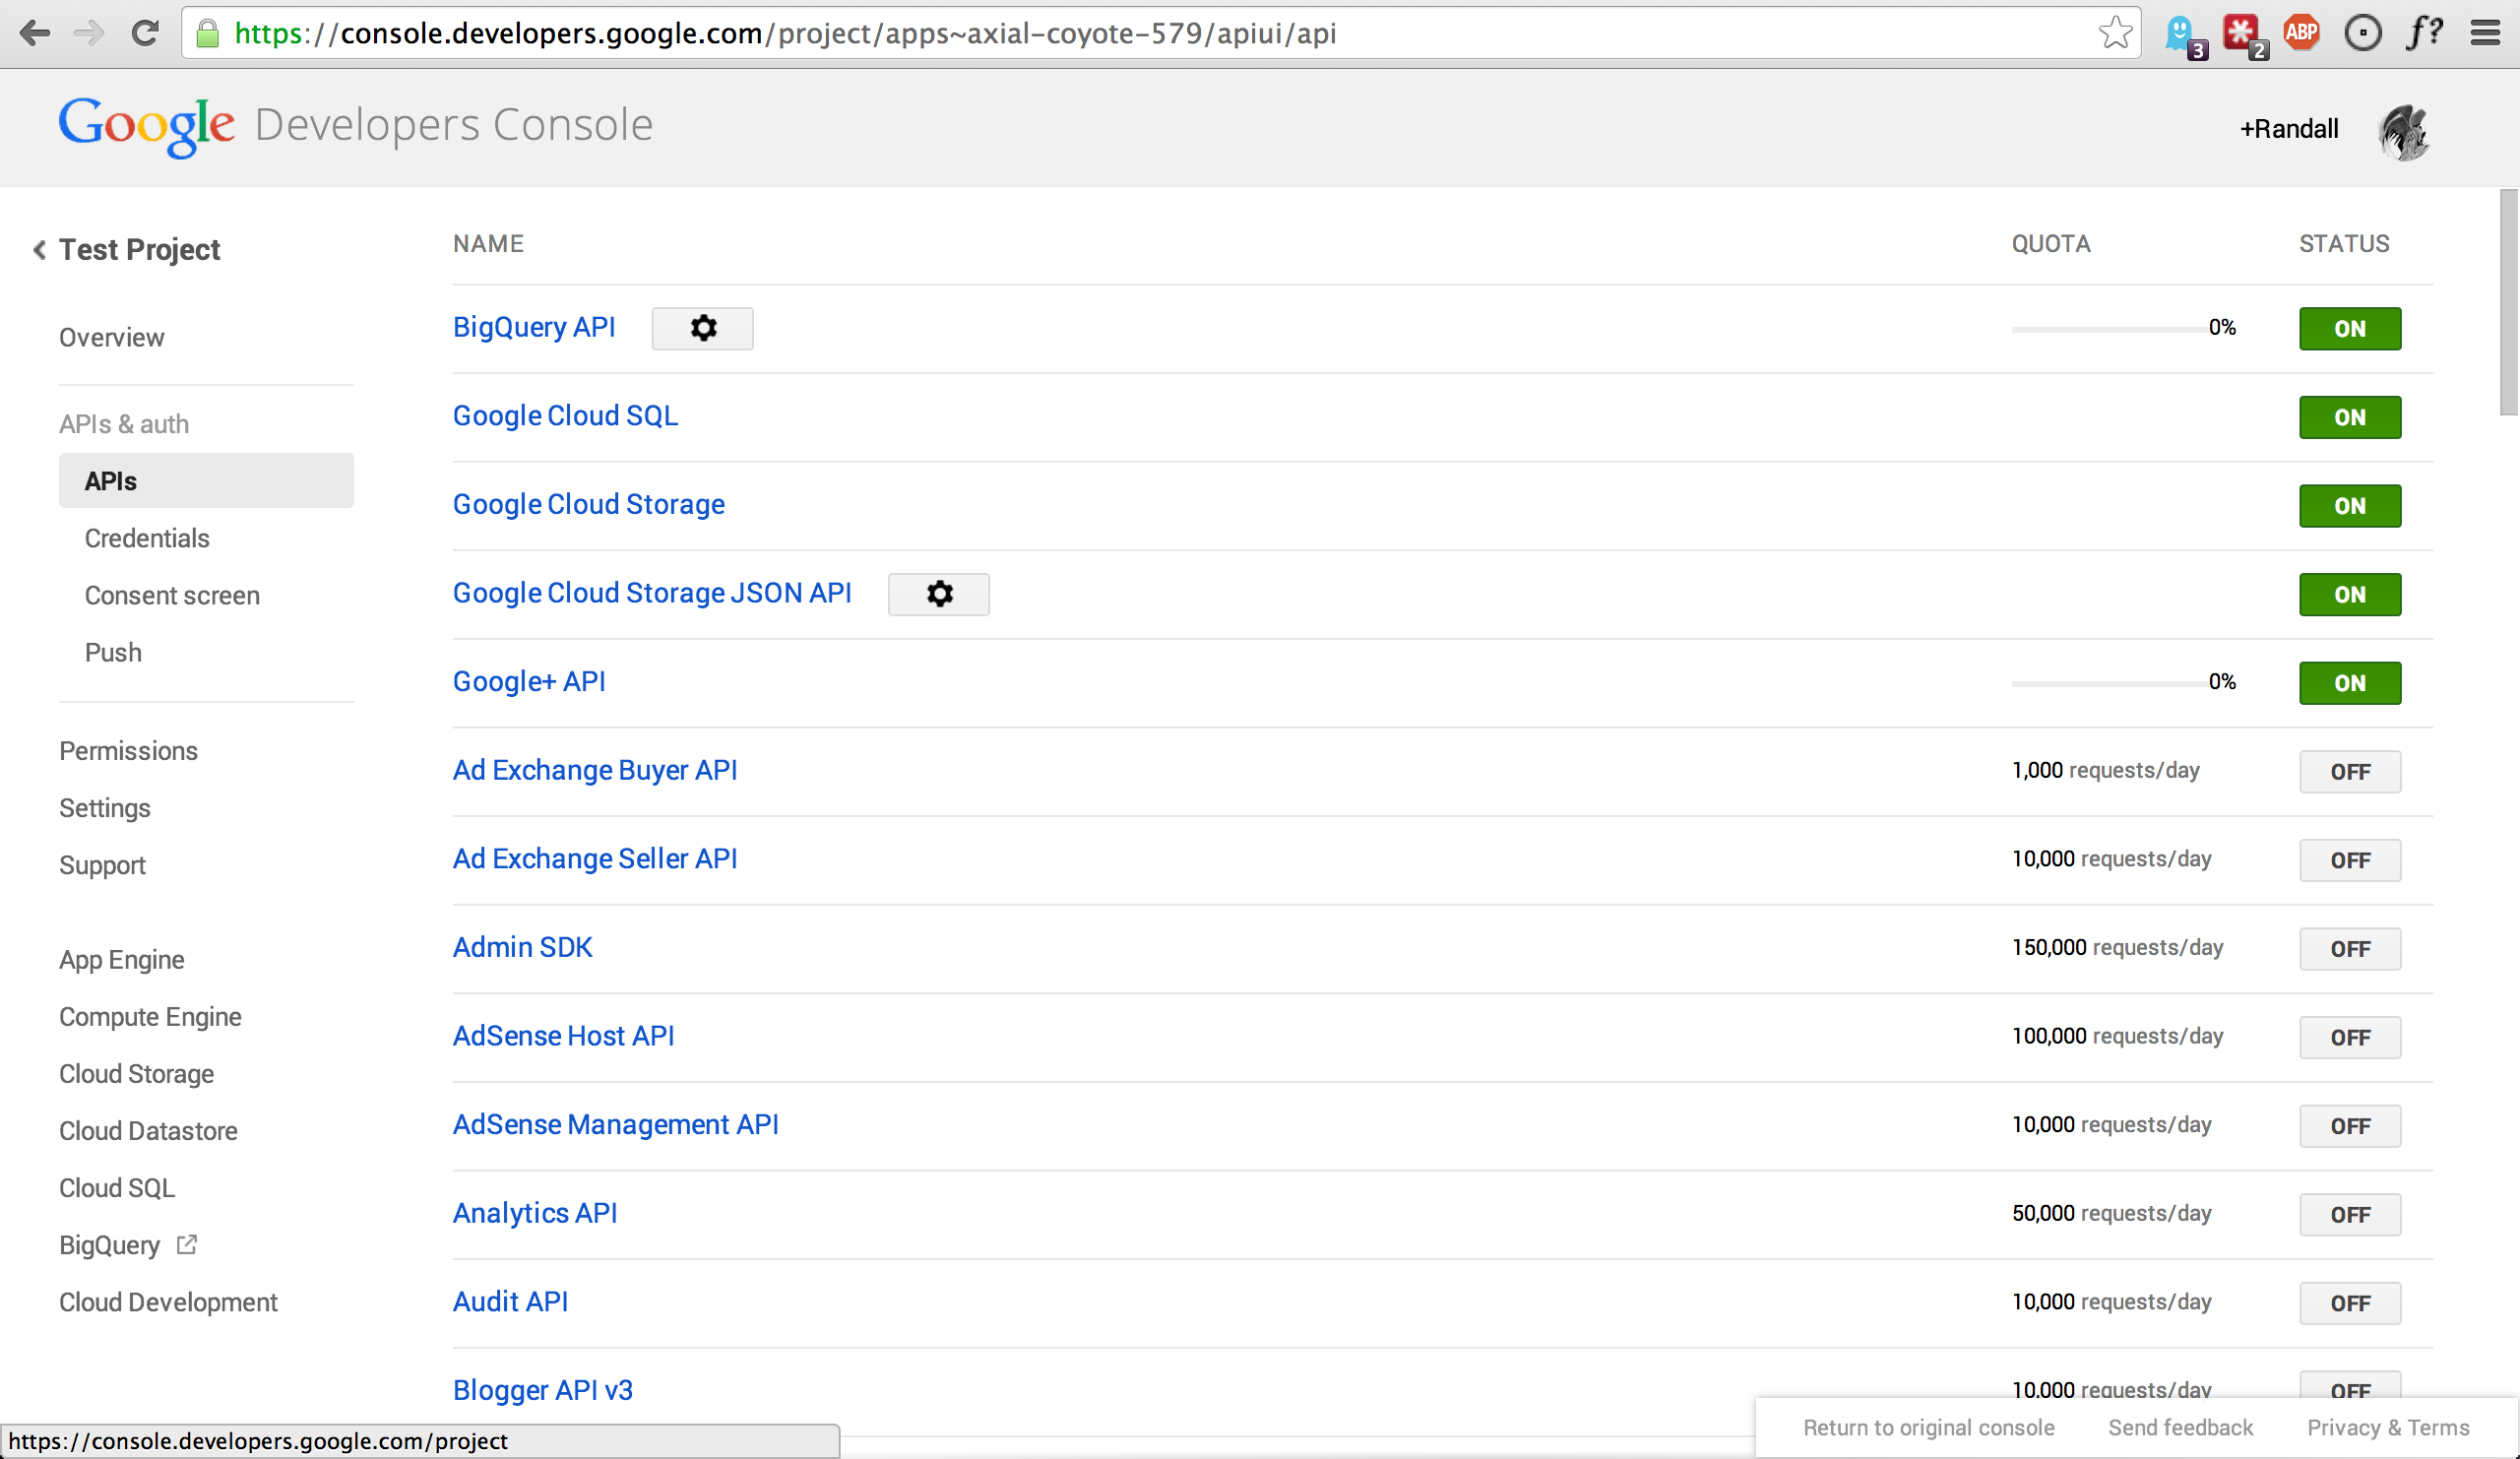
Now that you’ve got a Google Project – let’s enable Google Login. The way Google Projects work is that you have to selectively enable what functionality each Project needs.
From your Console Dashboard click on your new Project, then in the side panel click on the “APIs & auth” menu option.
Now, scroll through the API list until you see “Google+ API”, then click the “OFF” button next to it to enable it. You should now see the “Google+ API” as “ON” in your API list:
Create OAuth Credentials
The next thing we need to do is create a new OAuth client ID. This is what we’ll use to handle user login with Google.
From your Console Dashboard click the “APIs & auth” menu, then click on the “Credentials” sub-menu.
You should see a big red button labeled “Create New Client ID” near the top of the page – click that.
You’ll want to do several things here:
- Select “Web application” for your “Application Type”.
- Remove everything from the “Authorized Javascript Origins” box.
- Add the URL of your site (both publicly and locally) into the “Authorized
Redirect URI” box, with the
/googlesuffix. This tells Google where to redirect users after they’ve logged in with Google.
In the end, your settings should look like this:
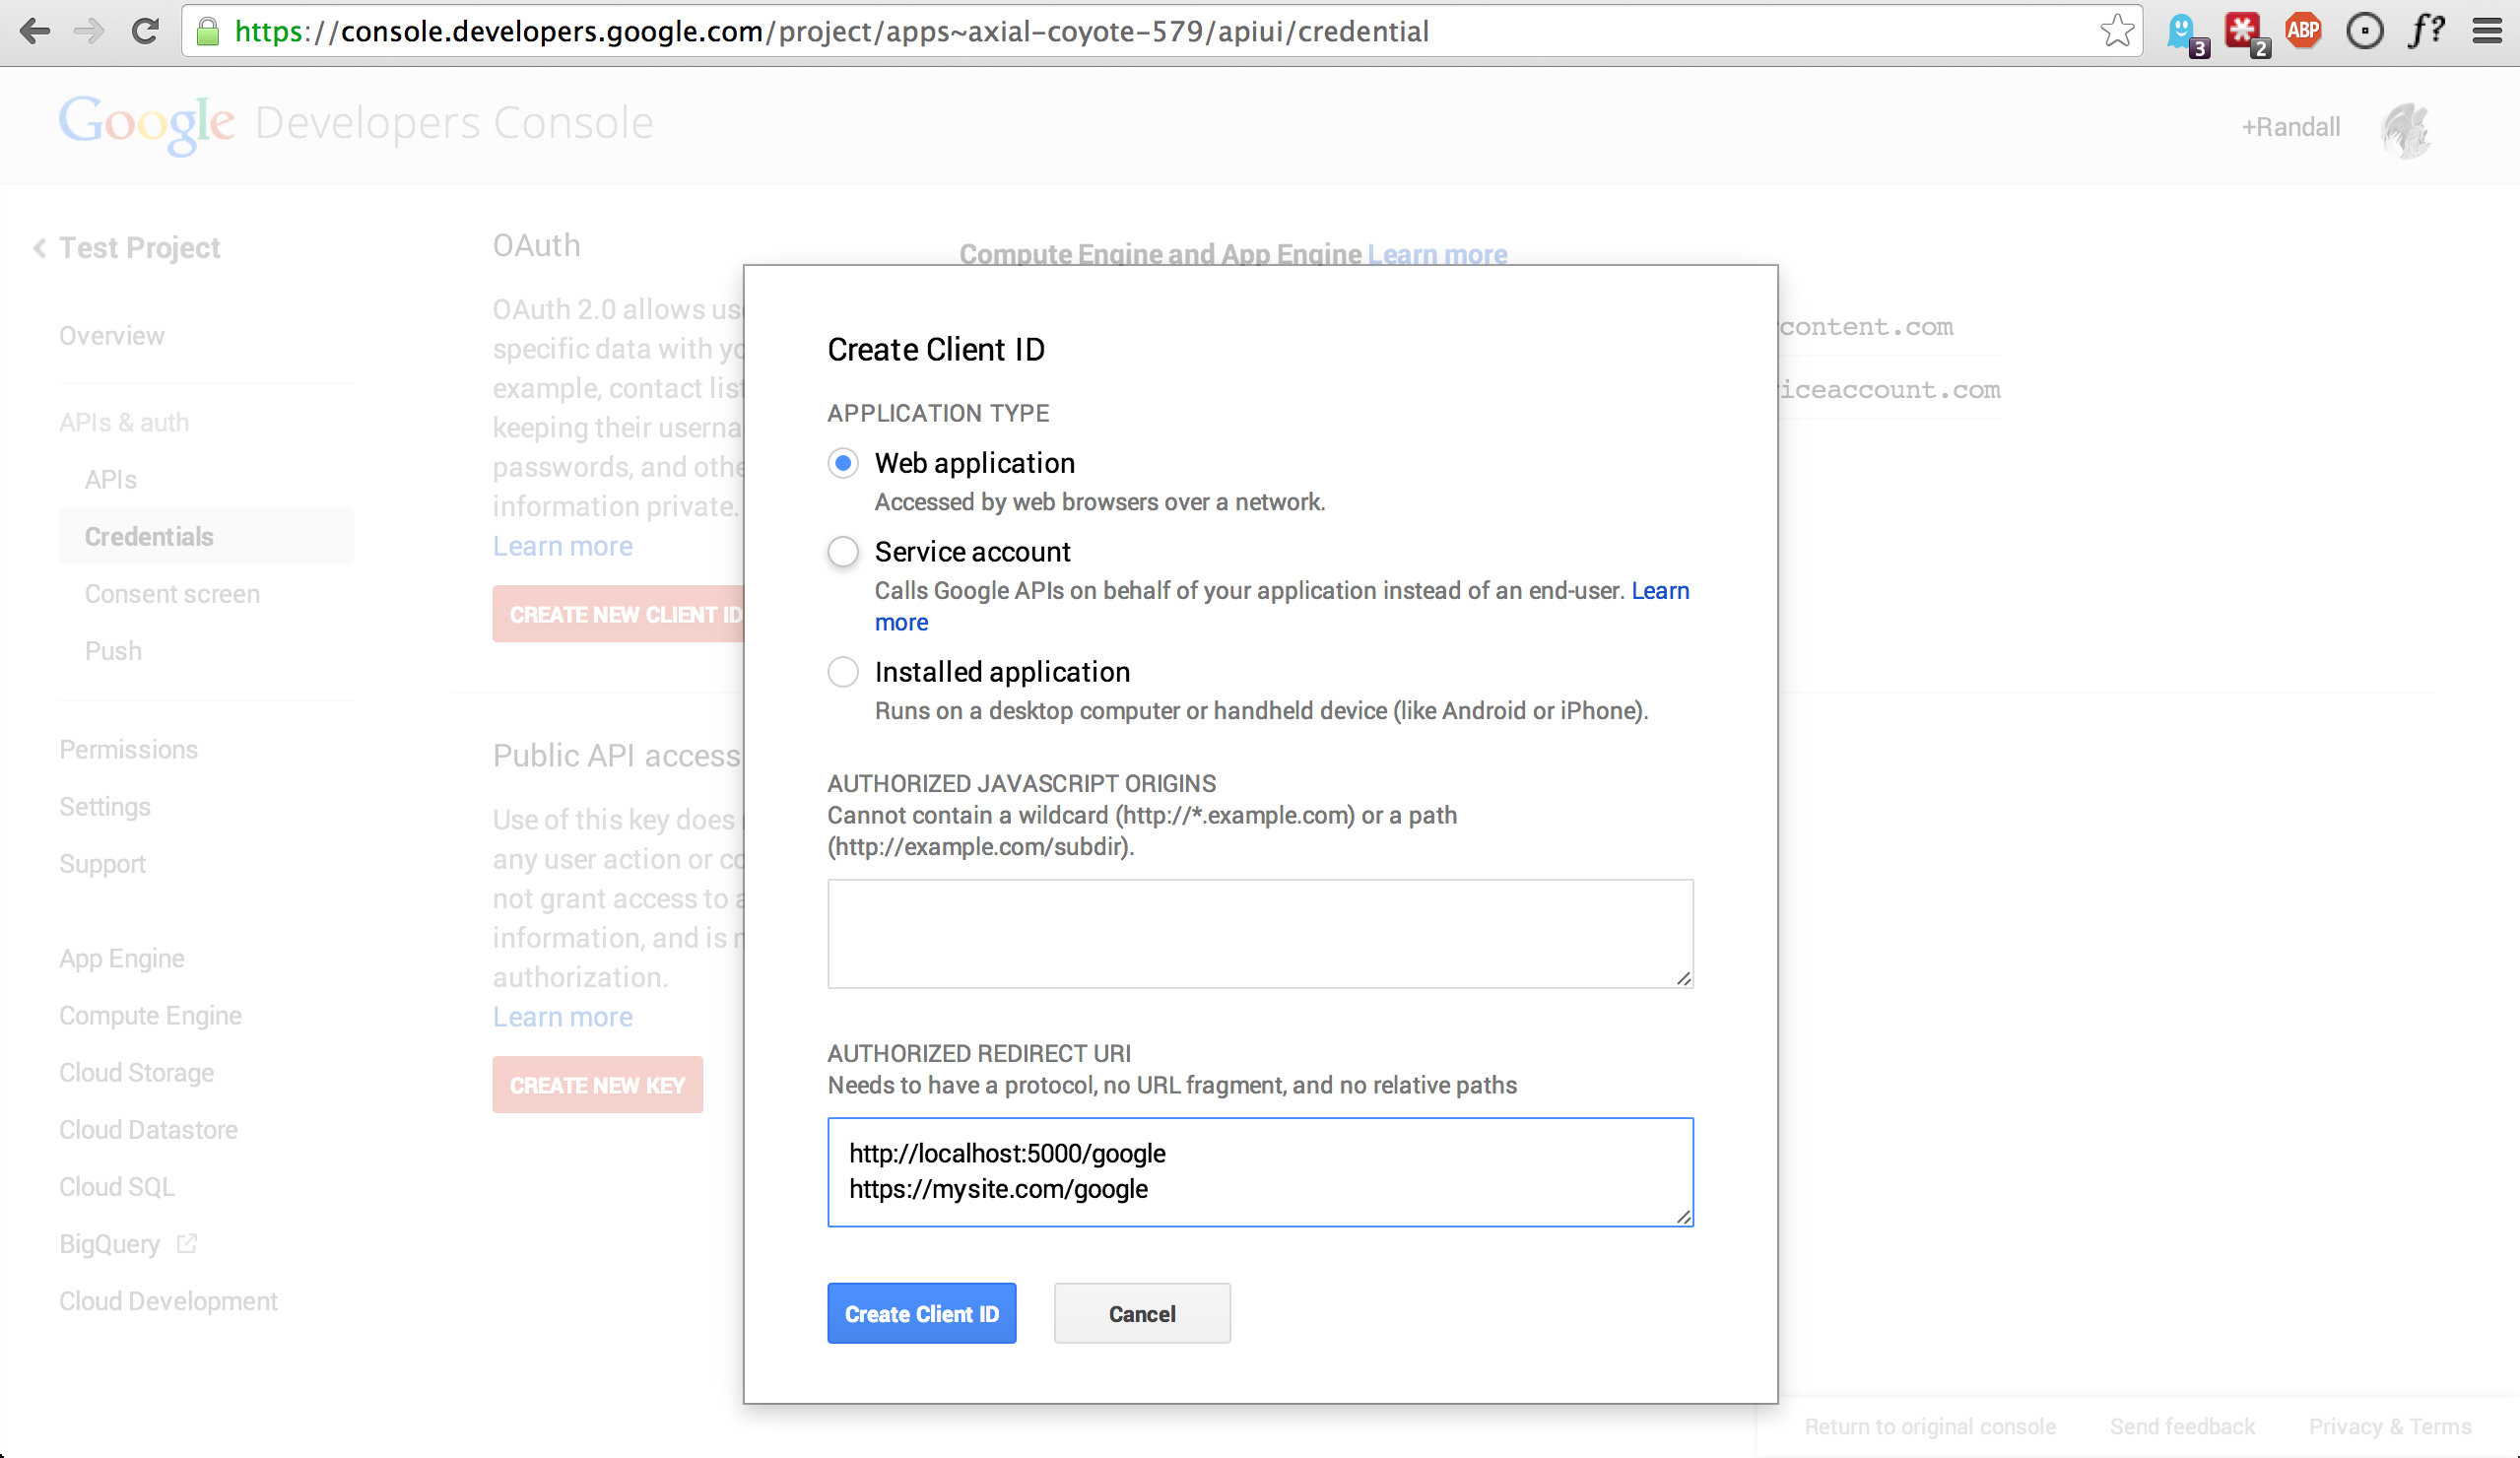
Once you’ve specified your settings, go ahead and click the “Create Client ID” button.
Lastly, you’ll want to take note of your “Client ID” and “Client Secret” variables that should now be displayed on-screen. We’ll need these in the next step.
Configure Your Flask App
Now that we’ve created a new Google Project and generated OAuth secrets – we can now enter these secrets into our Flask app so that Flask-Stormpath knows about them.
In your app’s config, you’ll want to add the following settings (don’t forget to substitute in the proper credentials!):
from os import environ

app.config['STORMPATH_ENABLE_GOOGLE'] = True
app.config['STORMPATH_SOCIAL'] = {
    'GOOGLE': {
        'client_id': environ.get('GOOGLE_CLIENT_ID'),
        'client_secret': environ.get('GOOGLE_CLIENT_SECRET'),
    }
}
These two settings: STORMPATH_ENABLE_GOOGLE and STORMPATH_SOCIAL work
together to tell Flask-Stormpath to enable social login support for Google, as
well as provide the proper credentials so things work as expected.
Note
We recommend storing your credentials in environment variables (as shown in the example above). Please don’t hard code secret credentials into your source code!
Test it Out
Now that you’ve plugged your Google credentials into Flask-Stormpath, social login should already be working!
Open your Flask app in a browser, and try logging in by visiting the login page
(/login). If you’re using the default login page included with this
library, you should see the following:
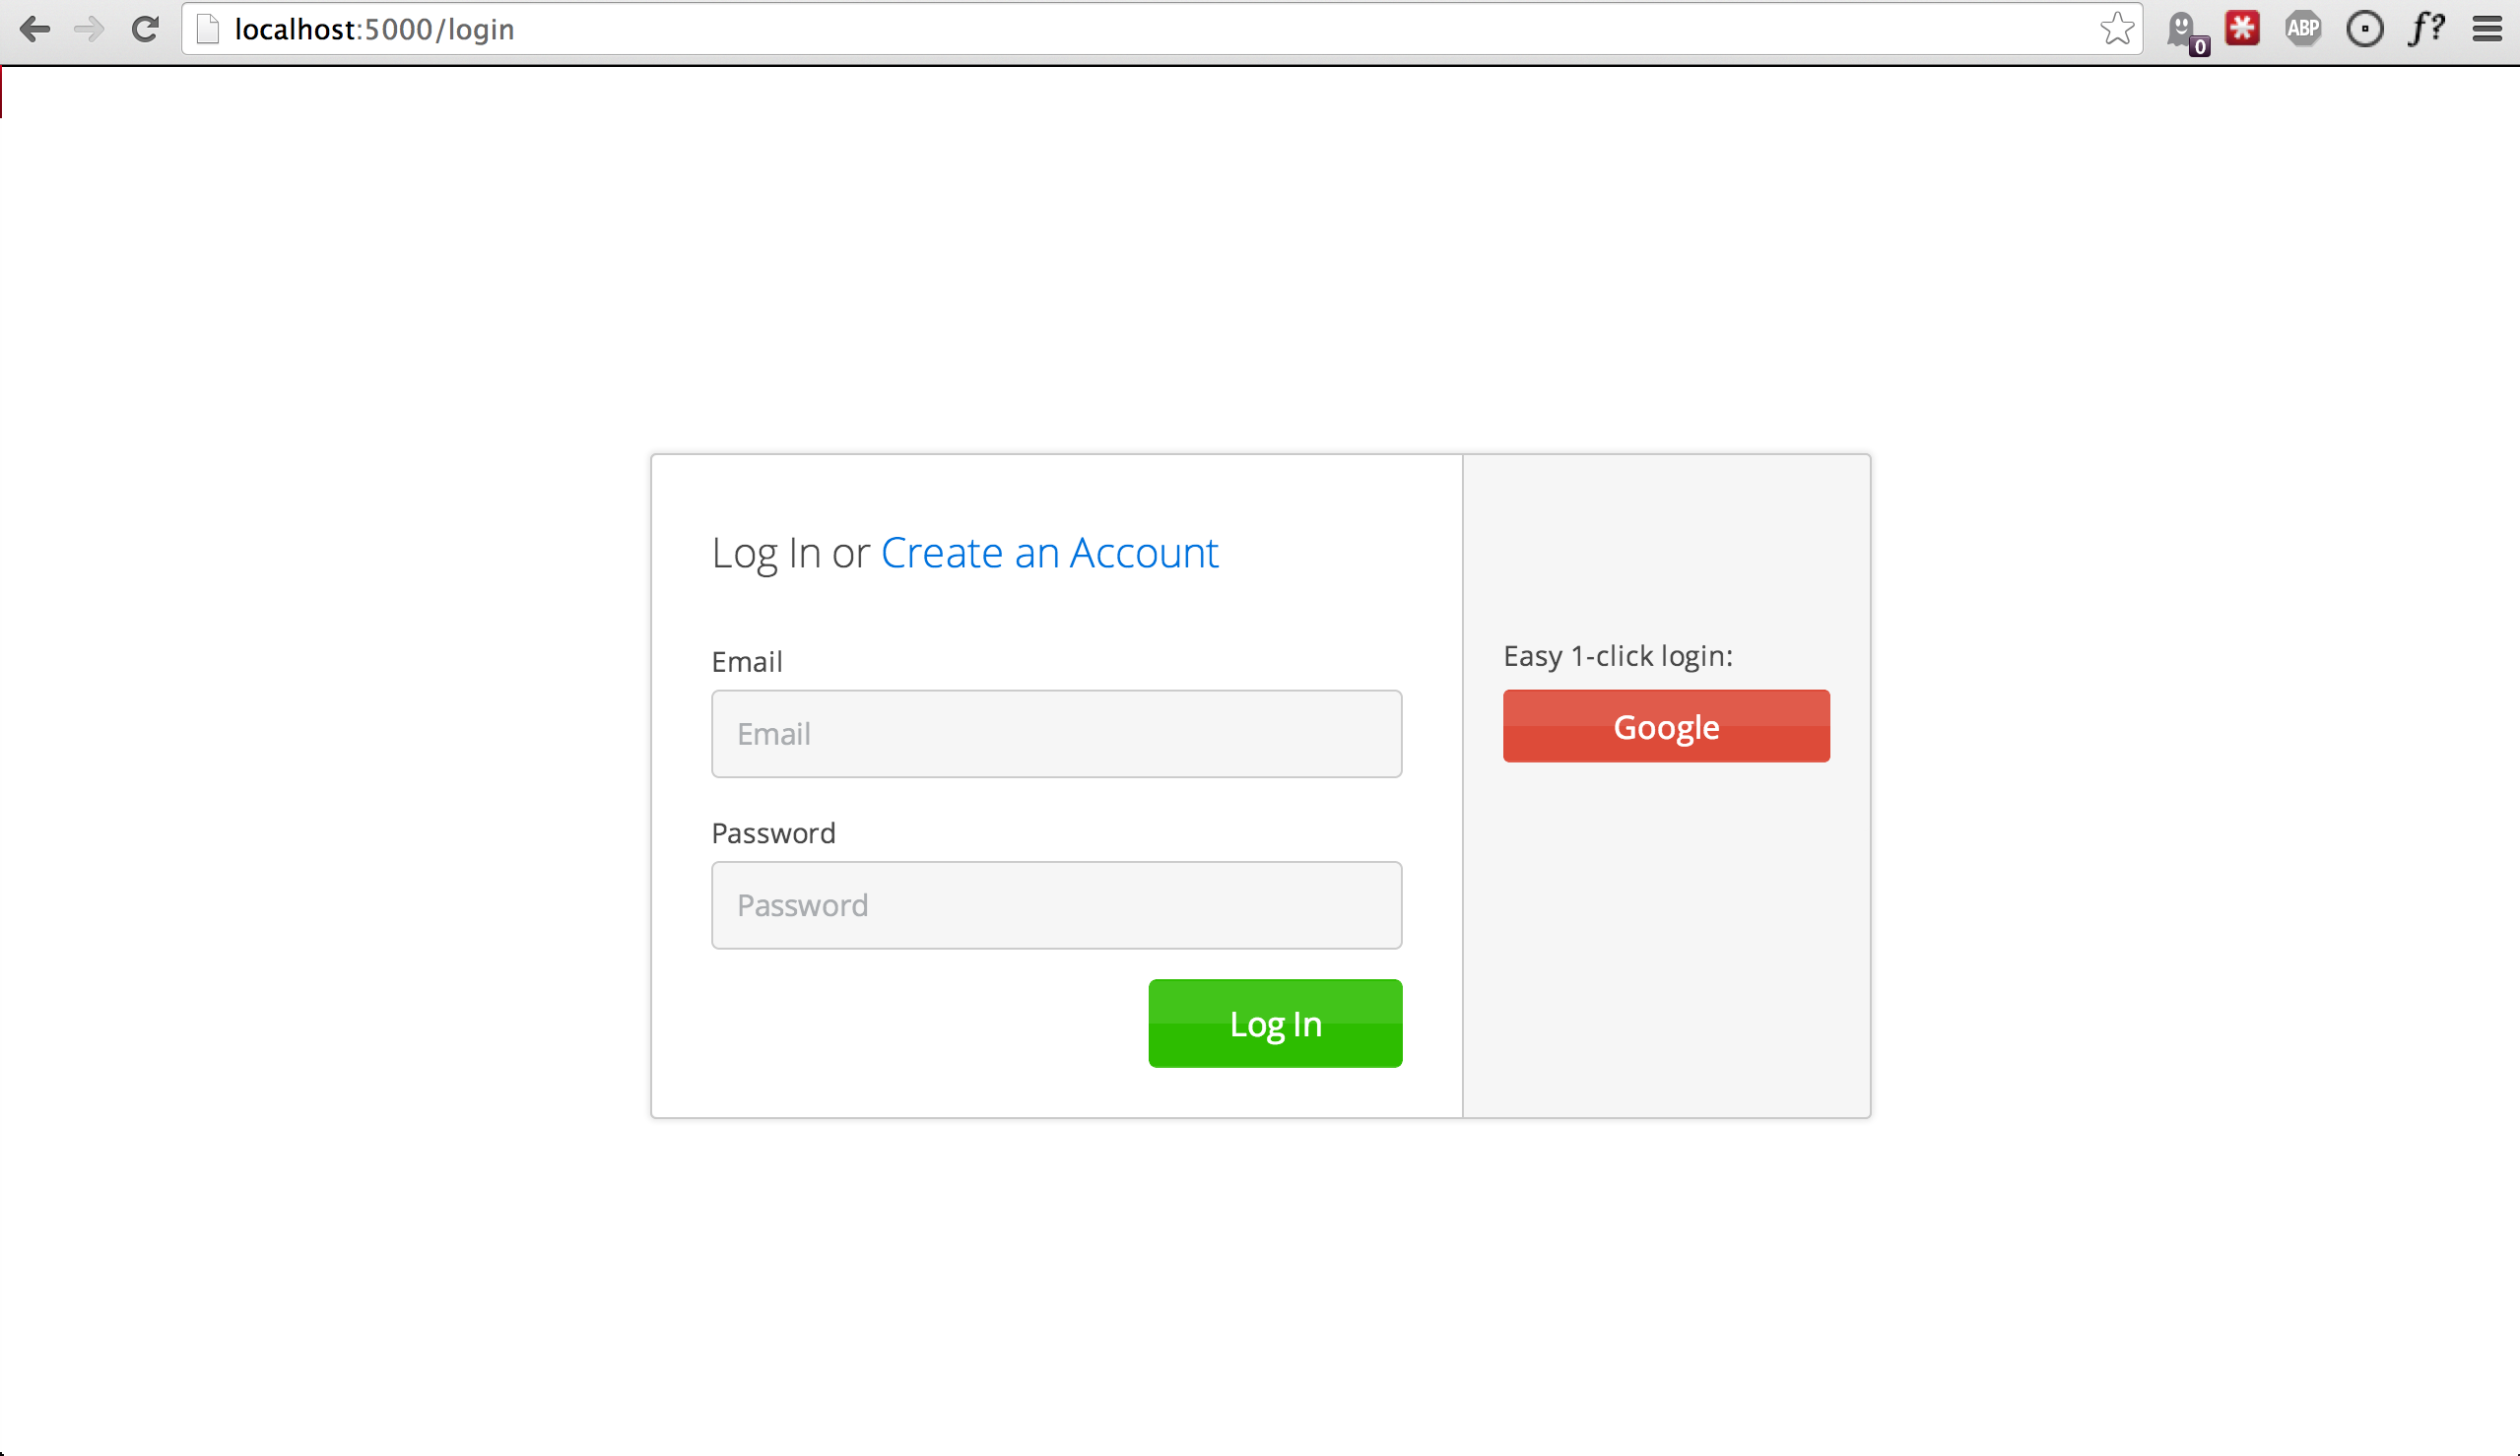
You now have a fancy new Google enabled login button! Try logging in! When you click the new Google button you’ll be redirected to Google, and prompted to select your Google account:
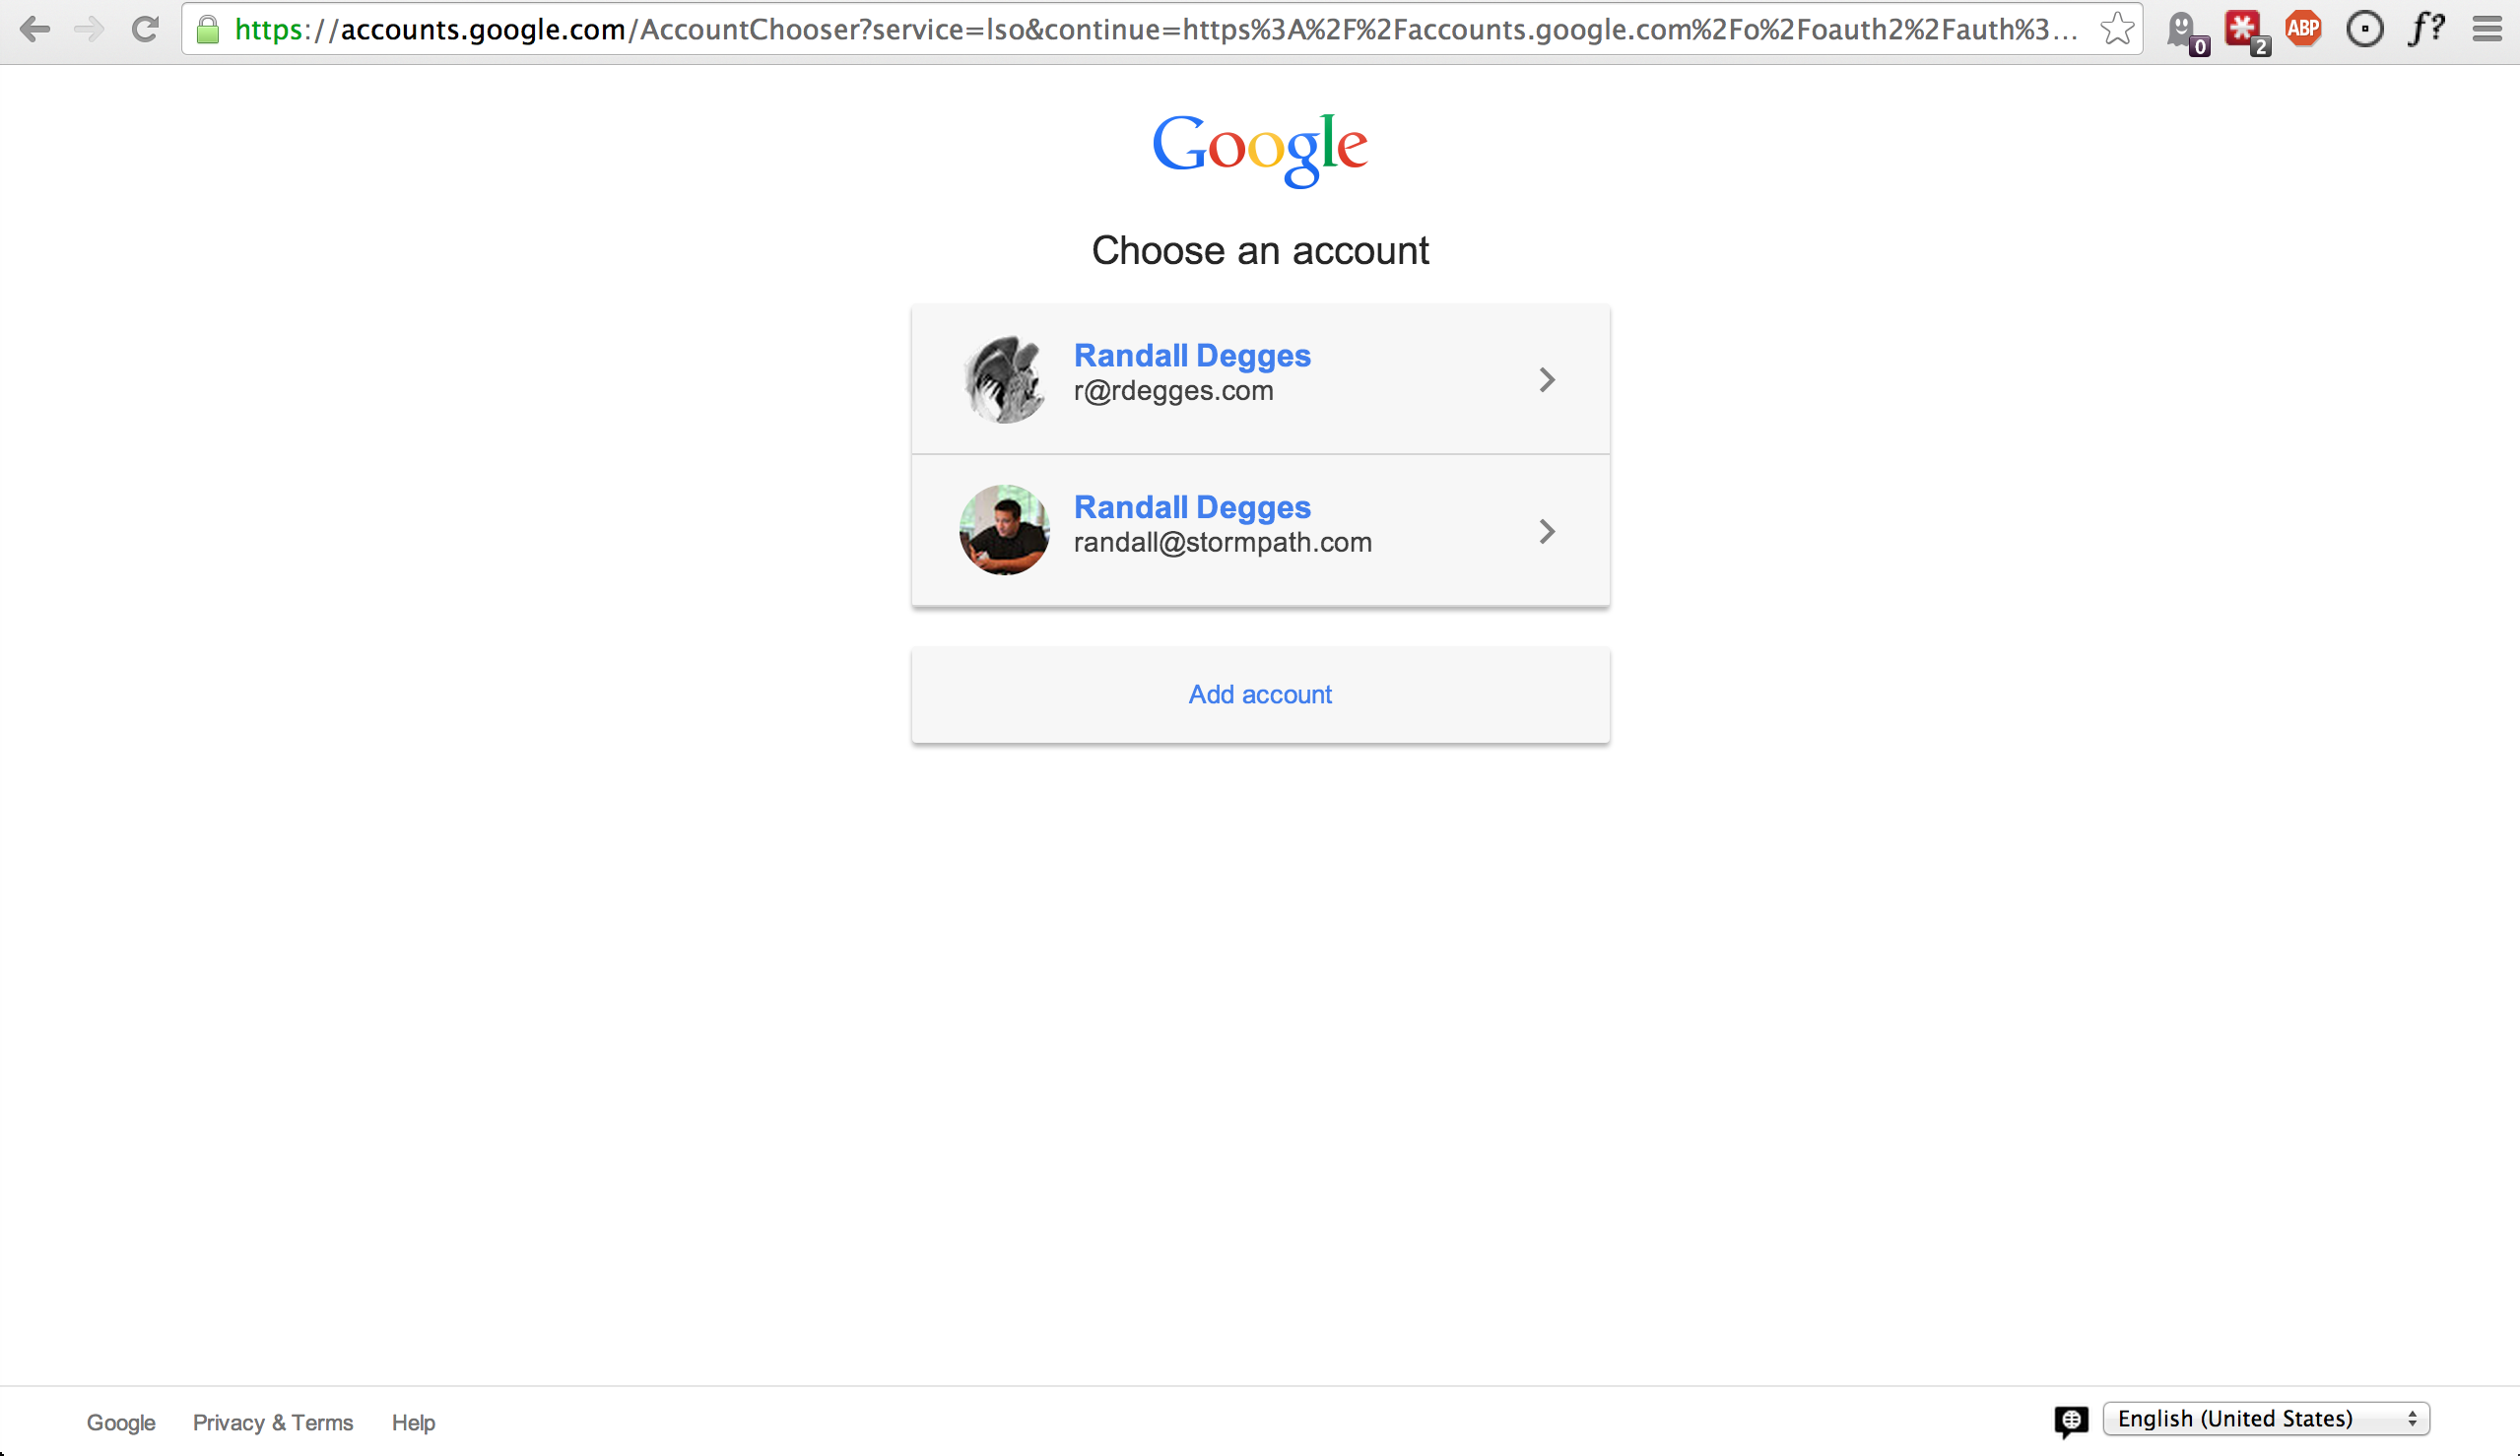
After selecting your account you’ll then be prompted to accept any permissions,
then immediately redirected back to your website at the URL specified by
STORMPATH_REDIRECT_URL in your app’s settings.
Simple, right?!
Enable Caching
The best kind of websites are fast websites. Flask-Stormpath includes built-in support for caching. You can currently use either:
All can be easily configured using configuration variables.
There are several configuration settings you can specify to control caching behavior.
Here’s an example which shows how to enable caching with redis:
from stormpath.cache.redis_store import RedisStore


app = Flask(__name__)
app.config['STORMPATH_CACHE'] = {
    'store': RedisStore,
    'store_opts': {
        'host': 'localhost',
        'port': 6379
    }
}

stormpath_manager = StormpathManager(app)
Here’s an example which shows how to enable caching with memcached:
from stormpath.cache.memcached_store import MemcachedStore


app = Flask(__name__)
app.config['STORMPATH_CACHE'] = {
    'store': MemcachedStore,
    'store_opts': {
        'host': 'localhost',
        'port': 11211,
    }
}

stormpath_manager = StormpathManager(app)
If no cache is specified, the default, MemoryStore, is used. This will
cache all resources in local memory.
For a full list of options available for each cache backend, please see the official Caching Docs in our Python library.
